Hardest Trophies: No difficult trophies due to the nature of the gameplay
Number of missable trophies: 22
Glitched trophies: 0
Does difficulty affect trophies?: No difficulty options
Minimum Playthroughs: 1
Release Date: –
STEP 1: Complete the Game + Specific Choices + Find All Collectibles
Welcome to a quick and easy journey through the Expanse. You need to follow the 5 video guides listed below, along with the choices listed for each episode.
There is a total of 24 Scavenge Items and 21 Data Logs that you need to find and collect. If you miss just one, then you have to replay from that episode and collect everything again.
Almost every misc trophy in the game is tied to sub objectives (blue objectives that show in the upper left corner, often during free roam sections). Completing these are necessary to earn 100% and keeping all crewmates alive.
Near the very start of the episode, choose: “Fight back”
When you’re talking to Virgil, choose: 1. “Stay with him” 2. “Things are bade. But you’ve been through worse.” > 3. “You’re afraid your fake identity will be found out” > 4. “You can go back to being our medic” > 5. “Not mine to give”
Besides the choices listed above, successfully complete all QTE’s to save all crew members. You’re choices from previous episodes will play out now and earn you all the trophies listed above.
Oyedeng, Kopengs
Complete Episode 5 of The Expanse
Story-related trophy – unmissable.
Doctor Approved
Found a Laser Crystal for Virgil
Episode 1: Archer’s Paradox
When you’re in space and get the ability to roam around, you’ll see a blue side objective in the top corner. From where you exit out into the vastness of space, turn around and look up so spot a flashing beacon – here you find the Laser Crystal for Virgil.
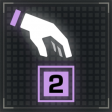
This trophy stretches over the first 2 episodes. You find the “gift” near the end of episode one. It counts as a Scavenge Item and are needed for the collectible trophies. When you enter the locked room by using a severed hand, turn right and open the drawer. Next you want to walk onto the ceiling to collect the item.
Next, at the very start of episode 2 – talk to Khan at the bridge and choose to give her the gift.
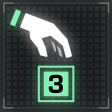
Drug Gifter
Give the Twins some Medicine
Episode 2: Hunting Grounds
The medicine is very well hidden. Follow the video for the precise location. Later in the episode when you’re back on the ship, find the twins in the kitchen and offer them the medicine.
Spore Taste
Give Virgil the Mushroom Powder
Episode 2: Hunting Grounds
The Mushroom Powder is another Scavenge Item and are needed for all collectibles trophies. The powder is find in the big open area at the start of the episode, you find it inside a cabinet after ascending through a elevator shaft.
Like every other misc trophy, the locations are shown in a video under each episode above – the 100% guides.
When you return to the ship, find Virgil in the kitchen and give him the powder.
Bottoms up!
Give Cox the Bottle of Scotch
Episode 2: Hunting Grounds
When you return to the ship in episode 2, go to Cox’s room and find his bottle of scotch in a cabinet.
Go the hangar bay and find him in the corner in a closed cell. Give him the bottle to unlock the trophy.
Martian Music
Listen to Maya’s Music
Episode 2: Hunting Grounds
On the ship in the hangar bay area, you’ll find Maya. Interact with the Music Player and choose: “Try me” to earn the trophy. If you talk to Maya first and agree to leave then you’ll miss the trophy.
Thorston Mayor
Discover the truth about Virgil’s past
Episode 2: Hunting Grounds
You need to get the decoder Scavenge Item (also shown in 100% video for epsiode) to earn this trophy. When you’re back on the ship, go to Virgil’s room and use the decoder to seach his computer.
Drone Dodger
Made it past the Drones in the Mines without being caught
Episode 4: Impossible Objects
Near the middle of the episode, you will encounter some drones. This encounter is super short and simple. Take your time and evade them all (remember to pick up the collectible close to the exit of the area).
This trophy is shown in the 100% video for episode 4 under Data Miner.
Brother’s Reaper
Rayen kills Arlen
This trophy stretches from the very start of the game. Some choices may or may not be needed. Just make sure that the big decisions are made correct, like don’t sacrifice Rayen’s leg in episode 1.
List of choices:
Episode 1: Archer’s Paradox
Near the start of the game, when you first encounter the twins, choose: “Cut this shit out” (May be needed for the trophy)
When you find Rayen stuck and you need to make an important choice, choose: “Lose the vault”
Episode 2: Hunting Grounds
Find the medicine and give it to the twins – see Drug Gifter
Episode 3: First Ones
By the very end of the episode, when you’re facing the twins, choose: “Trust him”
Episode 5: Europa’s Folly
Near the very start of the episode, choose: “Fight back”
Now you’re all set. When you’re facing Arlen near the end of Episode 5, Rayen will show up and shoot him.
Heal Thy Medic
Help Virgil overcome his panic attack
Episode 5: Europa’s Folly
When you’re talking to Virgil, choose:
“Stay with him”
“Things are bade. But you’ve been through worse.” >
“You’re afraid your fake identity will be found out” >
“You can go back to being our medic” >
“Not mine to give”
This will ensure his survival for the rest of the game.
Miraculous Maya
Keep Maya alive
This trophy leans a lot on Brother’s Reaper. The choices are the same.
Episode 1: Archer’s Paradox
Near the start of the game, when you first encounter the twins, choose: “Cut this shit out” (May be needed for the trophy)
When you find Rayen stuck and you need to make an important choice, choose: “Lose the vault”
Episode 2: Hunting Grounds
Find the medicine and give it to the twins – see Drug Gifter
Episode 3: First Ones
By the very end of the episode, when you’re facing the twins, choose: “Trust him”
Maya will be shot by the end of the episode, and Arlen will tell you later on that she is dead, which is a lie. Simply complete the game and she’ll be alive by the end.
Khan’s Revenge
Keep Khan alive
This is one of easiest cre members to keep alive – just do the requirements for the following trophies:
MISSABLE NOTE: If you miss anything you have to replay from that episode and onward. For example, you miss 1 Salvage Item in epsiode 1, then you need to play through the first 3 episodes collecting everything again,.
Data Collector
Find all Data Logs in all Episodes
There is a total of 21 Data Logs in the game. They are spread across all 5 episodes.
MISSABLE NOTE: If you miss anything you have to replay from that episode and onward. For example, you miss 1 Data Log in epsiode 1, then you need to play through the entire game collecting everything again.
No Belter Left Behind
Keep All Possible Crewmates Alive
See the choices under each episode 100% guide or the crew mates individual trophies.
BECOME A MEMBER
Join Gamer’s Club and show your support for the channel
Does difficulty affect trophies?: No difficulty options
Minimum Playthroughs: 1
Release Date: August 22, 2023
STEP 1: Complete the Game + Collect all Collectibles + Misc Trophies (2-3 Hours)
Enjoy the game while following the video listed under Terra Tour Guide. There are a few missable Collectibles and misc trophies, all are included in the video guide. If you miss the Collectibles or missable trophies, then you need to start a new playthrough. Luckily, the trophy for Collectibles will unlock as soon as you find the last ones on a new playthough.
If you “miss” anything that’s not listed as missable, then you can press “continue” upon completing the game and be put back right before the final showdown.
STEP 2: 3000 Steps on Mars (0,5-1 Hour)
3000 steps is ALOT, compared to the length of the game and the small amount of time you spend outside. Luckily you can rubberband your controller to walk in circles. Leave your console on and come back once in a while to see if you got the trophy.
Trophy Guide
Fort Solis Obtain all trophies.
Fort Solis Platinum trophy unlocks after obtaining every other trophy.
The Safety of Disbelief
Survive the Storm
Story-related trophy – unmissable.
Lights Out Locate the Generator in the Maintenance Unit
Story-related trophy – unmissable.
Everything is Dust Find compound 26.
During chapter 4 in the Greenhouse, you’ll enter Helen’s office and need to pick up a battery which is needed to progress. There will be a cabinet by the computer which needs a code to be unlocked, inside you will find compound 26. The code is mentioned in a Audio Log – The code is 0721.
Welcome to Fort Solis Complete the Ridge Climb
Story-related trophy – unmissable.
Dust Dancing Take 3000 steps on the surface of Mars
This will most likely be your last trophy, especially if you follow the All-In-One video guide listed under Terra Tour Guide.
3000 steps is ALOT, but luckily you can rubberband your controller to walk in circles. Leave your console on and come back once in a while to see if you got the trophy.
NOTE: That all steps have to be OUTSIDE on the actual surface of Mars – not inside Fort Solis.
Skeleton Crew Locate all crew members.
MISSABLE
BUG WARNING: If the trophy doesn’t unlock, then you need to delete you save and start a new game – it may be patched in the future. It’s unknown what’s causing the bug.It unlocked for me when I found the final crew member.
There is only one missable crew member. You can find him in a container in Chapter 2. It’s located right after you get outside after being stuck in a room.
All the other members are found as part of the story and are needed to progress the main story.
Relic Grant power to a door.
Story-related trophy – unmissable.
Mi Casa Su Casa Gain access to Officer Taylor’s room.
In Chapter 3, you’ll find the final crew member and Key Card Access Level 5 as part of the story. Before you head for the Greenhouse, head to the Crew Quarters to enter Taylor’s room.
Once more into the Breach
Gain entry to the Ridge Tunnel.
Story-related trophy – unmissable.
Tragedy Documented View all Video Logs
BUG WARNING: Some players have reported that this trophy won’t unlock. The reason can possibly be that the Video Logs have been collected without being played – this happens when you access an computer and back out before you play the Video Logs, then they get save to the hand terminal and can be played from there ore the Main Menu.
Everytime you access a computer – play all Video Logs and surveillance videos.
NOTE: You don’t have to watch the full Video Logs, it’s enough to just play them.
Terra Tour Guide Collect all audio logs, posters, emails and banners.
MISSABLE
There is a total of 143 Collectibles/Story items to collect for 100% along with 3 missable trophies besides Collectibles. All miscellaneous trophies are included as well.
This video includes ALL Collectibles including Posters, Banners, Flags, Messages; Video Logs, Audio Logs, Documents, Key Cards and ALL missable trophies. Key cards are story-related but I included them as they are needed to open certain doors.
NOTE: Messages, Video Logs/surveillance are mentioned as “Computer” in the video guide. Go through every computer file to unlock all the messages and logs associated with them.It’s Important that you PLAY each Video Log for it to count.
Casuality Experience the alternate ending.
SPOILER ALERT – SEMI-MISSABLE
A few moments into the final fights, you play Jacob again. After you leave airlock and are outside, you have to use the analog stick and mash X to escape. Don’t press anything in order to fail the QTE (Quick-Time-Event) – this will unlock the premature alternative ending for Fort Solis.
If you want the full ending and get the full ending, you have the option to choose “continue” after completing the game, placing right at the start of the final encounter. This way you can clean-up Collectibles and get a different ending.
Darkest Before the Dawn Complete Fort Solis.
Story-related trophy – unmissable.
Outpatient Escape the Medical Bay.
Story-related trophy – unmissable.
Drinking on the Job Finish the bottle of beer
MISSABLE
This trophy is obtainable in Chapter 1 and 2.
Near the start of the game, after you get out of the airlock and enter the Atrium. Go over the vending machine and keep pressing X to finish the beer.
This trophy is becomes unobtainable after the end of Chapter 2.
Boston Heyday Take a shot at the pool table.
MISSABLE
This trophy is obtainable in Chapter 1 and 2.
During Chapter 1, you’re heading to the Crew Quarters. You’ll will see a gym area with a stairmaster and other machines – this is where you get Boxing Clever. In the very next room you’ll find a pool table. Press X to interact with it.
This trophy is becomes unobtainable after the end of Chapter 2.
Boxing Clever Interact with the punch bag.
MISSABLE
This trophy is obtainable in Chapter 1 and 2.
During Chapter 1, you’re heading to the Crew Quarters. You’ll will see a gym area with a stairmaster and other machines. Go to the punching bag and press X to interact.
This trophy is becomes unobtainable after the end of Chapter 2.
Congratulations, you’re an engineer
Gain access to Nick Tout’s broken Multi Tool.
During Chapter 3, you’re outside trying to get access to the Comms Hub. Upon moving the debris and entering the Comms Hub, turn left to find a little puzzle. Complete the puzzle to earn the trophy and unlock a new Video Log.
BECOME A MEMBER
Join Gamer’s Club and show your support for the channel
Estimated trophy difficulty: 2/10 (if you play on Easy Difficulty & use Rewind feature)
Approximate amount of time to platinum: 2-3 Hours
Offline Trophies: (1, 3, 25, 2)
Online Trophies: 0
Hardest Trophies: No difficult trophies if you utilise “Rewind” – see Thank You for the Memories for more.
Number of missable trophies: 0
Glitched trophies: 0
Does difficulty affect trophies?: No, everything can be done on Easiest Difficulty
Minimum Playthroughs: 1 full & 11 partial (if you use a code to start at final boss, see Captain’s Lament for more.)
Release Date: July 18, 2023 (Free with PS Plus Premium)
STEP 1: Complete the Game + Earn All Misc Trophies
Pick any vehicle you want for your initial playthrough. I recommend that you set the difficulty to easy in the “options” menu after you’ve picked your vehicle. You need to complete all 6 levels and a boss fight. There’s a few misc trophies that you need to be aware of. Besides the level specific trophies listed below, you need to defeat one opponent with collision damage, one with machine guns and one with a special weapon – they will most likely unlock without even trying.
Abuse Health Stations – these stations are marked with a white X on the map. If you get low on health, drive around until the refresh.
Abuse Rewind – it’s possible to pause the game at any time and rewind the gameplay to earlier in the level. You can rewind to moments just before you took damage or lost a life. This makes the game almost laughable easy.
Go for Weapons – new and more powerful Weapons are mandatory for defeating the enemies efficiently. They spawn all around every level and are often hid behind destructibles like crates or vents.
STEP 2: Defeat the Final Boss with the Other 11 Vehicles
This is easier and quicker than it might seem at first. You start at the final boss if you use a password after selecting your vehicle. This will reduce each “playthrough” with more than 30 minutes! It will take you around 5-6 minutes per vehicle using the code method – see Captain’s Lament for more.
Trophy Guide
Twisted Champion Unlock all trophies in Twisted Metal.
Unlocks after completing every other trophy.
The Beginning of the End Complete level 1, Arena Duel.
Automatic story-related trophy, cannot be missed.
Not Here to Deliver Complete level 2, Warehouse District Warfare.
Automatic story-related trophy, cannot be missed.
Highway to Carnage Complete level 3, Freeway Free for All.
Automatic story-related trophy, cannot be missed.
Water Is for People, Not Cars Complete level 4, River Park Rumble.
Automatic story-related trophy, cannot be missed.
Watch Out for Pedestrians Complete level 5, Assault on Cyburbia.
Automatic story-related trophy, cannot be missed.
Watch the Edge Now Complete level 6, Rooftop Combat.
Automatic story-related trophy, cannot be missed.
Thank You for the Memories Complete the final round and defeat Minion.
Automatic story-related trophy, cannot be missed.
After completing the final level: Rooftop Combat, you’ll get a screen with the boss named Minion spawning on the same map.
The best strategy for defeating the boss is to destroy the pyramid (see Pyramid Secret), drop down in the new area, destroy all the plants for additional weapon spawn, and most importantly – use the health station (flashing white X on the map).
When you get low on health, leave the area and drive around until the health station refreshes.
Finally, you can pause the game and then scroll back in time to before you lost a life or took damage! This is basically cheating, but will save you a lot of time. This feature was not present in the PS1 version.
Candy Bag Collect your winning prize as Sweet Tooth.
Captain’s Lament Collect your winning prize as Road Kill.
There is a super easy and quick method to complete the game and earn the trophy for a specific vehicle. Using the method below, it’ll take you around 5-6 minutes for each vehicle.
Remember that you can pause the game during the final boss to rewind and recover lost health or lifes.
CHEAT CODE METHOD:
Pick your desired vehicle
Go to options > Password
Input the code: , , , , > Press start to confirm
Optional: set difficulty to Easy
Begin Battle & defeat the boss and get your trophy
Repeat with all other vehicles
Freefalling Cause either yourself or your opponent to fall off the rooftop in the Rooftop Combat level.
LEVEL 6: ROOFTOP COMBAT
Simply drive over the edge and die. Pause the game and rewind to keep your life – simple.
Pump ’em Full of Lead Defeat an opponent with the machine gun.
All vehicles have machine guns as their standard weapon. Hold to fire them at enemies. You might want to bring your opponents health down using other weapons – machine guns don’t damage that much, and they overheat quickly.
If You Can’t Beat Them, Ram Them Defeat an opponent with collision damage.
Super simple, ram any opponent with low health to defeat them with collision damage.
I Have a Special Power Defeat an opponent with a special weapon.
Each vehicle has a “special weapon.” Use to switch weapons, then use to fire it. Defeat any opponent using the weapon. You can see which weapon you have equipped in the lower right corner.
Resourceful Driver Collect 5 weapons in any level.
This can be done on any map and will most likely unlock during your first playthrough or during the final boss. Weapon pickups are purple/red looking orbs, they spawn around every map. Some weapons spawn after you destroy a crate or other type of destructible
Can’t Hide from Me Destroy all Calypso crates in the Arena Duel level.
LEVEL 1: Arena Duel
There are crates located around the 1st map with the text “Calypso.” Destroy all of them to unlock the trophy.
You Shouldn’t Have Parked There Eliminate a car in the Warehouse District Warfare level.
LEVEL 2: Warehouse District Warfare
This is another simple trophy. There are cars parked all around the map, destroy one of them to unlock the trophy.
You Thought a Barrier Would Stop Me? Blast through a road work site on the Freeway Free for All level.
LEVEL 3: Freeway for All
You’ll find the road work site near the middle of the map. You can access the area from small tunnels near the center.
Strategic Break Drive through an alley in the River Park Rumble level.
LEVEL 4: River Park Rumble
The alleys in Level 4 can be quite hard to spot because of the pixels. The alleys are located near the starting spawn. The alleys are narrow and placed so that it leads through a building, instead of inbetween two buildings.
Can I Ban the Van? Eliminate a van in the Assault on Cyburbia level.
LEVEL 5: Assault on Cyburbia
Another quick and easy trophy. You’ll see vans parked all around the houses and buildings near the center portion of the map. Destroy it in any way you please in order to unlock the trophy.
Pyramid Secret Destroy the pyramid on the Rooftop Combat level.
LEVEL 6: Rooftop Combat
This is done on the last level. You can shoot and destroy the big pyramid near the center of the map. It’s highly recommended that you destroy it as it reveals a health station and additional weapons.
https://www.ben-gun.com/wp-content/uploads/2023/07/356797783_1994319590915734_8074217989173034566_n.jpg197350Ben-Gunhttps://www.ben-gun.com/wp-content/uploads/2022/12/cropped-Bengun-logo-new-300x257.pngBen-Gun2023-07-20 11:06:322023-07-20 11:06:34Twisted Metal 1 [PS4/PS5] Trophy Guide & Roadmap
Does difficulty affect trophies?: No, everything can be done on Easiest Difficulty
Minimum Playthroughs: 1
PS4/PS5 Crossbuy: No – Not available on PS4
Free-Roam / Chapter Select after Story?: Yes – you can continue exploring after completing the main story
Release Date: April 28, 2023
STEP 1: COMPLETE THE MAIN STORY, BE ASSISTED BY BODE 10 TIMES AND SCAN ENEMIES [10-15 HOURS]
Enjoy the main story and complete as many side activities as you like. Exploring might save a bit of time later, if you find Priorite Shards, a few cosmetics and talk with some NPCs that are needed for Max Capacity.
Here is a few boiled down pointers to get the missable trophy You’ve Got a Friend and save some time later on.
[MISSABLE] Have Bode assist you at least 10 times before the end of Chapter 4! He is only available in Chapter 1 and 4 throughout the game. You can kite enemies until the assist is available again, or respawn enemies from Meditation Spots.
Explore as much as you like. Finding Priorite Shards and Chests unlocking a few different Cosmetics.
Talk to NPCs on your way through the main story, you pass most Cantina Recruits – see
Enjoy the main story and complete as many side activities as you like. Exploring might save a bit of time later, if you find Priorite Shards, complete Jedi Chamber, a few cosmetics and talk with some NPCs that are needed for Max Capacity.
Scan all defeated enemies! You need all 77 enemy types logged in your Tactical Guide for Intergalactic Geographic anyways.
STEP 2: FIND ALL JEDI CHAMBERS, RECRUITS, FISH, SEEDS, FORCE TEARS, BOUNTIES, LEGENDARY ADVERSARIES AND COLLECT ALL 100 PRIORITE SHARDS [4-7 HOURS]
Now is the time for the clean-up. With Air Dash and Force Lift/Slam unlocked, you can access and collect items needed to unlock Platinum. Luckily, you don’t need to collect EVRYTHING in the game.
Here’s a complete list of collectibles and tasks needed for trophies:
Your first priority will be to unlock the Treasures Map Upgrade on Planet Jedha. This upgrade shows you where to find all Treasures in the game, sadly it doesn’t differentiate between Shards, Scrolls and Data Discs – You can find a video on how to unlock the upgrade here: Splurgle.
When you go out to complete all the objectives above, you’ll be able to collect all Priorite Shards you come across.
STEP 3: HOLOTACTICS AND MISC TROPHIES [1-2 HOURS]
Congratulations on making it this far. The final step is quite simple – head to the Holotactics table in Pyloon’s Saloon and defeat all opponents. See Gambler for a guide on how to beat them all.
Trophy Guide
The Jedi Survivor Unlock all Trophies
Unlocks after completing every other trophy.
Rooftop Duel Defeat an Inquisitor
Automatic story-related trophy, cannot be missed.
For Saw Gerrera Break free from the grasp of the Empire
Automatic story-related trophy, cannot be missed.
Grab Some Seat Chat with the owner of the Koboh cantina
Automatic story-related trophy, cannot be missed.
The Past Made Present Release the Jedi from the bacta tank
Automatic story-related trophy, cannot be missed.
Survivors, We Adapt Travel together with a Nightsister
Automatic story-related trophy, cannot be missed.
Among the Masters Meet the Jedi Masters
Automatic story-related trophy, cannot be missed.
For the Path Protect Pilgrim’s Sanctuary
Automatic story-related trophy, cannot be missed.
Out of Bedlam Rescue a friend from the Bedlam Raiders
Automatic story-related trophy, cannot be missed.
Tanalorr Bound Collect the Abyss Compass
Automatic story-related trophy, cannot be missed.
Tragedy Defend the Archive
Automatic story-related trophy, cannot be missed.
At the Precipice Survive Nova Garon
Automatic story-related trophy, cannot be missed.
Into the Abyss Discover the route to Tanalorr
Automatic story-related trophy, cannot be missed.
A Place You Could Call Home Complete the story
Automatic story-related trophy, cannot be missed.
Han Slowlo Defeat 50 enemies under the effect of Slow
You activate Force Slow by pressing and at the same time. The problem is that enemies start moving normally after you hit them once, so you need to defeat them with the next attack right after a Force Slow has been activated.
There is a way to make it a lot easier, purchase the Extended Hold skill from the Force > Jedi Conecentration skill tree. There are multiple upgrades that will help you earn the trophy faster, but it will most likely come naturally.
So Uncivilized Defeat 10 enemies with shots using the Point Blank skill
First, you need to unlock the Blaster stance, it’s unlocked through normal story progression. Next you want to purchase the Point Blank skill.
To use it, press just before an enemy hits you with a melee attack to blast them away. You know you times it correct when it looks like a wide blast instead of a normal shot. You need to kill 10 enemies with the blast, so either try it on normal Stomtroopers or weaken stronger enemies first.
If you’re having trouble with the timing, lower the difficulty to increase the parry timing window.
You’ve Got A Friend Direct your companions to assist in combat 10 times each
[MISSABLE]
You have two companions throughout the game – Bode and Merrin. While in combat, press to lock on an enemy, then hold and press to direct companions to assist you in combat.
It’s important that you use Bode to assist you 10 times before the end of Chapter 4. If you miss 10 assists with Bode, you can quickly farm the last couple of assists in New Game+. You are assisted by Bode in Chapter 1 and 4.
Merrin will accompany you on Jedha, even after completing the game – specifically in the Arid Flats area (big open desert).
Catch! Hit 3 enemies with a single roller mine
This trophy can be done at anytime after you have reached the Fogged Expanse area. Resting at the nearby meditation spot resets the enemies if you happen to mess up.
There will be 3 roller mines nearby. Simply kite the out of the building and use the force to throw one of the mines into the other enemies.
They Never Saw It Coming Strike an unaware enemy 20 times
This trophy will come naturally. You often attack enemies from high ground (hehe). When you’re above or close to enemies that haven’t noticed you – you’ll see a button prompt above their head. Strike 20 enemies with the button prompt to unlock the trophy.
The trophy can be farmed from any Meditation Point if it’s necessary.
This Is Canon Push an enemy into the Shattered Moon mining cannon
This trophy becomes possible to achieve late in the story. You need to pass through this section near the end of the main story on your second visit to the Shattered Moon.
Use the force to push an enemy into the beam as it fires. If you don’t get the trophy after all enemies are defeated, respawn them by resting at the nearby Meditation Spot.
I’m a Living Legend Defeat all legendary adversaries
There is a total of 13 Legendary Adversaries to find and defeat. I recommned that you seek them out after completing the main story, a few of them are locked behind obstacles which requires some story-related abilities to pass.
Get Down From There Attack 20 Lifted enemies
You unlock force lift as part of the main story. Hold and press to lift enemies. Certain upgrades will make you lift more enemies at a time and have them in the air for a longer duration.
The fastest way to attack 20 lifted enemies is by quipping the blaster stance, simply shoot them as they are lifted.
One With the Force Avoid 50 attacks using Focus Sight
Focused Sight is an unlockable ability in the Survival tree, which costs 2 skill points (although it takes 3 total to buy it). To use it, hold when in battle and this will automatically evade incoming attacks. Using Focus Sight will drain your Force Meter.
Mirror Match A confused enemy defeats an enemy of the same type
To use Confuse on an enemy, hold and press . As soon as you unlock the ability near the start of the game, you will be facing two identical enemies. Use confuse on the first enemy and perfect parry the 2nd enemy, this will give the confused enemy a good chance to defeat the 2nd one.
There are plenty of other opportunities throughout the game if you miss it a the start of the game.
Precision Release is an ability in the Lightsaber > Dual Wield tree, which can be bought for 2 Skill Points after purchasing Focused Parry for 1 Skill Point. In order to perform a perfectly timed Precision Release, you need to press and hold , wait for an enemy to attack and release the button just before the attack connects.
A perfectly time precision release is recognisable by a flashing light animation and a flurry of attacks.
Slam Dunk Slam 5 enemies with a single use of Slam
Before you can attempt this, you need some specific upgrades in the Telekinesis skill tree:
Mass Slam (This skill lets you slam multiple enemies)
Gravitational Mastery (This skill lets you lift and slam enemies in a larger radius)
There are many locations in the game with enemies close together, one of the best places is on Planet Coruscant. There will be a large group of Stormtroopers close by. Kite them close together before you initiate a slam. I used lift to count the enemies before I slam them.
It’s important that you hold down the buttons to lift and slam multiple enemies!
It’s important that you hold down and to charge up a heavier Slam attack to slam multiple enemies!
Riposte Parry a Force Pull resisting enemy
First you need to find a “force resisting” enemy, such as BX Droids, wielding electrified batons or cleavers. When you’re facing one, press to try pulling them towards you. They will resist, but their resistance is followed by a sprint attack. When they sprint attack you, get ready to press to parry their attack. If you hare having trouble timing your parry, lower the game’s difficulty setting to increase the parry time window.
Star Tours Discover and complete all Jedi Chambers
There is a total of 7 Jedi Chambers in the game. The first chamber will be completed as part of the story, so you only need to seek out the other 6 and complete their puzzles. All Jedi Chambers are found on Planet Koboh.
King of the World Reach the highest point of Harvest Ridge
There is a series of small puzzles leading up to the highest point of Harvest Ridge. I recommend that you travel to the Fort Kah’lin Meditation Spot (located on top of a hill not far from the Southern Reach Outpost). From this location you can jump to a warehouse which is the final roadblock in order to reach the highest point, that way you don’t have to do the first series of puzzles in a cavern.
When you’re at the warehouse building, run around it to find two Nekkos, mount one of them and take it to the gate of the warehouse.
Next you want to jump inside the building and force pull the cable which opens the game, summon the Nekko to make it enter to the warehouse.
Then you want to mount the nekko, use it to reach a high ledge. Here you’ll find a mechanism that you can attach the cable to.
Go outside and bring the 2nd Nekko inside. Now you can lower the gate by detaching the cable.
Place the 2nd nekko on the newly lowered platform and raise it again by attaching the cable once more.
Use the 2nd nekko to go outside and use it to jump high enough and up to reach a ledge. Finally, climb to the top of the towe r to unlock the trophy.
There Is No Try Help lift a ship out of the tar pits
When you first land on Koboh, you pass a droid by his ship that seems to be stuck in tar. Return to this location after learning the Force Lift. You can reach the area quickly from the Derelict Dam Meditation Point.
Use and to raise the ship out of the tar and unlock this trophy. Talk to the Pit Droid afterwards to recruit him to the Cantina for Max Capacity.
Now, This Isn’t Podracing Travel 500m of distance while riding creatures
You unlock your first mount, a nekko, on your first visit to Koboh. This trophy will most likely unlock naturally while playing the game.
If you still need it after completing everything else, find some nekkos by the stables right beside Pyloon’s Saloon and run around in circles – you can rubberband your controller.
Cleaning Up Refresh the Refresher
This trophy takes place in Pyloon’s Saloon on Planet Koboh. Go to the bathroom by the bare and interact with the “refresher” for the trophy and a Priorite Shard.
They’re Probably Fine Drop your mount into the great unknown
This is easiest to obtain on Planet Jedha. Travel to the Anchorite Base Meditation Spot and mount one of the Spamels. Run the mount to the opposite cliff and dismount it upon reaching the edge.
The trophy can take some time to unlock. Sometimes the trophy unlocks when you fast travel away from the location, can be a bit buggy – may take a few tries for it to unlock.
Skywalker Keep your feet off the ground and walls for 60 seconds
There are multiple locations in the game where you can stay airborn for 60 seconds. It can be in multiple ways. One method is gliding with a Relter (airborne creature). There is a spot in the Stone Spires region on Planet Koboh that makes it quite easy, simply fly around in circles and hit the updraft winds to stay in the air.
Another sneaky method is hanging from a pipe. The trophy unlocks when you pull yourself up and stand on solid ground. Again, a another method can be used on ziplines, simply keep switching directions for 60 seconds and then land on solid ground.
It’s a Trap Explore the Phon’Qi Caverns
You need to find and explore PhonQi Caverns and unlock the map upgrade in order to unlock the trophy. The entrance to the Caverns are right beside the location where you first meet Skoova. It’s highly recommend that you complete this area as soon as possible, the trophy unlocks as you complete the area and unlock the Chests Map Upgrade – this way you can see all Chests in the game on your map.
Note that you need the Air Dash skill to get through the caverns..
Max Capacity Have a packed cantina
You need to find and recruit all Cantina Recruits in the game to have a packed cantina (Pyloon’s Saloon). There is a total of 11 Cantina Recruits in the game. The first two are automatically unlocked through the main story. You have to find the other other 9 by yourself.
Most of the characters are easy to find and you’ll cross them on your way without even trying, a few of them are found in more hidden areas. Unlocking the Cantina Recruits often involves talking with the characters, and on a few occassions you need to defeat some enemies first in order to save the Recruits.
I recommend hunting down the remaining Recruits you might have missed, after completing the main story. You need the upgrade Air Dash to recruit the Jawa for example.
Can You Pet the Bogling? You can pet the bogling
Boglings can be found all around Planet Koboh. Interact with any Bogling to unlock the trophy. They can often be found beside Pyloon’s Saloon and the stables area.
Caij Match Gain the attention of a mysterious stranger
Star Wars Jedi: Survivor contains 17 Bounties. Finding and killing all Bounties unlocks the Caij Match trophy. You unlock Bounties automatically from normal story progress, halfway through Chapter 3 when meeting Caij.
I recommend hunting down all Bounties after completing the Main Story. Most of the Bounties spawn after completing the Main Story.
You can pair this trophy with other clean-up related trophies like Force Tears and all Priorite Shards.
The Bounty questline can be broken down into 4 steps:
Defeat the first 14 Bounties
Return and talk to Caij at Pylon’s Saloon, she gives you the location for the next Bounty – seek him out and defeat him
Return and talk to Caij (again), she gives you the location for the next Bounty – seek him out and defeat him
Return to Caij a final time and interact with the datapad on the table to unlock the final Bounty – seek her out and defeat her to unlock the trophy
Who Gives a Puck Obtain your first bounty
Automatic story-related trophy, cannot be missed.
Perk of the Job Equip Perks in all slots
There is 7 additonal Perk slots to collect in the game. You start with 3 which adds up to a total of 10 Perk slots. You can only collect the Perk slots when you have the Air Dash skill (unlocks through the main story).
When you have found all 7 Perk slots, rest at a nearby Meditation Spot and go to Perks and equip Perks to fill al 10 slots.
Greezy Money Trade 25 collected items
This trophy will come naturally. You need to purchase all merchandise from Doma’s Shop using 100 Priorite Shards for Splurgle.
Trading Priorite Shards, Jedha Scrolls and Data Discs counts towards the trophy.
Cobra Cal Train with your weapons while wearing a headband
First you need to buy the headband from Doma’s Shop on Planet Koboh for 7 Priorite Shards (you will collect all 100 for Splurgle anyways), then equip it and head to Jedha.
On Planet Jedha, right beside the spaceship, you’ll find a dummy which you can attack. Striking the dummy with the headband equipped unlocks the trophy.
A Presence I’ve Not Felt Since… Wear an old wardrobe staple
This trophy is a cool reference to the first game – Star Wars Jedi Fallen Order. You need to find the Poncho Cosmetic and equip it for the trophy.
The Poncho can be found at Fort Kah’lin on Planet Koboh. It’s located on top of a hill not far from the Southern Reach Outpost. When you explore the area you will find an area with a lot of drois and a Priorite Shard. Approaching the Shard you’ll fall through a trapdoor and face a Legendary Adversary – The Spawn of Oggdo. Defeat the boss, collect the Priorite Shard and find the Poncho in the nearby chest.
Hey, Luke At Us Equip a new cosmetic in every Cal slot
You need to equip cosmetics in the following slots – Hair, Jacket, Shirt and Pants (Beard is not required). You unlock new cosmetics by opening chests around the game. You will have way more than one of each cosmetic type as long as you just explore a little bit throughout.
Road House Dropkick an enemy while wearing a mullet
First you need to find the Mullet hair Cosmetic in the Derelict Dam area on Planet Koboh, then you need to unlock the Crossguard Stance through normal story progression. Equip the Mullet in the “Hair” Cosmetics menu and equip the Crossguard Stance using a Meditation Spot.
Finally, sprint towards any enemy and hold to perform a dropkick.
Kitted Out Customize BD-1, the blaster, and Cal’s lightsaber with new parts
Before you can earn the trophy, you need to unlock the blaster – it unlocks through natural story progression.
Once unlocked, head over to any workbench and customise any category for BD-1, the blaster and Cal’s lightsaber. No need to fully customise every single category with parts and different colors.
Skoova Diving Fill the aquarium in the cantina
There is a total of 12 fish in the game you need to collect in order to fill the aquarium. First you need to find and talk to Skoova on Planet Koboh in the Foothills area. He will then join Pyloon’s Saloon and appear in multiple locations across Koboh and Jedha.
You need to find and talk to Skoova on 12 different locations, which will trigger a little scene where he captures a new fish for the acquarium.
Finding the final spawn and talking to Skoova unlocks the trophy.
Growth Spurt Find space for a full garden
There are multiple steps to achieve the trophy.
Recruit Pili (You pass her on Planet Jedah during the main story)
Talk to Pili at Pyloon’s Saloon
Find all 10 seed TYPES
Plant 1 of each TYPE
Let the plants fully grow
The catch is that all 10 seeds needs to be fully grown, that will unlock the final space on the rooftop garden. Each plant has multiple stages before its full grown – it takes around 40 minutes total. The plants have 3 stages each of growth.
IMPORTANT: If you stay on the area, the plant wont grow to the next stage, travel away and back to make it grow into the next stage. You can check on each plant from the “Gardening” menu.
Remember to talk to Pili once in a while, it’s required to unlock some of the next Gardening spots on the roof. The final spot is unlocked once all 10 plant types are fully grown.
Gambler Win all holotactics matches
You find the Holotactics table in Pyloon’s Saloon after recruiting Bhima and Tulli. Follow the steps below:
First you need to recruit Bhima and Tulli in the Boiling Bluff area (accessed from the Devastated Settlement area). They are two of the Cantina Recruits required for Max Capacity
Next you want to complete the game (if you haven’t already) while scanning all defeated enemies. Scanned enemies become playable pawns for the holotactics matches.You need to scan all enemies for Intergalactic Geographic anyways.
Recruit all Cantina Recruits, you need Skoova and T-1N8 recruited in order to play against them. See Max Capacity
NOW, it’s finally time to battle and defeat all opponents. Most battle can be won solely using the Droidekas and a few Stormtroopers or Droids. The Droideka will annihilate most enemies.
Remember that the game is a bit luck-based, so some opponents can take a few tries to beat.
Intergalactic Geographic Scan every type of enemy to fill out the Tactical Guide
There is a total of 77 different enemies in Star Wars Jedi Survivor. Note that 13 of the scans are from Legendary Adversaries, they are added automatically to the tactical guide when you defeat them.
This video shows you all enemy types and variants. That includes Bosses, Legendary Adversaries, The Galactian Empire, Droids, Haxion Brood, Flora & Fauna.
Reconnaissance Use BD-1 to investigate a target in the distance
You unlock BD-1’s Visor ability when you first land on Planet Koboh. Find any unaware enemy, press > > to scan an enemy through the binoculars. If it’s an enemy you’ve already scanned it will say ” Show Tactical Guide Entry” – Opening the Tactical Guide will unlock the trophy.
Splurgle Purchase all of Doma’s merchandise
You unlock Doma’s Shop upon reaching Pylon’s Saloon (it will be marked on the map). In order to purchase all of Doma’s merchandise you need to collect 100 Priorite Shards. The catch is that there are exactly 100 Shards to be found the entire game.
You can find Priorite Shards on Planet Koboh and Coruscant.
This map is ESSENTIAL to earn the Splurgle trophy. The map is earned after completing 3 puzzles on Planet Jedha and picking up the map upgrade near the center of the desert. Completing all 3 puzzles will also unlock 3 new perk slots for Cal which are needed for Perk of the Job anyways.
The Jedi Path Fully upgrade 3 skill trees
This is a quite simple trophy. You will have way more than enough skill points after completing the game. Pick any 3 skill trees and stick with those throughout the game. You can also respec your skill points from the skill points menu on any Medititation Point.
Blood, Sweat, and Tears Complete all Force Tears
There is a total of 15 Force Tears to find and complete. Force Tears contain different series of combat and platforming challenges. If you’re struggling with the combat Force Tears, change the difficulty to Story Mode.
The platforming ones are a different story – you need to know where to go and learn the patterns of the obstacles.
Star Wars Jedi: Survivor contain a total of 17 Bounties. Finding and killing all Bounties unlocks the Caij Match trophy or achievement. You unlock Bounties automatically from story progress, halfway through Chapter 3 when meeting Caij.
Defeating all 17 Bounties unlocks the following trophy:
Caij Match – Gain the attention of a mysterious stranger
I recommend that you attempt this trophy after completing the Main Story – Most of the Bounties spawn late in the Story. The trophy can be divided into 4 simple steps:
Lost & Found Weapon Quests are the most tricky quests to complete in Dead Island 2. The quest markers are scarce and you have to track down multiple Journal Entries (Collectibles) in order to take the quest forward. There is a total of 6 Lost & Found Weapon Quests in Dead Island 2. You only need to complete 5 to unlock the following trophy:
Sharpest Tool in the Box – Complete 5 Lost & Found Weapon Quests
Below you’ll find a walkthrough for each Lost & Found Weapon quest. If the quest aint available, try to complete nearby side quests or proceed with the main story. It’s best to leave Lost & Found quests until you have at least completed the main story and maybe some side quests.
My Mailman Was a Zombie!
The Clean and The Snatch (Beverly Hills)
Jo’s Rainy Day Stash (Venice Beach)
[REDACTED] (Venice Beach)
Fool’s Gold
Drunk & Disorderly (Ocean Avenue)
https://www.ben-gun.com/wp-content/uploads/2023/04/DI2_Xbox-Dash_1920x1080_Jacob-NoZombies-9babc2d423f3146fdc12.webp10801920Ben-Gunhttps://www.ben-gun.com/wp-content/uploads/2022/12/cropped-Bengun-logo-new-300x257.pngBen-Gun2023-04-26 14:47:052023-04-26 14:49:54Dead Island 2 All Lost & Found Weapon Quests Guide
The main focus of this guide is collecting all 81Chirpers and talk with all 46 Dead Corpses. This video series will be divided into the different areas of the game to make it more manageable.
Note that most of the Collectibles are missable! You can’t backtrack to all areas.
Collectibles overview
81 Chirpers (Burning Ears)
46 Talking Corpses (The Necromancer)
3 Dead Animals (Beast Friend)
98 Apples (Apple Pie)
24 Lootyagins (More Than Profit)
Following this video series, collecting the items in the shown order will make sure that you don’t miss any Chirpers or Talking Dead. The only thing that you need to be aware off is to backup your save near the end of the game.
Then you can reload and complete remaining Lootyagins and clean-up random misc trophies.
Facility 3826
Forester Area
Exhibition Center VDNH
Open World (All Sectors)
Lastochkin Theater
Infirmary & Pavlov Complex
https://www.ben-gun.com/wp-content/uploads/2023/04/339632841_939395597250583_2496045064289885879_n.jpg7201280Ben-Gunhttps://www.ben-gun.com/wp-content/uploads/2022/12/cropped-Bengun-logo-new-300x257.pngBen-Gun2023-04-23 19:56:192023-05-05 14:45:47Atomic Heart All Chirpers & Talking Dead Locations
No fillers, just a straight-to-the-point guide on how to unlock the Handcannon without playing Professional Difficulty. You can unlock it in about 30 minutes. The Platinum trophy just got a whole lot easier.
A new update hit the Resident Evil 4 Remake. The Mercenaries are back and fun to play as always. Play as 1 of 4 characters (for now) and play score attack across 3 different maps. In order to unlock the Handcannon, simply get a single S-Rank on each map once.
Next you can head over to the Extra Content Shop and purchase the weapon. The Handcannon can be found in your storage which is accessed from the Typewriter.
Number of missable trophies: All 3 Passenger trophies along with weapons and the two Credits trophies
Glitched trophies: 0
Does difficulty affect trophies?: No
Minimum Playthroughs: 3 (1 for each Passenger trophy)
PS4/PS5 Crossbuy: No – PS5 Exclusive
Free-Roam / Chapter Select after Story?: Yes – you can replay all levels.
Release Date: March 16, 2023
STEP 1: Complete the game without dying, misc Trophies, save all Passengers & defeat Belial + Credits last message
For your first playthrough I recommend that you save all Passengers, destroy all 12 Gargoyles, get x10 score multiplier and defeat the final boss. In order to unlock one of the credits trophies, you need to defeat the final boss before a timer runs out, shoot 70% words of the credits appearing and not skipping the final credits section.
If you miss any misc trophies, you have two more playhthorughs to unlock them.
How to save all Passengers:
Passenger 1
During the end of Level 2 you will enter a room with a machine on each side with 3 tubes each, along with the Passenger hanging in a cage above you. Shoot the switch on the longest pipe first, then the next two after a couple of seconds – you need to time the 3 pipes filling with water at the same time to stop the waterflow. The will light constant green when done correctly. Repeat for both machines.
Passenger 2
During the end of level 5 you reach a big open area with a Passenger tied to a cross with fire beneath them. Use the UV Light (the weapon crate will spawn close to the tracks if you don’t have it in hand) to light on the figures with a rope in hand – shoot them while shining a light on them. DON’T shoot the figures holding torches. When you reach the next track, you want to go left. Dont shoot the gate arrow to change tracks before you have saved the Passenger. When you shoot the 2nd figure holding a rope, the Passenger will be freed.
Passenger 3
During the end of level 7, you will a second segment which requires you to shoot specifc panels with the Flare Gun to proceed. There will be a Passenger in the middle of the area in a cage hanging above a pit. Use the Flare Gun to destroy the 2 wooden beams to right (destroying these first are crucial), next you want to destroy the beams holding the caage itself – this will save the Passenger and prevent them from dying.
Passenger 4
The final Passenger appears at the end of level 9. You enter a big room with rotating sawblades on both sides. A series of pipes will come down for a total of 5 times. In order to save the Passenger, you need to hit the fuse boxes that are connected to the pipes connected on your top right – that will remove a sawblade near the Passenger. Next you need to hit the fuse box that opens the boom gate so you can proceed. Repeat 3 times to save the Passengers.
STEP 2: Abandon all Passengers and let Belial defeat you + Credits Belial’s comment
Go through the game again, but this time you want to abandon all Passengers and let the timer run out during the final fight. During the credits you ant to shoot 70% of the credits and don’t skip the last part, in order to unlock the other credits Trophy which is listening to Belial’s final comment.
How to kill all Passengers:
Passenger 1
During the end of Level 2 you will enter a room with a machine on each side with 3 tubes each, along with the Passenger hanging in a cage above you. Simply wait until the cage fills with water to kill the Passenger.
Passenger 2
During the end of level 5 you reach a big open area with a Passenger tied to a cross with fire beneath them. Use the UV Light (the weapon crate will spawn close to the tracks if you don’t have it in hand) to light on the figures with a torch in hand – shoot them while shining a light on them. This will make them drop the torches and eventually kill the Passenger.
Passenger 3
During the end of level 7, you will a second segment which requires you to shoot specifc panels with the Flare Gun to proceed. There will be a Passenger in the middle of the area in a cage hanging above a pit. Use the Flare Gun to destroy the beams holding the cage to kill the Passenger. DON’T shoot the 2 beams to the right.
Passenger 4
The final Passenger appears at the end of level 9. You enter a big room with rotating sawblades on both sides. A series of pipes will come down for a total of 5 times. Simply do nothing and wait for the sawblades to kill the Passenger, then proceed normally through the section.
Your last trophy will be to kill all Passengers. Play up until Level 9, kill the last Passenger to unlock the trophy and your Platinum. Congratulations! You survived the nightmare.
How to abandon all Passengers:
Passenger 1
During the end of Level 2 you will enter a room with a machine on each side with 3 tubes each, along with the Passenger hanging in a cage above you. Quickly shoot the locks in front of you to open the door and end the level – you need to abandon the Passenger before the cage fills with water and kills him.
Passenger 2
During the end of level 5 you reach a big open area with a Passenger tied to a cross with fire beneath them. There will be a series of 2 gates that switches the tracks, shoot both gates to go right both times – this way you abandon the Passenger.
Passenger 3
During the end of level 7, you will a second segment which requires you to shoot specifc panels with the Flare Gun to proceed. There will be a Passenger in the middle of the area in a cage hanging above a pit. You need to hit all 3 symbols on first rotation to proceed with the level and abandon the Passenger, If you fail to do so, the Passenger will die instead – restart checkpoint and try again.
Passenger 4
The final Passenger appears at the end of level 9. You enter a big room with rotating sawblades on both sides. A series of pipes will come down for a total of 5 times. In order to abandon the Passenger, you need to hit the fuse boxes that are connected to the pipes connected on your top right – that will remove a sawblade near the Passenger. Next you need to hit the fuse box that opens the boom gate so you can proceed. Remove to of the sawblades and quickly open the last boom gates to abandon the Passenger. If you’re to slow the final sawblade will kill him instead.
Death to all Gargoyles Destroy all marked gargoyles
There is a total of 12 marked gargoyles to destroy in Switchback VR. There’s one located in each of the 10 levels and two located in the credits. Shoot the gargoyles once to destroy them.
The gargoyles carry over between all playthroughs and replays, so don’t worry if you miss one during your first playthrough.
The Collector Pick up all the weapons at least once
There is a total of 10 weapons to collect in the game.
Weapons:
Uzi
Grenade Launcher
Magnum
UV Light
Machine Gun
Flare Gun
Upgraded Pistol
Shotgun
Stun Gun
Belial’s Gun
The Grenade Launcher from Level 2 can be missed if you don’t pay attention. If you don’t have the trophy by the end of the game, check Level 2 first for the Grenade Launcher. All other weapons will most likely come naturally, they are quite hard to miss.
Gunslinger Reach multiplier 10
You increase your score multiplier by hitting objects with a yellow marker on them. Destroying normal object and killing enemies prevents the multiplier from going down.
I recommend that you attempt this trophy on Level 7, 8 or 9. Each level has A LOT of destructibles. Level 7 is by far the easiest and can be done in about 5 minutes.
The Saviour Save all the trapped passengers
There’s a total of 4 Passengers in the game. They are located in Level 2, 5, 7 and 9. No matter if ypu want to save, kill or abandon all Passengers, if you fail to achieve the desired outcome, quickly pause the game and restart last checkpoint.
How to save all Passengers:
Passenger 1
During the end of Level 2 you will enter a room with a machine on each side with 3 tubes each, along with the Passenger hanging in a cage above you. Shoot the switch on the longest pipe first, then the next two after a couple of seconds – you need to time the 3 pipes filling with water at the same time to stop the waterflow. The will light constant green when done correctly. Repeat for both machines.
Passenger 2
During the end of level 5 you reach a big open area with a Passenger tied to a cross with fire beneath them. Use the UV Light (the weapon crate will spawn close to the tracks if you don’t have it in hand) to light on the figures with a rope in hand – shoot them while shining a light on them. DON’T shoot the figures holding torches. When you reach the next track, you want to go left. Dont shoot the gate arrow to change tracks before you have saved the Passenger. When you shoot the 2nd figure holding a rope, the Passenger will be freed.
Passenger 3
During the end of level 7, you will a second segment which requires you to shoot specifc panels with the Flare Gun to proceed. There will be a Passenger in the middle of the area in a cage hanging above a pit. Use the Flare Gun to destroy the 2 wooden beams to right (destroying these first are crucial), next you want to destroy the beams holding the caage itself – this will save the Passenger and prevent them from dying.
Passenger 4
The final Passenger appears at the end of level 9. You enter a big room with rotating sawblades on both sides. A series of pipes will come down for a total of 5 times. In order to save the Passenger, you need to hit the fuse boxes that are connected to the pipes connected on your top right – that will remove a sawblade near the Passenger. Next you need to hit the fuse box that opens the boom gate so you can proceed. Repeat 3 times to save the Passenger. The series of pipes get more and more complex, but just take your time and make sure to hit the correct ones.
The trophy unlocks after surviving and leaving the area.
The Monster Kill all the passengers
There’s a total of 4 Passengers in the game. They are located in Level 2, 5, 7 and 9. No matter if ypu want to save, kill or abandon all Passengers, if you fail to achieve the desired outcome, quickly pause the game and restart last checkpoint.
How to kill all Passengers:
Passenger 1
During the end of Level 2 you will enter a room with a machine on each side with 3 tubes each, along with the Passenger hanging in a cage above you. Simply wait until the cage fills with water to kill the Passenger.
Passenger 2
During the end of level 5 you reach a big open area with a Passenger tied to a cross with fire beneath them. Use the UV Light (the weapon crate will spawn close to the tracks if you don’t have it in hand) to light on the figures with a torch in hand – shoot them while shining a light on them. This will make them drop the torches and eventually kill the Passenger.
Passenger 3
During the end of level 7, you will a second segment which requires you to shoot specifc panels with the Flare Gun to proceed. There will be a Passenger in the middle of the area in a cage hanging above a pit. Use the Flare Gun to destroy the beams holding the cage to kill the Passenger. DON’T shoot the 2 beams to the right.
Passenger 4
The final Passenger appears at the end of level 9. You enter a big room with rotating sawblades on both sides. A series of pipes will come down for a total of 5 times. Simply do nothing and wait for the sawblades to kill the Passenger, then proceed normally through the section.
The trophy unlocks after surviving and leaving the area.
The Uncaring Abandon all the passengers
There’s a total of 4 Passengers in the game. They are located in Level 2, 5, 7 and 9. No matter if ypu want to save, kill or abandon all Passengers, if you fail to achieve the desired outcome, quickly pause the game and restart last checkpoint.
How to abandon all Passengers:
Passenger 1
During the end of Level 2 you will enter a room with a machine on each side with 3 tubes each, along with the Passenger hanging in a cage above you. Quickly shoot the locks in front of you to open the door and end the level – you need to abandon the Passenger before the cage fills with water and kills him.
Passenger 2
During the end of level 5 you reach a big open area with a Passenger tied to a cross with fire beneath them. There will be a series of 2 gates that switches the tracks, shoot both gates to go right both times – this way you abandon the Passenger.
Passenger 3
During the end of level 7, you will a second segment which requires you to shoot specifc panels with the Flare Gun to proceed. There will be a Passenger in the middle of the area in a cage hanging above a pit. You need to hit all 3 symbols on first rotation to proceed with the level and abandon the Passenger, If you fail to do so, the Passenger will die instead – restart checkpoint and try again.
Passenger 4
The final Passenger appears at the end of level 9. You enter a big room with rotating sawblades on both sides. A series of pipes will come down for a total of 5 times. In order to abandon the Passenger, you need to hit the fuse boxes that are connected to the pipes connected on your top right – that will remove a sawblade near the Passenger. Next you need to hit the fuse box that opens the boom gate so you can proceed. Remove to of the sawblades and quickly open the last boom gates to abandon the Passenger. If you’re to slow the final sawblade will kill him instead.
The trophy unlocks after surviving and leaving the area.
God Mode Finish the game without getting killed
I recommend that you play on “Story Mode” difficulty to make it a bit easier on yourself. Whenever you think you’re about to die, quit the game and continue. You can also backup your save by uploading it to the PS Cloud to make sure. Remember that you also have 3 full playthroughs to attempt this.
There are only a few sections where you can die quite easily, the game is quite easy by default.
Level 5 – near the Passenger in Level 5, there’s an enemy following you – quickly proceed through the area to avoid being killed by him.
Level 9 – there will be a bunch of traps which will instantly kill you if you hit the wrong fuse box. I highly recommend that you make a backup of your save before playing this level.
Level 10 – during the final showdown, there’ll be a counter going down – if it reaches 00:00 you will die. Backup your save before this section, especially if you only have 2 minutes (all passengers were abandoned/killed).
A Moment of Hope Unlock the last message after the credits
During Level 10 you fight Belial a couple of times. During the final showdown you’ll have 2 minutes to defeat her + 15 seconds for each Passenger you might have saved – that means you’ll have between 2 and 3 minutes to defear her.
You need to defeat her before the time runs out to unlock the last message after the credits, also shoot at least 70% of the credits. DON’T skip the credts after the shooting sequence of the credits – it’s okay to speed up the credits, just don’t shoot “skip.” After the final set of the credits the last message will play and unlock the trophy.
Eternal Damnation Unlock the last comment from Belial after the credits
During Level 10 you fight Belial a couple of times. During the final showdown you’ll have 2 minutes to defeat her + 15 seconds for each Passenger you might have saved – that means you’ll have between 2 and 3 minutes to defear her.
You need to let the time run out to unlock her last comment after the credits, also shoot at least 70% of the credits. DON’T skip the credits after the shooting sequence of the credits – it’s okay to speed up the credits, just don’t shoot “skip.” After the final set of the credits the last comment will play and unlock the trophy.


 , 4
, 4 , 14
, 14 , 12
, 12 )
)


 ,
,  ,
,  ,
,  ,
, 
 to fire them at enemies. You might want to bring your opponents health down using other weapons – machine guns don’t damage that much, and they overheat quickly.
 to switch weapons, then use
  to fire it. Defeat any opponent using the weapon. You can see which weapon you have equipped in the lower right corner.


 and
and  at the same time. The problem is that enemies start moving normally after you hit them once, so you need to defeat them with the next attack right after a Force Slow has been activated.
 and press


 >
>  Show Tactical Guide Entry” – Opening the Tactical Guide will unlock the trophy.