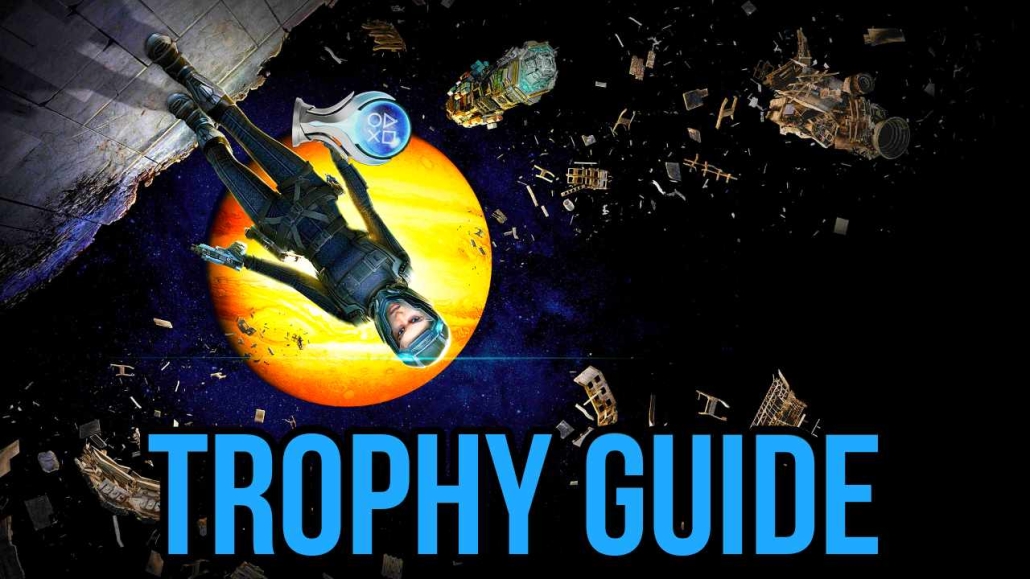
Helldivers 2 Trophy Guide & Roadmap

Helldivers-2-trophy-guide-100%

Roadmap

  • Estimated trophy difficulty: 4/10
  • Approximate amount of time to platinum: 40+ Hours
  • Offline Trophies: (1trophy, 3trophy, 11trophy, 24trophy)
  • Online Trophies: All (can’t play game without internet connection)
  • Hardest Trophies:
  • Number of missable trophies: 0
  • Glitched trophies: 1 trophySamples are a diver’s best friend
  • Does difficulty affect trophies?:
  • Minimum Playthroughs: –
  • Release Date: February 8th, 2024

STEP 1: Enjoy the game + Collect as many samples as possible

Play the tutorial, play some missions and enjoy the game. The only focus for this step is to collect as many Samples as possible. You need a total of 420 Common Samples and 30 Rare Samples for all level 1 ship upgrades – see trophyShip it! for more.

STEP 2: Earn all Difficulty related and miscellaneous trophies

For this step you need specific stratagems to unlock various trophies. You need to unlock at least 3 Orbital Barrages, Flamethrower, Eagle Napalm Strike, Incendiary Mines, Jump-Pack and Railgun stratagems. Other than that, see the individual trophies for strategies and requirements.

List of miscellaneous trophies:

You might already have unlocked some of these by just playing the game.

STEP 3: Complete 100 missions + All level 1 Ship Module upgrades

Now for the final step and maybe longest. You can tackle this in multiple ways, simply enjoy the game and complete missions, or play on the easiest difficulty solo or with a friend. It’s possible to complete missions in 5-10 minutes time on the lowest difficulties, and you can pick up the last Common Samples you need for the last level 1 ship module upgrades, if you still need trophyShip it!.

See trophyDoing your part for more tips and tricks.


Trophy Guide

The Epitome of Super Earth

Obtain all trophies of HELLDIVERS™ 2.

Aquire all other trophies to unlock the Platinum.

Hell Dive

Complete an Extreme difficulty mission or higher without anyone dying.

Complete any mission on Extreme difficulty without anyone dying. This is best done with a good teammate or two. The real enemy in many cases will be friendly fire. If you don’t have a squad or players you communicate well with, I recommend doing it solo.

Play a “Eradicate Terminid Swarm” Mission as they are the easiest to complete. If you’re playing alone, equip some Turret Strategems, the Mortar Turret is one of the best for this mission as you can keep your distance and stay in the same place, most of the time. You also need some Strategems to tackle the Bile Titans (huge four-legged bugs). Use the Orbital Laser or the Eagle 500kg Bomb to take them out.
I also recommend using the “Guard Dog” Rover backpack and any Support Weapon you want, but one of the best Support Weapons to use is the Railgun, the only downside is that the weapon unlocks late at rank 20.

Playing with teammates, you want to avoid using various Machine Gun Sentry’s, as they can quickly kill a teammate by accident – go for the Mortar Sentry or HMG Emplacement instead. Same as above, use Orbital Laser or Eagle 500kg Bombs to take out the Bile Titans.
Be careful with any type of explosive while playing with a squad. It’s best to hold down each of your own locations, then you don’t walk into each others line of fire.

Hold my primary, I’m going in!

Complete a full Hard difficulty mission or higher without anyone firing their primary or support weapon.

This is best done “Eradicate Terminid Swarm” Missions. Note that you can’t fire your primary weapon or use any Support Weapons like Machine Gun, Stalwart or Railgun.

You can see on the loadout menu before you drop, which weapons that are Support Weeapons (their icons are blue). It’s okay to use various backpacks, Orbital and Eagle Strategems – they won’t void the trophy.

These restrictions goes for all Squad members present. Cordinate with the team and make sure that no one equip Support Weapons or fire their primary weapon during the mission. Play solo if you don’t have good teammates to do the trophy with.

Gone in 360 seconds!

Complete a full Extreme difficulty Blitz mission and extract in under 6 minutes.

This is best done with a full squad of 4 players. You have to play Blitz Mission on difficulty 6 – Extreme (not possible on higher difficulties). When you’re playing with more players, you run in each your own directions and tank some Nests all by yourself.

I recommend using Eagle Strategems like 500kg Bomb and Airstrike. The Grenade Launcher Support Weapon is also perfect to take out Nests at medium distance.

You need to activate the Extraction Shuttle within 3 and a half minutes from mission start. The shuttle takes 2 minutes to arrive and another 15 seconds to land. This will also take a bit of luck, how big the Nests are and how far they are apart.

Extractamundo!

Extract with a full squad on a Hard difficulty or more mission

Hard difficulty (difficulty 5) is very doable with almost any team, randoms or friends, doesn’t really matter. Play any mission on Hard difficulty and extract with a full squad, which means you need a total of four players in-game. This also means that the trophy can’t be done solo. You can also unlock this trophy on higher difficulty mission, this trophy could very likely unlock without you even noticing. Enjoy the game and it will unlock soon enough.

If you somehow don’t get the trophy. Play one of the easiest missions in the game “Eradicate Terminid Swarm” with a group of friends and randoms. There will be plenty of time in the end to finish off enemies and extract.

Caught them by Supplies!

Kill a Charger with a resupply pod.

Samples are a diver’s best friend

Extract with at least 15 rare samples from a mission as a team.

ONE player needs to carry ALL 15 Rare Samples (or more) as you extract for the trophy to unlock. Normally this could be done with 15 total Samples as a team, but sadly it’s bugged, making it a bit more challenging. You need play on at least difficulty 5 – Hard or higher in order to carry a total of 15 Rare Samples as a team. Note that Rare Samples won’t spawn on smaller missions like “Eradicate Terminid Swarm.”

I recommend that you attempt this on difficulty 6 – Challenging or higher. Higher difficulty means more Samples spawning but also at a higher risk. Collect a total of 15 or more as a team. When you’re all waiting for the escape shuttle, all players drop their Samples for one player to pick them pick them up. Hold “down” on the d-pad and select the Samples icon to drop them.

Doing your part

Complete at least 100 missions.

Complete a total of 100 missions to unlock the trophy. You have to complete the objective and extract for it to count as a “completed” mission. You can see how many mission you have completed if you access the console located on your ship close to the bridge.

You can also complete the objective and simply suicide a lot to fail to extract – this will still count as a completed mission.

It’s the only way to be sure…

Have 6 orbital barrage stratagems in the same place at the same time.

This trophy can only be achieved with two or more players. If you’re doing this with one other player, you have to equip at least 6 Orbital Barrages total. 4 each would be the best and safest way to achieve the trophy, or add even more players to the squad.

The Orbital Barrages to use is:

  • Orbital Gatling Barrage (Level 0, costs: 1500)
  • Orbital 120MM HE Barrage (Level 5, costs: 4000)
  • Orbital 380MM HE Barrage (Level 8, costs: 7500)
  • Orbital Walking Barrage (Level 10, costs: 7500)

At the start of the match, tag a location and start throwing all your markers for the Orbital Barrage stratagems.

For the greater good!

Kill 5,000 enemies.

This trophy will unlock naturally as you enjoy the game. You will have way over 5,000 kills before you achieve 100%.

Get some!

Fire at least 150 rounds in one burst, killing at least 10 enemies.

Unlock the Stalwart machine gun stratagem from your ship and play any bug mission. Keep your mag fully loaded at all times. The best moment to attempt this trophy is during a fresh bug breach or during extraction. You often get swarmed with bugs during these moments. Focus fire on smaller enemies and armored the armored warriors and chargers.

The trick is to keep firing after you have killed 10+ bugs. You can see how many kills you got at the bottom of the screen. You’ll see a counter when you get big multi kills or kills in rapid succession. The trophy unlocks as you empty the mag if you killed more than 10 enemies.

Kill it with fire!

Kill 100 enemies using fire damage during the same mission.

There are 3 stratagems you want to unlock before you attempt this:

  • Flamethrower
  • Eagle Napalm Strike
  • Incendiary Mines

Play a “Purge Hatcheries” mission. All the bug eggs counts as 1 kill each. Use the Flamethrower to destroy them and use the other stratagems throughout the mission. You will have 40 minutes to unlock the trophy, which is way more than enough. Can be done solo or with a team, but only your own kills counts.

Act of War

Be injured in all limbs at the same time.

Taking damage will sometimes damage your limbs. These damages will result in negative effects on your movements. This trophy seems bugged, but really isn’t. You need to be damaged in all 4 limbs and survive the attack. The easiest way to achieve this is to equip the DP-40 Hero of the Federation armor (bought on page 5 of the Warbonds menu). This armor have a 50% to keep you alive suffering a lethal attack.

Once you have the armor, drop an Eagle Airstrike on top of yourself and hope that you survive. Repeat until you unlock the trophy.

The power of Democracy

Kill 25 enemies with one stratagem.

I recommend the Eagle 500kg Bomb stratagem for this trophy. Drop it on yourself and watch yourself fly. May take a couple of tries to get it right. Sometimes you ragdoll into infinity, other times you simply splatter. It’s also highly likely that a teammate will help you achieve this trophy by “accident.”

Fully operational

Reach max rank on one ship module.

You need to unlock all 3 upgrades for one ship module. The cheapest ship module to fully upgrade is the Patriotic Administration Centre, costing a total of 220 Common Samples, 100 Rare Samples and 5 Super Samples. 

You can collect Common Samples on all difficulties, but Rare Samples only spawn on difficulty 4 and above, and Super Samples only spawn on difficulty 7 and above. The Super Samples have specific spawns on the different maps, and there will always be 3 close together.

Ship it!

Upgrade all ship modules at least 1 level.

Unlock the first level for all 6 ship modules to unlock the trophy. This will quite possibly be one of your last trophies, as you need to acquire a lot of Common Samples for all level 1 upgrades. I recommend getting a good team with focus on collecting Samples. Play on difficulty 4-6 depending on your skill, the higher difficulty the more Samples you’ll find. If you only need Common Samples, you can play on the easier difficulties as you also work towards trophyDoing your part (complete 100 missions).

You need a total of 420 Common Samples and 30 Rare Samples for all level 1 upgrades. See all of the ship modules individual upgrade costs below.

All Orbital Cannon Ship Modules

Ship Module NameUpgrade EffectAffected StratagemsHow to Unlock
Exploding ShrapnelDamage falloff from orbital Stratagems explosions reduces damage.Orbital Walking Barrage
Orbital Railcannon Strike
Orbital Airburst Strike
Orbital Precision Strike
Orbital 380MM HE Barrage
Orbital 120MM HE Barrage
100 Common Samples
More GunsBarrage orbitals can fire 1 additional salvo(s) per barrage.Orbital Gatling Barrage
Orbital Walking Barrage
Orbital 380MM HE Barrage
Orbital 120MM HE Barrage
80 Common Samples, 60 Rare Samples
Zero-G Breech LoadingOrbital stratagems have a 10% reduced cooldown.Orbital Gatling Barrage
Orbital Walking Barrage
Orbital EMS Strike
Orbital Gas Strike
Orbital Railcannon Strike
Orbital Smoke Strike
Orbital Airbust Strike
Orbital Laser
Orbital Precision Strike
Orbital 380MM HE Barrage
Orbital 120MM HE Barrage
80 Common Samples, 80 Rare Samples, 10 Super Samples

All Patriotic Administration Center Ship Modules

Ship Module NameUpgrade EffectAffected StratagemsHow to Unlock
Donation Access LicenseEach support weapon gets more magazines.Stalwart
Railgun
Laser Cannon
Grenade Launcher
Machine Gun
Flamethrower
Anti-Materiel Rifle
60 Common Samples
Streamlined Request ProcessSupport Weapons have a 10% decreased cooldown on Stratagems.Stalwart
Autocannon
Railgun
Laser Cannon
Arc Thrower
Spear
Grenade Launcher
Machine Gun
Flamethrower
Recoilless Rifle
Anti-Materiel Rifle
Expendable Anti-Tank
80 Common Samples, 40 Rare Samples
Hand CartsAll Backpack stratagems have a cooldown of 10%.Shield Generator Pack
“Guard Dog”
Ballistic Shield Backpack
Supply Pack
“Guard Dog” Rover
Jump Pack
80 Common Samples, 60 Rare Samples, 5 Super Samples

All Hangar Ship Modules

Ship Module NameUpgrade EffectAffected StratagemsHow to Unlock
Liquid-Ventilated CockpitThe cooldown time for Eagle stratagems is reduced by 50%.Eagle 500KG Bomb
Eagle Airstrike
Eagle Strafing Run
Eagle Smoke Strike
Eagle Cluster Bomb
Eagle Napalm Airstrike
Eagle 110MM Rocket Pods
80 Common Samples
Pit Crew Hazard PayEagle Rearm time is reduced by 20%.Eagle 500KG Bomb
Eagle Airstrike
Eagle Strafing Run
Eagle Smoke Strike
Eagle Cluster Bomb
Eagle Napalm Airstrike
Eagle 110MM Rocket Pods
80 Common Samples, 40 Rare Samples
Expanded Weapons BayThe number of Eagle Stratagem uses is increased by 1 per Rearm.Eagle 500KG Bomb
Eagle Airstrike
Eagle Strafing Run
Eagle Smoke Strike
Eagle Cluster Bomb
Eagle Napalm Airstrike
Eagle 110MM Rocket Pods
80 Common Samples, 80 Rare Samples, 10 Super Samples

All Bridge Ship Modules

Ship Module NameUpgrade EffectAffected StratagemsHow to Unlock
Targeting Software UpgradeDeployment time for Orbital Stratagems is reduced by 1 second.Orbital Gatling BarrageOrbital Walking BarrageOrbital EMS StrikeOrbital Gas StrikeOrbital Railcannon StrikeOrbital Smoke StrikeOrbital Airburst StrikeOrbital LaserOrbital Precision StrikeOrbital 380MM HE BarrageOrbital 120MM HE Barrage60 Common Samples
Nuclear RadarEnemy ping radius is increased by 50 meters on the minimap.N/A80 Common Samples,
40 Rare Samples
Power SteeringSteering during Hellpod deployment is improved.N/A80 Common Samples, 80 Rare Samples, 10 Super Samples

All Engineer Bay Ship Modules

Ship Module NameUpgrade EffectAffected StratagemsHow to Unlock
Synthetic SupplementationCooldown for Sentry, Emplacement, and Resupply Stratagems are reduced by 10%.Shield Generator Relay
EMS Mortar Relay
Rocket Sentry
Gatling Sentry
Tesla Tower
Mortar Sentry
Anti-Personnel Minefield
Machine Gun Sentry
Autocannon Sentry
Incendiary Mines
HMG Emplacement
60 Common Samples,
10 Rare Samples
Advanced ConstructionIncreases the health of Sentry Stratagems by 50%.EMS Mortar Sentry
Rocket Sentry
Gaitling Sentry
Tesla Tower
Mortar Sentry
Machine Gun Sentry
Autocannon Sentry
80 Common Samples, 60 Rare Samples, 5 Super Samples
Rapid Launch SystemDeployment time for Emplacement Stratagems is removed.Shield Generator Relay
Tesla Tower
Anti-Personnel Minefield
Incendiary Mines
HMG Emplacement
80 Common Samples, 80 Rare Samples, 10 Super Samples

All Robotics Workshop Ship Modules

Ship Module NameUpgrade EffectAffected StratagemsHow to Unlock
Dynamic TrackingDeployment time for all Sentry Stratagems is reduced.EMS Mortar Sentry
Rocket Sentry
Gatling Sentry
Mortar Sentry
Machine Gun Sentry
Autocannon Sentry
60 Common Samples +
20 Rare Samples
Shock Absorption GelAmmo for all Sentry Stratagems is increased by 50%.EMS Mortar Sentry
Rocket Sentry
Gatling Sentry
Mortar Sentry
Machine Gun Sentry
Autocannon Sentry
80 Common Samples, 40 Rare Samples, 5 Super Samples
High-Quality LubricantSentries will rotate toward newer targets quickly.EMS Mortar Sentry
Rocket Sentry
Gatling Sentry
Mortar Sentry
Machine Gun Sentry
Autocannon Sentry
80 Common Samples, 80 Rare Samples, 10 Super Samples

Nothing is bigger than Freedom

Defeat a Hulk.

Hulks spawns normally on Bot missions on difficulty 5 (Hard) and above. You can find missions with an objective to take out a Hulk on lower difficulties. Use heavy weapons and stratagems to take it out. They are armored and are difficult to take down if you’re not prepared. The heat vent on it’s back is it’s weak point and the only part that can be damaged with regular ballistic weapons.

The taller they are…

Defeat a Bile Titan.

Bile Titans spawns normally on Terminid missions on difficulty 5 (Hard) and above. You can find missions with an objective to take out a Bile Titan on lower difficulties. Use heavy weapons and stratagems to take it out. They are armored and are difficult to take down if you’re not prepared.

They don’t call it Tacticool for nothin’

Complete 10 tactical objectives.

Tactical objectives are indicated with blue icons on the map. These objectives are found around the map and spawn regularly. There can be anywhere from 1-4 tactical objectives during each mission.

Tactical objectives includes:

  • Destroy Stalker hive
  • Destroy rogue research buildings
  • Realign radar disk
  • Upload escape pod data

Let’s call it a draw

Shoot off both arms on a Hulk and then extract while it’s alive.

Hulk enemies only spawn on bot missions and on difficulty 5 (Hard) and above. This is best done on a “Eradicate Automaton Forces” mission. You need to wait for a Hulk enemy to spawn, shoot off both of it’s arms and leave it alive and complete the mission. Be careful with explosives, Sentry’s and Orbital or Eagle Strategems – you may kill off the Hulk by accident.

I highly recommend that you attempt this after you have unlocked and purchased the Railgun at rank 20. If you play with friends, you can attempt it earlier, more players just add to the issue of killing the Hulk by accident. you need a coordinated team to make it work.

Cool guys don’t loo- AAAAH!

Fly at least 25 meters from the shockwave of an explosion.

You will likely get this naturally, but if you don’t, you can try hitting yourself with a Eagle 500kg Bomb or other Orbital stratagems.

Another way is playing the “Destroy Rogue Research Station” obejective (but this appears randomly during missions). Place the bomb and activate it, then stand as close to it as possible, but at a slightly higher elevation. Once it explodes, you will be thrown through the air.

Hot Potato!

Throw back a live grenade.

Play any Bot mission marked with red on the Galactic War map on your ship. This can be done on any difficulty. There are multiple automaton enemy types that are able to throw grenades. Wait for an enemy to throw a grenade, run to it and press :x: to throw it back.

Bot Scrapper

Play 1 Bot Mission.

Interact with the Galactic War map on your ship, play any mission from planets located in the sectors marked red. These missions will place you against the Automatons.

Bug Stomper

Play 1 Bug Mission.

Interact with the Galactic War map on your ship, play any mission from planets located in the sectors marked orange. These missions will place you against the Terminid swarm.

Extractinating the Countryside

Play a planet defense mission.

Planet defense missions spawn randomly across the Galactic War campaign. They last defense missions spawned after a new sector was taken over by Super Earth. You will get a notification on the Galactic War table when enemies attack one of your sectors, this is shared globally for all players like the rest of the missions and available sectors to explore.

Patriot

Play at least 50 missions.

Super simple, play any 50 missions to unlock the trophy. Doesn’t matter if you complete, fail or leave the missions – they all count.

Hold My Liber-tea!

While using a jump pack, knock yourself into a ragdoll state.

This trophy is obtained by being knocked into the ragdoll state while flying with the LIFT-850 Jump Pack. The LIFT-850 Jump Pack is a backpack-type stratagem that can be unlocked for 6000 credits in Ship Management after reaching level 8.

With the Jump Pack equipped, hold :x: to fly upwards. Now for the ragdoll, there are multiple ways to achieve this. You can time your jump with one of your own grenade explosions or with a shot from the EAT-17 Expendable Anti-Tank weapon (needs to be unlocked first).

Eat This!

Kill a bug warrior with a shotgun within 1 meter.

A bug warrior is red and armored in the front. Play with shotgun for a couple of missions and this will most likely come naturally. The bug warrior needs to be right on top you for the trophy to pop.

Democracy ain’t done with you yet

Heal another player using stims.

You need to play in a squad for this trophy, it can’t be done solo. Once a teammate is injured, run over to them an press :x: to heal them with one of your own Stims. You need at least one Stim in order to heal a teammate.

Promote Synergy

Provide assisted reload for a teammate.

Unlock the Autocannon from the stratagem menu, or play with a friend that has it. This trophy will be a bit annoying to attempt with randoms, unless you have a mic and can communicate with them and ask for a reload.

Your friend or random teammate needs to equip the Autocannon, you need to equip the backpack (they both spawn on the same pod drop when you call it in). Let your teammate fire some next, then you want to stand next to them and press :x: to reload.

Strapping young lad

Customize your Helldiver with new cape, armor, and helmet.

Before you can earn the trophy, you need to unlock Warbonds (one form of currency in the game) by completing missions. Warbonds are used to unlock new weapons and customization options. While on the ship, press :square: to access your Acquisitions. Use your Warbonds to buy any new cape, armor and helmet. You can equip them immediately, or from a console also found on your ship.

In the nick of time

Extract after the timer reaches zero.

This trophy will unlock as you enjoy the game. But, if it for some reason doesn’t unlock across your 100+ missions, play any mission and wait until there’s under 2 minutes on the timer left. Call in the extraction and enter the escape shuttle with the timer at 00:00 to unlock the trophy.

The Real Deal

Complete Basic Training.

You play Basic Training at the start of the game. This is a mandatory introduction and tutorial.

The long arm of Justice

Kill a target at a distance of over 100m.

There are multiple ways to do this. One of the easiest methods is to call down various Eagle Strategems. Throw them as far as you can and run the opposite direction. Another method is placing a Mortar Sentry which hits targets across long distances.

This is also possible with various Support Weapons like Railgun, Grenade Launcher or Marksman Rifle.

Stalking is illegal

Complete a Stalker Hive tactical objective.

This trophy will most likely unlock naturally while playing. The Stalker Hive objective spawns more frequently on higher difficulty missions. But don’t worry to much it, even if a teammate finds a Stalker Hive and destroys it, every player in the squad will earn the trophy.

Tactical objectives spawn around every map, except on missions where you have to kill a certain amount of enemies. They are marked with a blue icon on the map once near.

Job’s done!

Complete a mission but fail to extract.

Just as the descriptions states, complete any main mission objective and then fail the mission by running out of reinforcements and die. This can quickly be done on Trivial difficulty, complete any mission and keep killing yourself with grenades until the mission fails.

Science is done by quantity

Extract with at least 15 common samples.

This trophy can be earned on any difficulty. You need to extract with 15 common samples total as a team. If you open the mini map, there’s three icons in the upper right corner – green icon for common samples, orange icon for rare samples and a purple icon for super samples.

On higher difficulties you’ll have a larger amount of placed samples around the map, but also at a higher risk. I recommend finding a good team, friends or random, and communicate via voice chat about collection samples. Remember if you or your teammate dies, collect each other samples – they will be marked on the mini map. This is also possible on a low difficulty solo, just take your time and explore the full map.

They mostly come at night…

Extract from a mission during nighttime.

This will unlock early throughout your journey. The trophy will unlock during the first couple of hours of gameplay. There’s no way to force or change the weather or time of day, other than waiting in mission.

Spread Managed Democracy

Kill 150 enemies during the same mission.

Like most other trophies, they will unlock naturally as you enjoy the game. Bug missions will work best for this mission. Utilize Orbital and Eagle Strategems along with a Support Weapon and/or backpack. Play any bug mission except “Eradicate Terminid Swarm,” other missions have an infinite amount of spawning enemies, and even more if you play on the highest difficulties.

Suicide Squad: Kill The Justice League Trophy Guide & Roadmap

Roadmap

  • Estimated trophy difficulty: 4/10
  • Approximate amount of time to platinum: 40-50+ Hours
  • Offline Trophies: (1trophy, 1trophy, 3trophy, 34trophy)
  • Online Trophies: All (can’t play game without internet connection)
  • Hardest Trophies: trophy The Final Frontier.
  • Number of missable trophies: 1 Semi-missable, see trophy History Repeats
  • Glitched trophies: 0
  • Does difficulty affect trophies?: Yes – Mastery Level 20 is required during Endgame
  • Minimum Playthroughs: 1
  • Release Date: January 30th (Deluxe Edition) / February 2nd (Standard Edition) 2024

STEP 1: Complete the Main Story (7-10 Hours)

Enjoy the game and focus on the Main Story Missions. The game consists of 6 Chapters. You can complete the story on easiest difficulty without doing any side missions or farming. The only hurdle to overcome could be the very last missions, but it’s doable as your bot teammates will keep reviving you.

STEP 2: Collect All Collectibles & Complete Support Squad Missions (5-10 Hours)

For this step, tackle all 40 Riddler Trophies, 21 Riddles, 13 AR Challenges and complete all 23 Support Squad Side Missions (except Gizmo’s final mission) as you get around the map. I recommend that you complete the three Hack Support Missions first as her upgrades will let you hold 5 Contacts at a time, instead of 2. This will help you to work towards the 100 Contracts completed quite faster and reduce farming later on.

Completing all Support Squad Missions will give you options to craft legendary gear, Overhaul, Supercharge and Elite various gear. This can be quite helpful during the Endgame when you play around with your build and synergies.

NOTE: DON’T complete the last Gizmo Mission, can be used to farm insane amounts of XP fast – see trophyTrial By Blood for more info.

Collecting all Riddler related activities unlocks cosmetics and A.R.G.U.S. Tapes. Use the following guides for all Riddler Collectibles:

STEP 3: Complete Incursions & Reach Mastery Level 20 (10+ Hours)

Now it’s time to tackle the Incursions. Play on the highest difficulty when you’re in Metropolis to earn as much Promethium as possible. You need to pat 1000 Promethium for each replay of the Incursion Missions. Complete the 3 Incursions on highest difficulty Sweatin’ Bullets to unlock Mastery Level 1. During these Incursions you unlock various Tier 1-3 gear which are needed for three different trophies. You need to equip a complete set for each Tier, each set consists of three pieces, but there are way more available for you to unlock.

Keep replaying missions on highest difficulty and farming Promethium in the city until you reach Mastery Level 20. Replay Mastery Level 20 Incursions and above until you have three pieces of Infamy Tier 3 Gear, then equip them all on the same character.

Remember to equip new Contracts and complete them as you replay Incursions.

STEP 4: Farm Squad Level 50 & 100 Contracts (15+ Hours)

After a hero reach max level 30, they start leveling your overall Squad Level. Play as your favorite hero and replay Incursions on highest difficulty for a lot of XP. You can also replay Story Missions on highest available difficulty if you want to switch it up.

Also, clean-up the last couple of Contracts you may have left. Remember to go to the Contracts menu to equip new ones and cash in the ones you’ve completed.

If you didn’t complete last Gizmo Mission – see trophyTrial By Blood for the best XP cheese method.


Trophy Guide

The Beginning of the End

The Ultimate Squad

Aquire all other trophies to unlock the Platinum

Cleaning Out the Closet

Steal something useful from the Hall of Justice

Story-related trophy – unmissable.

Hitting The Fan

Survive the Batman Experience

Story-related trophy – unmissable.

Fowl Play

Defeat an alternate version

Story-related trophy – unmissable.

Walled In

Escape plan gone wrong

Story-related trophy – unmissable.

Death Blooms

Recruit your second Support Squad member

Story-related trophy – unmissable.

Blitzkrieg Pop

Destroy the Behemoth

Story-related trophy – unmissable.

Thunderstruck!

Kill The Fastest Man Alive

Story-related trophy – unmissable.

Hell and Back

Rescue Lex Luthor

Story-related trophy – unmissable.

Blackest Night

Kill The Green Lantern

Story-related trophy – unmissable.

Endgame

Kill The World’s Greatest Detective

Story-related trophy – unmissable.

The Forest Trespasser

Defeat the otherworldly queen

Story-related trophy – unmissable.

Act of War

Complete your first Incursion Mission

Story-related trophy – unmissable.

No One Defeats Brainiac!

Kill The Collector of Worlds

Story-related trophy – unmissable.

Battle Lines

Complete an Incursion Mission at Mastery level 5

See trophy The Final Frontier.

Killin’ Time

Complete an Incursion Mission at Mastery level 10

See trophy The Final Frontier.

Into the Angry Planet

Complete an Incursion Mission at Mastery level 15

See trophy The Final Frontier.

The Final Frontier

Complete an Incursion Mission at Mastery level 20

Incursion Missions are a big part of the whole Endgame of Suicide Squad. After defeating Braniac for the first time (and completing the main story), you unlock a series of 3 Incursion Missions along with random smaller Missions placed around the map.

Playing an Incursion Mission costs 1000 Promethium to start. You earn Promethium by completing the smaller Missions around the map and other actions. One of the fastest ways to earn Promethium is by defeating Cargonauts, they spawn randomly around the map often hidden or on the side of buildings (they are the smaller cicular enemies with tentacles).

NOTE: Play on highest difficulty to earn more resources, the game is still pretty easy.

Before you can even play Incursions on Mastery level, you need to complete the 3 Incursion Missions on highest difficulty Sweatin’ Bullets.

You unlock the next tier of Mastery Levels by completing the 3 Incursions on highest available Mastery Level. When you reach Mastery Level 5 and 10, a new mission will spawn which you need to complete to unlock the next Mastery Levels in line.

Sometimes the game will unlock the next Mastery Level for you, even though you only completed 2 of 3 Missions on the highest Available Mastery Level. When you don’t unlock the next Level by cycling the smae 2 Missions, replay the 3rd one on the highest Mastery Level.

Keep repeating the process of farming Promethium and replaying the same 3 Incursions on highest available Mastery level. Even though your character isn’t maxed out in terms of level and gear, you can get pretty far. I recommend switching between characters as you reach max level which is 30.

When you reach around Mastery level 12-15, it will start to get a bit though, use your best character to make it a bit easier. Elite your gear at Toyman, Supercharge at Posion Ivy and Overhaul guns at Penguin, or even craft new ones. Leveling a max level character gives skill points to place in a new Squad Level skill tree, this can also give an edge during high level Incursions.

The only point to keep playing after Mastery Level 20 is to unlock even better Infamy sets and gear.

Winged Vengeance

Complete the final Penguin Support Squad Mission

There is a total of 4 Penguin Support Squad Missions in the game.

During Penguin’s Support Missions, you need to defeat Terminauts (small circular enemies with tentacles) as they drop damage boosters. You can only damage the enemies while you’re boosted.

The Support Squad side missions have random spawns around the map. They are always the same in terms of gameplay rules for completing that specific mission type. A quick way to find the next available mission is to open the map, then pressing :triangle:. This will give you a list of missions available and where to find it.

War Machine

Complete the final Gizmo Support Squad Mission

There is a total of 3 Gizmo Support Squad Missions in the game.

Gizmo’s missions are some of the easiest. You only earn charges/points while using vehicles. Hop into any vehicle and destroy the enemies. Vehicles will keep spawning until you complete the mission.

The Support Squad side missions have random spawns around the map. They are always the same in terms of gameplay rules for completing that specific mission type. A quick way to find the next available mission is to open the map, then pressing :triangle:. This will give you a list of missions available and where to find it.

Welcome to the Jungle!

Complete the final Poison Ivy Support Squad Mission

There is a total of 4 Poison Ivy Support Squad Missions in the game.

The Support Squad side missions have random spawns around the map. They are always the same in terms of gameplay rules for completing that specific mission type. A quick way to find the next available mission is to open the map, then pressing :triangle:. This will give you a list of missions available and where to find it.

Managing People

Complete the final Rick Flag Support Squad Mission

There is a total of 2 Rick Flag Support Squad Missions in the game.

During these missions, enemies only take damage from grenades. Smaller enemies will drop grenades when you down them. Keep shooting the them in the legs or use traversal attacks to make them drop. You can also counter shot big enemies to make them drop grenades.

The Support Squad side missions have random spawns around the map. They are always the same in terms of gameplay rules for completing that specific mission type. A quick way to find the next available mission is to open the map, then pressing :triangle:. This will give you a list of missions available and where to find it.

Your World is Mine!

Complete the final Lex Luthor Support Squad Mission

There is a total of 2 Lex Luthor Support Squad Missions in the game.

These missions can require a bit of patience. You can only damage the enemies with counter shots. Helicopters will be a real pain during these two missions. Luckily there’s lots of time and bot teammates will revieve you over and over.

The Support Squad side missions have random spawns around the map. They are always the same in terms of gameplay rules for completing that specific mission type. A quick way to find the next available mission is to open the map, then pressing :triangle:. This will give you a list of missions available and where to find it.

Shock Treatment

Complete the final Hack Support Squad Mission

There is a total of 3 Hack Support Squad Missions in the game.

The Support Squad side missions have random spawns around the map. They are always the same in terms of gameplay rules for completing that specific mission type. A quick way to find the next available mission is to open the map, then pressing :triangle:. This will give you a list of missions available and where to find it.

Combine and Conquer

Complete the final Toyman Support Squad Mission

There is a total of 5 Toyman Support Squad Missions in the game.

You can only damage enemies with critical shots during Toyman’s Support Squad Missions. The best characters to complete these missions are Captain Boomerang or Deadshot because the have the option to equip sniper rifles.

The Support Squad side missions have random spawns around the map. They are always the same in terms of gameplay rules for completing that specific mission type. A quick way to find the next available mission is to open the map, then pressing :triangle:. This will give you a list of missions available and where to find it.

Turn and Turn Again

Achieve 13 Stars in Riddler AR Challenges

See trophy Blaze of Glory.

Their Dark Designs

Achieve 26 Stars in Riddler AR Challenges

See trophy Blaze of Glory.

Blaze of Glory

Achieve 39 Stars in Riddler AR Challenges

There is a total of 13 Riddler AR Challenges in the game. Each Challenge consists of a series of checkpoints you need to pass through as quickly as possible, if you beat the high score you earn 3 stars. You can use any character you want. Each Challenge has a recommended character listed, use the recommended character for each Challenge to make it easier. You need to beat the high score on each Challenge to earn a total of 39 stars.

Challenge becomes available after you encounter The Riddler, unlike Riddler Trophies and Riddles, all of the Challenges are not available from that point. You need to progress the story to unlock new Challenges.

Parallel Universe

Solve 5 of Riddler’s Riddles

See trophy The Real Deal.

The Real Deal

Solve 21 of Riddler’s Riddles

There is a total of 21 Riddles to solve in Suicide Squad: Kill The Justice League. All Collectibles are available for you to collect after you encounter The Riddler for the first time, as part of the main story mode.

There is between 1-3 Riddles per District. When you enter a District you will hear Enigma telling a Riddle and it will pop up at the top of the screen. To solve a Riddle, you need to find the specific item or area the Riddle describes. When you think you have found the area, hold UP on the D-Pad to scan the item. If you want to hear a Riddle again, open your map, hover over the specific District and press L3 – this will cycle through the Riddles for the District.

Stop Me If You’ve Heard This One

Collect 10 Riddler Trophies

See trophy The Oldest One in the Book!

The Oldest One in the Book!

Collect 40 Riddler Trophies

There is a total of 40 Riddler Trophies to find and collect in Suicide Squad: Kill The Justice League. All Collectibles are available for you to collect after you encounter The Riddler for the first time, as part of the main story mode.

The Riddler Trophies are divided across the map like so:

  • 5 x Riddler Trophies in RACINE
  • 7 x Riddler Trophies in MIDTOWN
  • 9 x Riddler Trophies in CENTRAL BUSINESS DISTRICT
  • 5 x Riddler Trophies in CENTENNIAL PAR
  • 3 x Riddler Trophies in SUICIDE SLUMS
  • 6 x Riddler Trophies in WONDERLAND DISTIRCT
  • 6 x Riddler Trophies in BAKERLINE

Open your Map and hover over a specific District to see how many Riddler Trophies, AR Challenges and Riddles that are present in that specific area and how many you have collected.

Level Up

Reach Level 10 with any Squad Member

Reach level 10 with any Sucide Squad member to unlock the trophy. This will come naturally as you enjoy the story mode.

Harleen the Queen

Reach Max Level with Harley Quinn

Reach level 30 with Harley Quinn to unlock the trophy.

See trophyTrial By Blood for the best XP farming method.

King For A Day

Reach Max Level with King Shark

Reach level 30 with King Shark to unlock the trophy.

See trophyTrial By Blood for the best XP farming method.

Captain Boomerang! Agent of Oz

Reach Max Level with Captain Boomerang

Reach level 30 with Captain Boomerang to unlock the trophy.

See trophyTrial By Blood for the best XP farming method.

Lawton’s Last Stand

Reach Max Level with Deadshot

Reach level 30 with Deadshot to unlock the trophy.

See trophyTrial By Blood for the best XP farming method.

The Chosen One

Fully complete the Combat Flair checklist 5 times (Single Player Sessions Only)

The Combat Flair checklist can be seen to the right sight of the screen during mission in Metropolis or during Incursions (Single Player Sessions only).

The checklist consists of 3 objectives. A objective could be hit 20 enemies while sliding, or 10 critical kills, defeat 2 enemies with Suicide Strikes and son on. Completing these checklists will give various buffs during missions.

Trial by Blood

Reach Squad Level 50

You raise your Squad Level by playing as one of your maxed out characters in level 30. Leveling beyond level 30 will add one point to your Squad skill tree. Add 50 points to the various skills in order to reach Squad Level 50. This trophy requires alot farming of farming after you’re done with Incursion Missions and 100 Contracts.

Note that you earn a lot more XP during free-roam in Metropolis if you set the difficulty higher. Here’s how to change it, open the main menu, go to Squad > Difficulty. You will unlock new difficulties as you earn XP during the Endgame, so make sure to check it once in a while, it’s easy to miss the on-screen notification during gameplay.

General tips:

  • Equip gear with +15% XP bonuses for kills or just regular XP (depending on how you farm)
  • Set Difficulty to highest possible, both in Metropolis and while replaying Incursions
  • Join random games, they may have unlocked higher Mastery Levels for even more XP
  • Put all your Squad Level Skill Points into XP boosting skills – each Point will add 0,5% of additional XP for a total of 30%.

Single-Player XP Farming Method (May be patched later)

Leave the final Gizmo mission – DON’T complete it! Set the difficulty to the highest possible difficulty, then start the mission. Keep killing enemies using the vehicles, just never turn in the points. This way, the enemies will respawn infinitely and you will earn insane amounts of XP, this can save you over hours of grinding and replaying missions.

Choices

Get Penguin to overhaul a piece of gear

You unlock Penguin’s overhaul option once you have completed the first of his Support Missions.

Travel to the Hall of Justice to find the Penguin near the entrance. Talk with him and choose the option Overhaul and pick any piece of gear to Overhaul it.

The Support Squad side missions have random spawns around the map. They are always the same in terms of gameplay rules for completing that specific mission type. A quick way to find the next available mission is to open the map, then pressing :triangle:. This will give you a list of missions available and where to find it.

The Venom Connection

Equip 3 pieces of the Tier 1 Infamy Set

You unlock Tier 1 Infamy by completing Incursions (Endgame) on Masterly Level 1-9.

A set consists of three pieces of gear. When you select one of the three available main Incursions (the missions with the option to change difficulty and change Mastery Level), gear awards are shown. Each mission can give two different types of gear. For example, one mission could rewards SMGs and Pistols whereas another could award Shields and Melee gear.

Collect any three tier 1 pieces from different categories and equip them.

All Sorts of Fun

Equip 3 pieces of the Tier 2 Infamy Set

You unlock Tier 2 Infamy by completing Incursions (Endgame) on Masterly Level 10-19.

A set consists of three pieces of gear. When you select one of the three available main Incursions (the missions with the option to change difficulty and change Mastery Level), gear awards are shown. Each mission can give two different types of gear. For example, one mission could rewards SMGs and Pistols whereas another could award Shields and Melee gear.

Collect any three tier 2 pieces from different categories and equip them.

The Reaper

Equip 3 pieces of the Tier 3 Infamy Set

You unlock Tier 3 Infamy by completing Incursions (Endgame) on Masterly Level 20-25.

A set consists of three pieces of gear. When you select one of the three available main Incursions (the missions with the option to change difficulty and change Mastery Level), gear awards are shown. Each mission can give two different types of gear. For example, one mission could rewards SMGs and Pistols whereas another could award Shields and Melee gear.

Collect any three tier 3 pieces from different categories and equip them.

Trial By Fire

What the hell just happened?

Story-related trophy – unmissable.

Choice of Evils

Unlock a Villain Synergy

You unlock a Villain Synergy by equipping different types of Villian gear. That could be Black Mask or Bane gear. When you look at a weapon or gear piece, you can see the villians mentioned with colored text, then you know you got the right piece of equipment.

During each season, new Elseworlds will spawn with different kind of Infamy Sets, during this time of writing, the available Infamy Set is Bane themed. You have a chance of earning Infamy Set gear by playing Incursions on Master Level 1 and above.

A sure way to obtain a Black Mask related piece of gear, complete all of Penguin’s Support Missions, this will unlock the option to create rare pieces of gear. Craft a piece of Black Mask (or Bizarro) themed weapon.

Grand Experiment

Get Toyman to Elite a piece of gear

You unlock Toyman’s Elite option once you have completed all of his 5 Support Missions.

Head over to Toyman at the Hall of Justice, pick the option Elite on any piece of gear.

Forces In Motion

Get Poison Ivy to Supercharge the Affliction on a piece of gear

You unlock Poison Ivy’s Supercharge option once you have completed all of her 4 Support Missions.

Head over to Poison Ivy at the Hall of Justice, pick the option Supercharge any piece of melee weapon or grenade mod.

Allies

Complete 50 Support Squad Contracts

See trophy Need to Know.

Number the Dead

Defeat 10 Raising Hell Hit Squads

Raising Hell Hit Squads appears in the Endgame. When you open your map, you’ll see a red box below your active Contracts with 5 Challenges. Complete all of the Challenges to spawn a Raising Hell Hit Squad. The Hit Squad is easy to defeat like most enemies. The only annoying part is that they can spawn during a mission, if you happen to complete the final Challenge at that time. The enemies can be hard to spot, they are surrounded by a purple aura instead of a red aura. Sometimes you can’t see them through all the chaos, that’s why I recommend that you complete the final Challenge during free-roam. This will make it ten times easier to defeat the specific enemies.

Need to Know

Complete 100 Support Squad Contracts

You unlock Contracts during the main story. Open the menu to find the Contracts tap. Here you got the option to take on small assignments from various Support Squad members. The tasks are quite simple and many only take a minute or two to complete. Examples of Contracts:

  • Kill 10 enemies in Racine
  • Kill 5 Flash-infused enemies
  • Kill 40 enemies with SMGs
  • Perform 10 ground evades
  • Complete 1 Hack vs. Braniac mission
  • Afflict 5 enemies in Bakerline with any affliction
  • Kill 20 Grunt enemies with Shotguns

As you can see they very in simplicity and difficulty. Always complete the simple kill-related Contracts, like killing 10 enemies in a specific distirct or killing a certain number with a specific weapon type. A 100 Contracts can be completign quite fast in the Endgame if it’s your main focus.

History Repeats

Begin the Batman Experience

Near the start of the game, you will encounter the Dark Knight Batman himself. Right after the encounter, interact with the button closest to you to begin the tour. You can replay the mission from the Squad menu if you miss the trophy.

The Last of Us 2 Remastered: No Return DLC Trophy Guide & Roadmap

Roadmap

  • Estimated trophy difficulty: 4/10
  • Approximate amount of time to platinum: 7-10 Hours
  • Total Trophies: (0trophy, 1trophy, 0trophy, 12trophy)
  • Offline Trophies: (11trophy)
  • Online Trophies: 2 (1trophy & 1trophy) May Your Survival Be Long & May Your Death Be Swift (Daily Runs are online-only)
  • Hardest Trophies: trophyMay Your Death Be Swift
  • Number of missable trophies: 0
  • Glitched trophies: 0
  • Does difficulty affect trophies?: Yes, you must complete The Daily Run on Grounded difficulty
  • Minimum Playthroughs/Runs: 12+
  • Release Date: January 19th 2024

STEP 1: Win a Run with each of the 10 Characters (5-7 Hours)

Welcome to The Last of Us Part 2 No Return mode. For this step you’ll complete a full run of 6 encounters each, including a boss fight at the end, for all 10 available characters. You start with Ellie and will unlock a new character each time you play as the next character in line. I recommend that you win a full run with Ellie before you go on to Jesse, then Dina and so on.

You can play on Very Light to make the experience more bearable. It’s also possible to back up your save to the PS Cloud in between encounters. Note that Boss Fights that include infected can insta-kill you if they get to close.

During this step, keep an eye on challenges and try to clear as many of them as possible, while completing a run with each character.

I recommend that you write down which Mods you have played throughout your runs – it will make step 2 a lot shorter. Game Mods are listed during each encounter and you unlock new ones as you play. All 26 Mods needs to be played in order to unlock trophy Modded.

STEP 2. Clean up Challenges via Custom Run (1-3 Hours)

Now is the time to complete remaining challenges AND play with each possible game mod. You might have noticed different buffs and debuffs appearing throughout your runs. There is a total of 26 game mods in the game. Luckily you can go to Custom Run > Mods. Here you can enable or disable what mods you have experienced or not.

One of the challenges you’ll have left at this point will most likely the last of Yara’s challenges. You need to defeat three Seraphite Brutes. During your Custom Runs, disable all other bosses than the Seraphite Elite – this boss encounter include one Brute enemy each time.

STEP 3: Daily Run on Grounded Difficulty (1-2 Hours)

This will by far be the hardest trophy for 100%. You can only try the Daily Run once per day. But luckily there’s a workaround – see trophyMay Your Death Be Swift.

What makes this trophy extra difficult, is that the game decides which character you use on that specific day, along with enemy types, difficult Mods and which boss you fight.

Luckily, you can turn on all combat accessibility options without voiding the trophy. There are a few options that will help you out tremendously. The first option is unlimited invisibility while prone. This is especially useful for Hunted encounters, you can go prone and crawl around until the timer runs out. If you ever get spotted, you have to break line of sight (or defeat the specific enemy that spotted you), and go prone again – you will see and little circular icon indicating when you’re invisible in the lower right corner. Note that aiming your weapon will make you visible to all enemies.

Next essential option is slow motion while aiming. This is pretty self-explanatory. It will be easier to pull off headshot and evade enemies. You can put the option to toggle slow motion, though I personally think that slow motion while aiming is easier to control during hectic situations.

If the daily run proves to difficult, wait until the next day and hope that the encounters and boss fight have become easier than the day before.


Trophy Guide

Mixed Bag

Get kills with 5 different weapons in an Assault encounter in No Return

This can only be earned during an Assault encounter.

In this encounter you play against three waves of enemies. This trophy can be easier the further you get into the run as you unlock more weapons, Weapons includes all firearms, throwables (including trap mines) and melee weapons.

Whenever enemies drop melee weapons, pick it up and defeat at least one enemy with it. Each weapon type counts as a different weapon e.g. axe, machete, baseball bat, hammer, piece of wood, etc).

Become The Hunter

Kill 12 enemies in a Hunted encounter in No Return

This can only be earned during an Hunted encounter.

This is best done on Very Light difficult and during one of the later encounters during a run – enemies will spawn more frequently. Simply unload all stocked up throwables and ammo on enemies – obviously don’t play stealthily.

Got Your Back

Win a round of Holdout without your ally falling below 70% health in No Return

This can only be earned during an Holdout encounter.

Holdout is a encounter where you defend a friendly NPC against wave of enemies. Always stay close to the NPC and guard them. Try to predict where enemies will come from and place trap mines in their paths (they will spawn as pickups during this mode).

To make this trophy a bit easier, play on Very Light on a Custom Run with only Holdout enabled under Mechanics. The very first encounter will have the least amount of enemies.

Burglar

Open the safe in Capture without killing any enemies in No Return

This can only be earned during an Capture encounter.

This is best done in a Custom Run. Go to Mechanics and enable only the Capture mode.

During Capture, you need to sneak past all enemies and open the safe without being spotted or killing anyone. I recommend playing on Very Light difficulty which lowers the enemies awareness and reaction time to your movements.

You need to be patient and wait for enemies to leave the area around the safe. You can also lure the enemies closest to the safe away with a brick or bottle. Sometimes the enemies just won’t move, and then you need to take a chance and quickly open the safe before they spot you.

Start a new Custom Run if you fail. The further you get into a run, the more enemies there’ll be in each encounter.

Roll Call

Win a run with every character in No Return

First, you must unlock all characters. This is done by playing a few encounters with each character to unlock the next one. Here are all characters and how to unlock them:

  1. Ellie (available from the start)
  2. Dina (complete 2 Encounters with Ellie)
  3. Jesse (complete 3 Encounters with Dina)
  4. Tommy (complete 3 Encounters with Jesse)
  5. Joel (complete 4 Encounters with Tommy)
  6. Abby (available from the start)
  7. Lev (complete 2 Encounters with Abby)
  8. Yara (complete 3 Encounters with Lev)
  9. Mel (complete 3 Encounters with Yara)
  10. Manny (complete 4 Encounters with Mel)

Complete a run with each character to unlock the trophy. You can play on Very Light to make the experience more bearable. It’s also possible to back up your save to the PS Cloud in between encounters. Note that Boss Fights that include infected can insta-kill you if they get to close.

Modded

Complete an encounter with each Mod in No Return

Before you can try out each Mod, you need to unlock them first by completing 12 encounters with Mods. This will come naturally as you win a complete run with each character.

All 26 Mods Checklist (sorted alphabetically):

  1. Crafting Gives Bonus Parts
  2. Decreased Enemy Health
  3. Distractions Attract Enemies
  4. Enemies Drop Bombs on Death
  5. Increased Enemy Health
  6. Increased Enemy Speed
  7. Invisible Enemies
  8. Long Guns Locked
  9. Long Shot Damage Bonus
  10. Low Health Damage Bonus
  11. Melee Attacks Set Enemies On Fire
  12. Melee Kills Restore Health
  13. Mirror Mode
  14. Molotov Rain
  15. Mystery Encounter
  16. Photo Mode Filters
  17. Pustule Rain
  18. Reloading Discards Ammo Left
  19. Stealth Kills Boost Movement Speed
  20. Stuns Restore Melee Durability
  21. Temporarily Unlock All Recipes
  22. Thick Fog
  23. Time Limit
  24. Time Slows on Headshots
  25. Tripwire Traps
  26. Vaulting Boosts Movement Speed

Potential Glitch & Fix: Some players are reporting their trophy counter gets stuck at 25/26 despite having done all Mods. A potential fix for this is to complete a mystery encounter (it’s a specific Mod) that also has various other Mods. This can quickly be done in a new Custom Run, activate only the mystery Mod and complete an encounter and it should unlock the trophy.

Risk Taker

Complete five gambits in one run of No Return

Gambits appear in the top left corner during encounters. Gambits can include getting one headshot or just one melee kill during an encounter.

Note that you need to complete five in ONE complete run. Keep an eye on the upper-left corner and complete the gambits rather sooner than later during an encounter.

Good Riddance

Beat all bosses

This will come naturally when you go for a win with every character. Completing a run and defeating the boss at the end, will unlock the next boss in line for the next run, which means that completing six regular runs with whatever characters you want, will give you this trophy at the end.

List of all 6 bosses:

  1. Arcade Bloater
  2. Theater Infestation
  3. Rattler Captain
  4. Garage Bloater
  5. Seraphite Elite
  6. Rat King

Team Ellie

Complete all Ellie faction challenge tracks

Ellie faction challenge tracks includes challenges for Ellie, Dina, Jesse, Tommy and Joel. Below you’ll find each of their challenges and how to complete them.

Note that most challenges can be completed by any character. If the challenge doesn’t say, for example: “as Ellie” – then you can do it with any other character. The challenges save after you leave to main menu or your run ends (even by winning or dying, it doesn’t matter).

Ellie:

  1. Complete 2 encounters with Ellie
  2. Upgrade all Perseverance skills as Ellie – Perseverance is Ellie’s starting skill tree. Press Touchpad > R1 to view the skills. You must buy all 3 skills in her Perseverance skill tree. Play through encounters to get enough Supplements in one run.
  3. Kill 4 enemies with Molotovs in one encounter – go into an encounter with 3 Molotovs. Throw them at enemies, ideally 2 close together and then another 2 single enemies. You can also craft Molotovs during encounters as Ellie, she has this ability from the start. Alternatively, can be done with other characters if you buy the Moltov Crafting Recipes from the weapons locker in safe room.
  4. Collect every gun in one run as Ellie – for this you must buy every gun IN ONE RUN from the safehouse between encounters as Ellie. You don’t need to collect any melee weapons or craftables (no craftable recipes, special ammo, or throwables/explosvies). In total you must get 6 weapons as Ellie: Semi-Auto Pistol, Revolver, Bow, Pump Shotgun, Bolt-Action Rifle, Silenced Submachine Gun.

Dina:

  1. Complete 3 encounters with Dina
  2. Kill 4 enemies with trap mines in one encounter – Dina has the ability to craft Trap Mines unlocked from the start. Go into a match with 3 Trap Mines already crafted. Place them on the floor and attract enemies, you can let them spot you and run in the area behind the mine to make them walk into it. Then craft a 4th Trap Mine during the encounter for the last kill.
  3. Craft 10 times in a run – craft 10 times total during ONE RUN. This includes all craftables (health kits, ammo, throwables etc). Can be done with other characters.
  4. Craft a health kit, Molotov, trap mine, and stun bomb in a run – Dina starts with the crafting recipes for Trap Mine and Stun Bomb. You just need to buy the Molotov Recipe from the weapons locker in the safehouse. Craft one of each with resources you find during encounters. Can be done with other characters too if you buy all 3 recipes from the safehouse.

Jesse:

  1. Complete 3 encounters with Jesse
  2. Purchase 10 items from the Trading Post in one run – buy 10 items from the weapons locker in safehouse IN ONE RUN. Go for the cheapest ones such as crafting recipes, ammo, health kits. Weapons cost the most so don’t buy too many of those. Play the encounters that give the most currency.
  3. Kill 3 enemies with pipe bombs in one encounter – Jesse has the ability to craft pipe bombs from the start. Go into an encounter with 3 pipe bombs already crafted. Throw them directly at enemies to blow them up. You can craft more during the encounter if needed. Can also be done with other characters if you buy the pipe bombs (or recipe) from the weapons locker in safehouse.

Tommy:

  1. Complete 4 encounters with Tommy
  2. Kill 5 enemies in one encounter while zoomed in with a scope – use Tommy’s sniper rifle (starting weapon), aim with L2 and press X to use the scope to zoom in. Do 5 kills total in a single encounter. Can also be done with other characters (for example, Manny’s Hunting Pistol can be upgraded with a scope too)
  3. Complete a run with only your initial gun or guns – don’t buy any weapons from the weapons locker during the whole run. Only use the starting weapon(s). You are allowed to upgrade your weapons. Using throwables/explosives is fine too. You can use bricks, bottles, molotovs, trap mines, pipe bombs, health kits, special ammo. This can be done with any character.
  4. Complete an encounter where every kill is a headshot – easiest method is to start a custom run with only Capture type encounters. The first encounter will only have 3-4 enemies total. Headshot all of them. Just take it slow and get close to the enemies for easier headshots.
  5. Complete an encounter without missing a single shot – easiest method is to start a custom run with only Capture type encounters. The first encounter will only have 3-4 enemies total. Use a 1-hit kill weapon such as Tommy’s sniper rifle, or Manny’s hunting pistol to kill one enemy with each shot. Don’t miss a shot. Can be done with any character.

Joel:

  1. Complete an infected encounter as Joel – can only be done as Joel, must win an encounter with Infected-type enemies (not human enemies)
  2. Kill 6 enemies using the same gun without reloading in an encounter – Joel’s custom starting revolver is good for this, it has plenty of enemies. Try to do headshots only, this way you can do 6 kills before needing to reload.
  3. Kill 3 enemies with shivs in one encounter – Joel starts with the Shiv crafting recipe. Craft 3 shivs before an encounter. Then grab enemies from behind in stealth with :triangle: and use the shiv with :triangle: to stab them. This also works in unarmed melee combat, sometimes when you hit an enemy with your bare hands you get the prompt to grab them and can use the shiv. Can also use shivs when enemies grab you.
  4. Hit 5 enemies with a bottle or brick in one run – during encounters search for bottles/bricks and toss them at enemies with R2. Must do this 5 times total in ONE RUN (not one encounter). Works with any character.
  5. Complete a bloater boss encounter as Joel – start a custom run, under enemies select the boss “Arcade Bloater” (first boss). Alternatively, Garage Bloater also works. Now win a run from start to end and defeat the Bloater boss as Joel. Only works with Joel.

Team Abby

Complete all Abby faction challenge tracks

Abby faction challenge tracks includes challenges for Abby, Lev, Yara, Mel and Manny. Below you’ll find each of their challenges and how to complete them.

Note that most challenges can be completed by any character. If the challenge doesn’t say, for example: “as Ellie” – then you can do it with any other character. The challenges save after you leave to main menu or your run ends (even by winning or dying, it doesn’t matter)

Abby:

  1. Complete 2 encounters with Abby
  2. Gain 50 health from melee kills and attacks in one encounter – Abby starts with the “Brawler” skill tree. Learn the first skill to gain health on melee kills. For this, kill a few enemies in an encounter with melee as Abby.
  3. Upgrade 3 melee weapons in a run – Abby starts with the melee upgrading recipe. Pick up melee weapons from defeated enemies, press touchpad to open the backpack and hold X on the melee upgrade to craft it. Can also be done with other characters if you buy the melee upgrade recipe from the weapons locker.
  4. Complete an encounter with all melee kills – this can be done with any character. It can be easily done during an Hunted Encounter with Infected (make a Custom Run), defeat one enemy with melee while evading the rest.

Lev:

  1. Complete 3 encounters with Lev
  2. Get 7 kills with explosive arrows in one run – As Lev you start with the “Archery” skill tree. Buy the 2nd skill “Craft Explosive Arrows” (touchpad > R1). Now you can craft explosive arrows. Then press :left: > :triangle: to swim between regular and explosive arrows. Get 7 kills total with the explosive arrows. Ideally, get some enemies close together to get multikills. If needed you can craft more arrows. This counts across the entire run, doesn’t need to be in one encounter.
  3. Craft 20 arrows of any type in one run – As Lev you start with the “Archery” skill tree, allowing you to craft arrows from the start. You can craft more per use by buying Lev’s “Craft More Arrows” skill (touchpad > R1). Just collect resources, shoot your arrows, craft new ones, gather more resources and repeat until you crafted 20 total.
  4. Complete an encounter with all bow kills – Use the bow to defeat every enemy in an encounter. Can be done with any character (Lev starts with Bow, other characters must buy it from safehouse).

Yara:

  1. Complete 3 encounters with Yara
  2. Complete a Seraphite encounter as Yara – Must play as Yara for this. On the encounter board in safehouse it shows what enemy type is present in an encounter. Pick one that says “Seraphites”. You can also create a custom run, enable only Seraphites and disable all other enemies.
  3. Defeat 3 Seraphite brutes – For this you must defeat the 5th boss “Seraphite Elite” a total of 3 times. The boss with the hammer always counts as a Seraphite Elite. You don’t need to do this with Yara, it counts with any character. Do this in custom runs, disable all other bosses and only enable the Seraphite Elite. This guarantees you get this boss. For other encounters enable only “Capture” to get through it faster. You can also combine this with winning a run with each character.

Mel:

  1. Complete 4 encounters with Mel
  2. Craft 8 health kits in a run – press touchpad > select Medkit > hold X to craft it. You find plenty of the required resources in encounters, and also in chests. Mel starts with the Healing Upgrade branch, you can buy her ability “Double Health Kits” (touchpad > R1) to craft 2 Health Kits per crafting.
  3. Heal 80 health with one health kit – there are two ways to do this: play as Ellie, from her Perseverance skill tree buy the “Improved Health Kits” to heal +50% per use. An alternate method that works with any character is to play an encounter that unlocks the “Survival” skill book, then buy the “Improved Health Kits” from that. Now let your health get very low to the last red segment. This is very risky because you’d die in one more hit. Ideally do this in encounters against humans, let them shoot you from a safe distance, then hide behind cover when reaching the last health segment. Now use the medkit and it will heal over 80 health total. If you have too much health before using the medkit it won’t restore enough health.

Manny:

  1. Fully upgrade any gun – buy all upgrades for any gun at the safehouse workbench, play encounters to get enough parts (can also sometimes buy parts from the weapons locker)
  2. Kill 5 enemies with incendiary shotgun shells in one run – Manny starts with the “Munitions” skill tree, the third skill is “Craft Incendiary Shells”. You must only buy a shotgun from the weapons locker, then buy this skill (Touchpad > R1). Now craft the incendiary ammo (Touchpad to open backpack and hold X on the incendiary shells). Then switch ammo by pressing :left: > :triangle: on the shotgun.

True Strength

Get an S rank on an encounter

There are multiple factors deciding the rank, Mods, accuracy, kills etc. But his trophy will unlock naturally early into No Return. Nearly every boss fight will end with a S rank without even trying. Just enjoy the game.

May Your Survival Be Long

Win a Daily Run of No Return

See trophyMay Your Death Be Swift.

May Your Death Be Swift

Win a Daily Run of No Return on Grounded difficulty

This will by far be the hardest trophy for 100%. You can only try the Daily Run once per day. But luckily there’s a workaround (See video below). What makes this trophy extra difficult is that the game decides which character you use on that specific day along with enemy types, difficult Mods and which boss you fight.

Luckily, you can turn on all combat accessibility options without voiding the trophy. There are a few options that will help you out tremendously. The first option is unlimited invisibility while prone. This is especially useful for Hunted encounters, you can go prone and crawl around until the timer runs out. If you ever get spotted, you have to break line of sight (or defeat the specific enemy that spotted you), and go prone again – you will see and little circular icon indicating when you’re invisible in the lower right corner. Note that aiming your weapon will make you visible to all enemies.

Next essential option is slow motion while aiming. This is pretty self-explanatory. It will be easier to pull off headshot and evade enemies. You can put the option to toggle slow motion, though I personally think that slow motion while aiming is easier to control during hectic situations.

If the daily run proves to difficult, wait until the next day and hope that the encounters and boss fight have become easier than the day before.

Replay Daily Run workaround:


Prince of Persia The Lost Crown Trophy Guide & Roadmap


Roadmap

  • Estimated trophy difficulty: 4/10
  • Approximate amount of time to platinum: 15-22 Hours
  • Offline Trophies: (1trophy, 5trophy, 14trophy, 11trophy)
  • Online Trophies: 0
  • Hardest Trophies:
  • Number of missable trophies: 0
  • Glitched trophies: 0
  • Does difficulty affect trophies?: No
  • Minimum Playthroughs: 1
  • Release Date: January 15th (Deluxe Edition), January 18th (Standard Edition) 2024

STEP 1: Complete the Story (6-10 Hours)

Enjoy the game and focus on the main story. This will take anywhere from 6 to 10 hours, depending on your skills and accessibility options. I recommend turning on the “Guided Mode” option. This way you’ll have markers on the map showing where you need to go next.

You have the option to continue exploring and collecting Collectibles after completing the main story.

STEP 2: Complete All 9 Side Quests & Find All Required Collectibles (8-10 Hours)

Complete any remaining Side Quests and collect all Collectibles needed for trophies. Note that the 57 Lore Items are not needed for anything and can be ignored.

The following Collectibles are needed for Trophies:

  • 30 Sand Jars –  trophy Written in the Sand
  • 36 Amulets –  trophy Tools of a Prophet
  • 8 Wak-Wak Heads – trophy Tree of Life
  • 24 Soma Tree Petals –  trophy Elixir of Gods
  • 12 Amulet Slots –  trophy Glory of Faravahar
  • 9 Secret Mystery Chests – for Side Quest: The Architect (trophy Charitable Soul)
  • 8 Lost Warriors – for Side Quest: The Lost Warriors (trophy An Honorable Endtrophy A Warrior’s End)

For  trophyCharitable Soul all 9 Side Quests must be completed:

  1. Ancient Power Unearthed (Lower City)
  2. The Deserter (Hyrcanian Forest)
  3. Motherly Love (The Depths)
  4. The Moon Gatherer (Sacred Archives)
  5. Treasures of the Seven Seas (Sunken Harbor)
  6. The Impossible Climb (Upper City)
  7. Prophecy of Mount Qaf (Lower City)
  8. The Lost Warriors (Lower City)
  9. The Architect (Upper City)

STEP 3: Complete Miscellaneous Combat Trophies (1-2 Hours)

Most of the combat trophies will unlock naturally, though some can be a bit tricky or misdirected with their descriptions.

The Miscellaneous Combat Trophies are:

  • trophy Betrayal
  • trophy Shock Trooper
  • trophy Air Dancer
  • trophy Deadly Trap

Thanks for using my guide and congratulations on your new Platinum trophy


Trophy Guide

Prince of Persia

Acquire all Trophies

Aquire all other trophies to unlock the Platinum

The Maneater

Defeat the king of beasts

Story-related trophy – unmissable.

The Forest Trespasser

Defeat the otherworldly queen

Story-related trophy – unmissable.

Snake in the Sand

Defeat the banished god

Story-related trophy – unmissable.

Fists & Arrows

Defeat the artful legend

Story-related trophy – unmissable.

The Storm Master

Defeat the mighty master

Story-related trophy – unmissable.

The White Lion

Defeat the vengeful prince

Story-related trophy – unmissable.

King of Kings

Defeat the king

Story-related trophy – unmissable.

The End of Time

Defeat the god prince

Story-related trophy – unmissable.

A Warrior’s End

Defeat the old general

This trophy is tied to The Lost Warriors side quest. The side quests starts automatically when you pass the dying warrior on your way to next story objective.

You’re tasked with defeating 8 Lost Warriors hidden across the entire map. After defeating all 8 Lost Warriors you get a new objective which is to defeat the old general, marking the end of the side quest.

Time Served

Eliminate the Jailer


During the main story, you’ll get the Clairvoyance Time Power (Sacred Archives area) after a series of time clone puzzles. Head straight up from that location through a long series of wall jumps. You need to activate the Clairvoyance ability to make them appear. Follow the path to reach the Jailer.

Defeat him for the trophy Scholarship Key. The Key opens up other areas of the Secret Archives area and are also needed to reach a Lost Warrior enemy which is required for a Side Quest.

Parallel Universe

Defeat an alternate version

Story-related trophy – unmissable.

Warrior Within

Use every Athra Surge

There is a total of 10 Athra Surges in the game:

  • 4 x Level 1 attacks
  • 3 x Level 2 attacks
  • 3 x Level 3 attacks

You earn 5 of these through normal story progression, the last 5 you need to collect through boss fights and other tasks.

Glory of Faravahar

Fully upgrade the necklace

In order to fully upgrade your necklace, you need to find 9 Amulet Holders. Each Amulet Holder will add a slot to your necklace. There is a total of 9 slots to find (or earn) across the map. Some of the Amulet Holders will unlock as you complete side quests and complete all 9 Secret Chest puzzles.

Blessing of Shamshir

Fully upgrade sword and bow

Upgrading your bow and sword costs Time Crystals and Azure Damascus Ingots. There is a total of 20 Ingots in the game. You need to find (or earn) all 20 in order to afford all weapon upgrades. The highest upgrade for your sword and bow is +4.

There is no way to track which one you’re missing, so be sure to keep track of which you have collected. You could risk going over all 20 locations if you still miss one after completing everything else.

After you have collected all 20 Azure Damascus Ingots, return to Kaheva and upgrade your sword and bow to unlock the trophy.

Tools of a Prophet

Collect all amulets

There is a total of 36 Talismans in the game. Most Talismans are found in Chests, while others are rewarded for defeating bosses, completing Side Quests or purchased from a vendor.

Follow the timestamps on YouTube to find the specific Amulet you’re missing.

Elixir of Gods

Acquire all Soma Tree petals

Soma Tree Petals and Soma Tree Flowers works as the games Health Upgrades. You get 1 bar of health for each 4 Soma Tree Petals you collect. A Soma Tree Flower consists of 4 Soma Tree Petals.

There’s a total of 30 Soma Tree health Collectibles to collect:
– 6 x Soma Tree Flowers (not needed for trophy)
– 24 x Soma Tree Petals

To keep it simple, this guide will treat each Soma Tree Collectible as “1” and include both Petals and Flowers.

Tmestamps can be found on YouTube.

Cyra’s Last Hope

Find the Herbalist’s last camp

In order to reach the Herbalist’s last camp, you need the Fabric of Time. You earn this upgrade after defeating a specific story boss.

Once you have the upgrade, head to the Hyrcanian Forest. To the very east of the area, you’ll find two rings you can grab to reach the other side, here you’ll find the camp along with a Chest that contains a new Costume.

Written in the Sand

Complete the prophecy fresco

You need to find all 30 Sand Jars and return them to the Lower City area, to complete the Prophecy of Mount Qaf side quest and unlock the trophy.

The Spirited-Sand Jars are scattered across the entire map, often well hidden behind fake walls or secret areas. Luckily, you can hover over each area of the map to see how many you have collected in that area.

Timestamps can be found on YouTube.

Tree of Life

Speak with every Wak-Wak head

There is a total of 8 Wak-Wak Heads in the game. The live (or exist) in Wak-Wak Trees which serves as the game’s checkpoints (or Bonfires if you have played soulslike games). Simply interact with the 8 specific Trees in order to unlock the trophy, there’s no need to select the option “talk.”

List of Wak-Wak Heads and the area they are located in:

  • Hyrcanian Forest (Kamil)
  • The Depths (Kalux)
  • Soma Tree (Soma Tree)
  • Sacred Archives (Karim)
  • Raging Sea (Kaname)
  • Pit of Eternal Sands (Kaya)
  • Tower of Silence (Kamya)
  • Upper City (Kazra)

Spectre of the Seas

Discover the ghost ship

Before you can reach the ghost ship, you need the Fabric of Time. You earn this upgrade after defeating a specific story boss.

Head to the very east of the Soma Tree area, here you’ll discover a new map called Hidden Village. Climb to the top of the lighthouse and jump off the edge to end up on the ghost ship.

Hidden Floor

Discover a secret floor

During the main story, you’ll end up in The Depths area. Here you can find “The Scrapper.”

The Scrapper sells Amulets and a Lost Key. You need the Key to access the secret floor in the Citadel elevator. Save up 3 Xerxes coins and buy it from him.

Next time you use the elevator, it will stop at the secret floor. Head right into the new area to unlock the trophy.

The True Moon

Complete the Moon Gatherer’s quest

You find the moon gatherer in the Sacre Archives area. Talk with the man to start the side quest.

You’re tasked to find him in 4 different locations across the game. Start this quest as early as possible, that way you can complete the quest as you play through the main story. Then you don’t need to backtrack to the same areas to many times.

Follow the video for each location.

Charitable Soul

Complete every side quest

There is a total of 9 Side Quests. Game Guide coming soon..

Betrayal

Eliminate an enemy with the Dimensional Claw

You unlock Dimensional Claw after the Kiana, Forest Queen boss fight. The description of the trophy can be a bit misleading.

First you need to capture an enemy with the Dimensional Claw, next you want to release it again to make it fight for you – let this new ally defeat an enemy for you. This seems to work best with flying enemies. The trophy can be earned very quickly from The Haven Soma Tree.

Natural Resources

Collect 5 ores

There is a total of 20 “ores” or Damascus Azure ingots. You need to collect all of them to fully upgrade your swords and bow.

See trophyBlessing of Shamshir.

Shock Trooper

Eliminate 20 enemies with an opportunity attack

You get introduced to opportunity attacks early in the game during the first boss fight. Enemies eyes will sometimes flash yellow, this is an indication for an opportunity attack. Parry the attack to insta-kill the enemy.

You can farm opportunity attacks from any Soma Tree. It can quickly be farmed from The Haven Soma Tree area . Head right into the next area to find a warrior. Eliminate him with an opportunity attack, run back to the Soma Tree to respawn all enemies and repeat 20 times.

An Honorable End

Defeat a Lost Warrior

See trophyA Warrior’s End.

All the Time in the World

Earn 10,000 Time Crystals

Time Crystals are dropped by all enemies, they can also be found as bigger crystals you can destroy around the world. This trophy will unlock naturally during the main story.

Air Dancer

Eliminate 30 enemies in the air

Defeat 30 enemies in the air to unlock the trophy, that means that YOU need to be airborne when you defeat the enemy. Defeating 30 flying enemies won’t unlock the trophy.

This trophy will most likely unlock naturally before you complete the main story.

Deadly Trap

Eliminate 5 enemies by throwing them into spikes

This trophy is a bit misleading. The only way you can actually throw enemies is by using the Dimensional Claw, but in order to unlock the trophy, you need to launch or kick enemies into spikes. The easiest way to unlock the trophy is by launching the enemies into spikes.

The trophy can be farmed in the Hyrcanian Forest by the Soma Tree with a Wak-Wak Head.


BECOME A MEMBER

Join Gamer’s Club and show your support for the channel

the expanse archangel dlc trophy guide

The Expanse: A Telltale Series – Archangel DLC Trophy Guide

Roadmap

  • Estimated trophy difficulty: 1/10
  • Approximate amount of time to platinum: 30-60 Minutes
  • Offline Trophies: (0trophy, 1trophy, 2trophy, 2trophy)
  • Online Trophies: 0
  • Hardest Trophies: No difficult trophies due to the nature of the gameplay
  • Number of missable trophies: 4
  • Glitched trophies: 0
  • Does difficulty affect trophies?: No difficulty options
  • Minimum Playthroughs: 1
  • Release Date: November 1st, 2023

STEP 1: Complete the DLC Episode -+ Missable Trophies

Welcome to a quick and easy journey through the Expanse Archangel DLC Episode.

Almost every misc trophy in the game is tied to sub objectives (blue objectives that show in the upper left corner, often during free roam sections).

The only trophy that can be a bit annoying is trophyMaster Negotiator. You need to pick specific choices during a small section of the DLC, if you miss it – you need to start a new plathrough. Follow the choices in the video guides below for the trophy.


Trophy Guide

Keep Arjun in Check

Play three chess moves against Arjun

See trophyData Master.

Safe Cracker

Open the Secretary-General’s safe

You will get a súb-objective after answering messages and checking the star map the first time – it tasks you to open the safe. The safe key is located on the desk inside a small puzzle box. It´s very hard to miss.

Later in the DLC, a new sub-objective appears regarding opening the safe, use the key to open it. You can pick up the key at any time if you don´t get it at the start of the Episode.

Zen Master

Practice meditation at the Buddha statue

Throughout the Episode, you¨ll come across a bunch of buddha statues. The easiest one to access is in the office area, simply walk up to the statue and choose meditate.

Master Negotiator

Get the votes to oppose Mendez’s motion on the first try

After talking with all politicians, you need to pick the three correct options to get enough votes.

The choices are:

  • Raise Taxes > Against raising
  • Space Ports > For deregulation
  • Water Tower > Against building

Madame Undersecretary

Complete the Archangel story

Story-related trophy – unmissable. The DLC takes around 30-60 minutes to complete.


BECOME A MEMBER

Join Gamer’s Club and show your support for the channel

Telltale’s The Expanse Trophy Guide & Roadmap

Roadmap

  • Estimated trophy difficulty: 1/10
  • Approximate amount of time to platinum: 4-5 Hours
  • Offline Trophies: (1trophy, 4trophy, 14trophy, 12trophy)
  • Online Trophies: 0
  • Hardest Trophies: No difficult trophies due to the nature of the gameplay
  • Number of missable trophies: 22
  • Glitched trophies: 0
  • Does difficulty affect trophies?: No difficulty options
  • Minimum Playthroughs: 1
  • Release Date: –

STEP 1: Complete the Game + Specific Choices + Find All Collectibles

Welcome to a quick and easy journey through the Expanse. You need to follow the 5 video guides listed below, along with the choices listed for each episode.

There is a total of 24 Scavenge Items and 21 Data Logs that you need to find and collect. If you miss just one, then you have to replay from that episode and collect everything again.

Almost every misc trophy in the game is tied to sub objectives (blue objectives that show in the upper left corner, often during free roam sections). Completing these are necessary to earn 100% and keeping all crewmates alive.

STEP 2: Complete DLC for 100%

DLC Episode Archangel Trophy Guide.


Trophy Guide

Bullseye
Collect all Trophies in The Expanse

Telltale’s The Expanse Platinum trophy unlocks after obtaining every other trophy.

Urshanabi Horder

Complete Episode 1 with all Scavenge Items

See trophyData Logger.

Data Logger

Complete Episode 1 with all Data Logs

There are 8 pieces of Salvage and 6 Data Logs to collect in Episode 1.

Misc trophies earned in Episode 1:

Important Choices in Episode 1:

  • Complete all blue extra objectives (associated with the trophy listed above)
  • Near the start of the game, when you first encounter the twins, choose: “Cut this shit out” (May be needed later)
  • When you find Rayen stuck and you need to make an important choice, choose: “Lose the vault”
  • By the end of the episode, when you’re confronting Cox, choose: “Throw him in the brig”

Captain Drummer

Complete Episode 1 of The Expanse

Story-related trophy – unmissable.

Debris Spree

Complete Episode 2 with all Scavenge Items

See trophyData Master.

Data Master

Complete Episode 2 with all Data Logs

There are 8 pieces of Salvage and 5 Data Logs to collect in Episode 1.

Misc trophies earned in Episode 2:

Important Choices in Episode 2:

  • Complete all blue extra objectives (associated with the trophies listed above)
  • By the end of the episode, choose: “Go to Maya’s room” (May be needed later)

Celebrations are in Order

Complete Episode 2 of The Expanse

Story-related trophy – unmissable.

Grave Robber

Complete Episode 3 with all Scavenge Items

See trophyData Recovery.

Data Recovery

Complete Episode 3 with all Data Logs

There are 8 pieces of Salvage and 4 Data Logs to collect in Episode 3.

Misc trophies earned in Episode 3:

  • None

Important Choices in Episode 3:

  • By the very end of the episode, when you’re facing the twins, choose: “Trust him”

Impossible Objects

Complete Episode 3 of The Expanse

Story-related trophy – unmissable.

Data Miner

Complete Episode 4 with all Data Logs

There are 0 pieces of Salvage and 4 Data Logs to collect in Episode 4.

Misc trophies earned in Episode 4:

  • trophy Drone Dodger – Made it past the Drones in the Mines without being caught

Important Choices in Episode 4:

  • When you’re in the prison cell and talking to a female prisoner, choose: “Yeah” (May be needed later)

The Pit and the Pirates

Complete Episode 4 of The Expanse

Story-related trophy – unmissable.

Data Archivist

Complete Episode 5 with all Data Logs

There are 0 pieces of Salvage and 2 Data Logs to collect in Episode 5.

Misc trophies earned in Episode 5:

Important Choices in Episode 5:

  • Near the very start of the episode, choose: “Fight back”
  • When you’re talking to Virgil, choose:
    1. “Stay with him”
    2. “Things are bade. But you’ve been through worse.” >
    3. “You’re afraid your fake identity will be found out” >
    4. “You can go back to being our medic” >
    5. “Not mine to give”
  • Besides the choices listed above, successfully complete all QTE’s to save all crew members. You’re choices from previous episodes will play out now and earn you all the trophies listed above.

Oyedeng, Kopengs

Complete Episode 5 of The Expanse

Story-related trophy – unmissable.

Doctor Approved

Found a Laser Crystal for Virgil

Episode 1: Archer’s Paradox

When you’re in space and get the ability to roam around, you’ll see a blue side objective in the top corner. From where you exit out into the vastness of space, turn around and look up so spot a flashing beacon – here you find the Laser Crystal for Virgil.

Stogie for Fogey

Give Khan a Gift

Episode 1: Archer’s Paradox – Episode 2: Hunting Grounds

This trophy stretches over the first 2 episodes. You find the “gift” near the end of episode one. It counts as a Scavenge Item and are needed for the collectible trophies. When you enter the locked room by using a severed hand, turn right and open the drawer. Next you want to walk onto the ceiling to collect the item.

Next, at the very start of episode 2 – talk to Khan at the bridge and choose to give her the gift.

Drug Gifter

Give the Twins some Medicine

Episode 2: Hunting Grounds

The medicine is very well hidden. Follow the video for the precise location. Later in the episode when you’re back on the ship, find the twins in the kitchen and offer them the medicine.

Spore Taste

Give Virgil the Mushroom Powder

Episode 2: Hunting Grounds

The Mushroom Powder is another Scavenge Item and are needed for all collectibles trophies. The powder is find in the big open area at the start of the episode, you find it inside a cabinet after ascending through a elevator shaft.

Like every other misc trophy, the locations are shown in a video under each episode above – the 100% guides.

When you return to the ship, find Virgil in the kitchen and give him the powder.

Bottoms up!

Give Cox the Bottle of Scotch

Episode 2: Hunting Grounds

When you return to the ship in episode 2, go to Cox’s room and find his bottle of scotch in a cabinet.

Go the hangar bay and find him in the corner in a closed cell. Give him the bottle to unlock the trophy.

Martian Music

Listen to Maya’s Music

Episode 2: Hunting Grounds

On the ship in the hangar bay area, you’ll find Maya. Interact with the Music Player and choose: “Try me” to earn the trophy. If you talk to Maya first and agree to leave then you’ll miss the trophy.

Thorston Mayor

Discover the truth about Virgil’s past

Episode 2: Hunting Grounds

You need to get the decoder Scavenge Item (also shown in 100% video for epsiode) to earn this trophy. When you’re back on the ship, go to Virgil’s room and use the decoder to seach his computer.

Drone Dodger

Made it past the Drones in the Mines without being caught

Episode 4: Impossible Objects

Near the middle of the episode, you will encounter some drones. This encounter is super short and simple. Take your time and evade them all (remember to pick up the collectible close to the exit of the area).

This trophy is shown in the 100% video for episode 4 under trophyData Miner.

Brother’s Reaper

Rayen kills Arlen

This trophy stretches from the very start of the game. Some choices may or may not be needed. Just make sure that the big decisions are made correct, like don’t sacrifice Rayen’s leg in episode 1.

List of choices:

Episode 1: Archer’s Paradox

  • Near the start of the game, when you first encounter the twins, choose: “Cut this shit out” (May be needed for the trophy)
  • When you find Rayen stuck and you need to make an important choice, choose: “Lose the vault”

Episode 2: Hunting Grounds

  • Find the medicine and give it to the twins – see trophy Drug Gifter

Episode 3: First Ones

  • By the very end of the episode, when you’re facing the twins, choose: “Trust him”

Episode 5: Europa’s Folly

  • Near the very start of the episode, choose: “Fight back”

Now you’re all set. When you’re facing Arlen near the end of Episode 5, Rayen will show up and shoot him.

Heal Thy Medic

Help Virgil overcome his panic attack

Episode 5: Europa’s Folly

When you’re talking to Virgil, choose:

  • “Stay with him”
  • “Things are bade. But you’ve been through worse.” >
  • “You’re afraid your fake identity will be found out” >
  • “You can go back to being our medic” >
  • “Not mine to give”

This will ensure his survival for the rest of the game.

Miraculous Maya

Keep Maya alive

This trophy leans a lot on trophy Brother’s Reaper. The choices are the same.

Episode 1: Archer’s Paradox

  • Near the start of the game, when you first encounter the twins, choose: “Cut this shit out” (May be needed for the trophy)
  • When you find Rayen stuck and you need to make an important choice, choose: “Lose the vault”

Episode 2: Hunting Grounds

  • Find the medicine and give it to the twins – see trophy Drug Gifter

Episode 3: First Ones

  • By the very end of the episode, when you’re facing the twins, choose: “Trust him”

Maya will be shot by the end of the episode, and Arlen will tell you later on that she is dead, which is a lie. Simply complete the game and she’ll be alive by the end.

Khan’s Revenge

Keep Khan alive

This is one of easiest cre members to keep alive – just do the requirements for the following trophies:

The trophies are also part of the 100% video guides listed under each episode.

Call it Even

Keep Cox alive

In order to keep Cox alive you need to make specific choices early in the game.

List of choices:

Episode 1: Archer’s Paradox

  • By the very end of the episode, choose: “Throw him in the brig” (or else he will die)

Episode 2: Hunting Grounds

  • Find the bottle of scotch in his quarters, then bring it to Cox in the hangar bay cell (trophy Bottoms up!)

Now simply complete the game, succeed in all QTE’s (just to be sure) and he will be alive.

Bosmang

Complete all Episodes of The Expanse

Story-related trophy – unmissable.

Scavenger Star

Find all the Scavenge Items in the game

There is a total of 24 pieces of Scavenge items in the game. They are spread across the first 3 episodes. The final 2 episodes only contain Data Logs.

See trophyData Logger (Episode 1), trophyData Master (Episode 2) & trophyData Recovery (Episode 3) for all 24 locations.

MISSABLE NOTE: If you miss anything you have to replay from that episode and onward. For example, you miss 1 Salvage Item in epsiode 1, then you need to play through the first 3 episodes collecting everything again,.

Data Collector

Find all Data Logs in all Episodes

There is a total of 21 Data Logs in the game. They are spread across all 5 episodes.

See trophyData Logger (Episode 1), trophyData Master (Episode 2), trophyData Recovery (Episode 3), trophyData Miner (Episode 4) & trophyData Archivist (Episode 5) for all 21 locations.

MISSABLE NOTE: If you miss anything you have to replay from that episode and onward. For example, you miss 1 Data Log in epsiode 1, then you need to play through the entire game collecting everything again.

No Belter Left Behind

Keep All Possible Crewmates Alive

See the choices under each episode 100% guide or the crew mates individual trophies.


BECOME A MEMBER

Join Gamer’s Club and show your support for the channel

Fort Solis Trophy Guide & Roadmap

Roadmap


STEP 1: Complete the Game + Collect all Collectibles + Misc Trophies (2-3 Hours)

Enjoy the game while following the video listed under trophy Terra Tour Guide. There are a few missable Collectibles and misc trophies, all are included in the video guide. If you miss the Collectibles or missable trophies, then you need to start a new playthrough. Luckily, the trophy for Collectibles will unlock as soon as you find the last ones on a new playthough.

If you “miss” anything that’s not listed as missable, then you can press “continue” upon completing the game and be put back right before the final showdown.

STEP 2: 3000 Steps on Mars (0,5-1 Hour)

3000 steps is ALOT, compared to the length of the game and the small amount of time you spend outside. Luckily you can rubberband your controller to walk in circles. Leave your console on and come back once in a while to see if you got the trophy.


Trophy Guide

Fort Solis
Obtain all trophies.

Fort Solis Platinum trophy unlocks after obtaining every other trophy.

The Safety of Disbelief

Survive the Storm

Story-related trophy – unmissable.

Lights Out
Locate the Generator in the Maintenance Unit

Story-related trophy – unmissable.

Everything is Dust
Find compound 26.


During chapter 4 in the Greenhouse, you’ll enter Helen’s office and need to pick up a battery which is needed to progress. There will be a cabinet by the computer which needs a code to be unlocked, inside you will find compound 26. The code is mentioned in a Audio Log – The code is 0721.

Welcome to Fort Solis
Complete the Ridge Climb

Story-related trophy – unmissable.

Dust Dancing
Take 3000 steps on the surface of Mars

This will most likely be your last trophy, especially if you follow the All-In-One video guide listed under trophy Terra Tour Guide.

3000 steps is ALOT, but luckily you can rubberband your controller to walk in circles. Leave your console on and come back once in a while to see if you got the trophy.

NOTE: That all steps have to be OUTSIDE on the actual surface of Mars – not inside Fort Solis.

Skeleton Crew
Locate all crew members.

MISSABLE

BUG WARNING: If the trophy doesn’t unlock, then you need to delete you save and start a new game – it may be patched in the future. It’s unknown what’s causing the bug.It unlocked for me when I found the final crew member.


There is only one missable crew member. You can find him in a container in Chapter 2. It’s located right after you get outside after being stuck in a room.

All the other members are found as part of the story and are needed to progress the main story.

Relic
Grant power to a door.

Story-related trophy – unmissable.

Mi Casa Su Casa
Gain access to Officer Taylor’s room.

In Chapter 3, you’ll find the final crew member and Key Card Access Level 5 as part of the story. Before you head for the Greenhouse, head to the Crew Quarters to enter Taylor’s room.

Once more into the Breach

Gain entry to the Ridge Tunnel.

Story-related trophy – unmissable.

Tragedy Documented
View all Video Logs

BUG WARNING: Some players have reported that this trophy won’t unlock. The reason can possibly be that the Video Logs have been collected without being played – this happens when you access an computer and back out before you play the Video Logs, then they get save to the hand terminal and can be played from there ore the Main Menu.

Everytime you access a computer – play all Video Logs and surveillance videos.

NOTE: You don’t have to watch the full Video Logs, it’s enough to just play them.

See trophy Terra Tour Guide for all Collectibles locations.

A Better Tomorrow
Enter the Greenhouse

Story-related trophy – unmissable.

Cartographer
Visit all locations at Fort Solis.

Story-related trophy – unmissable.

Terra Tour Guide
Collect all audio logs, posters, emails and banners.

MISSABLE

There is a total of 143 Collectibles/Story items to collect for 100% along with 3 missable trophies besides Collectibles. All miscellaneous trophies are included as well.

This video includes ALL Collectibles including Posters, Banners, Flags, Messages; Video Logs, Audio Logs, Documents, Key Cards and ALL missable trophies. Key cards are story-related but I included them as they are needed to open certain doors.

NOTE: Messages, Video Logs/surveillance are mentioned as “Computer” in the video guide. Go through every computer file to unlock all the messages and logs associated with them. It’s Important that you PLAY each Video Log for it to count.

Casuality
Experience the alternate ending.

SPOILER ALERT – SEMI-MISSABLE

A few moments into the final fights, you play Jacob again. After you leave airlock and are outside, you have to use the analog stick and mash X to escape. Don’t press anything in order to fail the QTE (Quick-Time-Event) – this will unlock the premature alternative ending for Fort Solis.

If you want the full ending and get the full ending, you have the option to choose “continue” after completing the game, placing right at the start of the final encounter. This way you can clean-up Collectibles and get a different ending.

Darkest Before the Dawn
Complete Fort Solis.

Story-related trophy – unmissable.

Outpatient
Escape the Medical Bay.

Story-related trophy – unmissable.

Drinking on the Job
Finish the bottle of beer

MISSABLE

This trophy is obtainable in Chapter 1 and 2.

Near the start of the game, after you get out of the airlock and enter the Atrium. Go over the vending machine and keep pressing X to finish the beer.

This trophy is becomes unobtainable after the end of Chapter 2.

Boston Heyday
Take a shot at the pool table.

MISSABLE

This trophy is obtainable in Chapter 1 and 2.

During Chapter 1, you’re heading to the Crew Quarters. You’ll will see a gym area with a stairmaster and other machines – this is where you get trophy Boxing Clever. In the very next room you’ll find a pool table. Press X to interact with it.

This trophy is becomes unobtainable after the end of Chapter 2.

Boxing Clever
Interact with the punch bag.

MISSABLE

This trophy is obtainable in Chapter 1 and 2.

During Chapter 1, you’re heading to the Crew Quarters. You’ll will see a gym area with a stairmaster and other machines. Go to the punching bag and press X to interact.

This trophy is becomes unobtainable after the end of Chapter 2.

Congratulations, you’re an engineer

Gain access to Nick Tout’s broken Multi Tool.

During Chapter 3, you’re outside trying to get access to the Comms Hub. Upon moving the debris and entering the Comms Hub, turn left to find a little puzzle. Complete the puzzle to earn the trophy and unlock a new Video Log.


BECOME A MEMBER

Join Gamer’s Club and show your support for the channel

Twisted Metal 1 [PS4/PS5] Trophy Guide & Roadmap

Roadmap

  • Estimated trophy difficulty: 2/10 (if you play on Easy Difficulty & use Rewind feature)
  • Approximate amount of time to platinum: 2-3 Hours
  • Offline Trophies: (1trophy, 3trophy, 25trophy, 2trophy)
  • Online Trophies: 0
  • Hardest Trophies: No difficult trophies if you utilise “Rewind” – see trophyThank You for the Memories for more.
  • Number of missable trophies: 0
  • Glitched trophies: 0
  • Does difficulty affect trophies?: No, everything can be done on Easiest Difficulty
  • Minimum Playthroughs: 1 full & 11 partial (if you use a code to start at final boss, see trophy Captain’s Lament for more.)
  • Release Date: July 18, 2023 (Free with PS Plus Premium)

STEP 1: Complete the Game + Earn All Misc Trophies

Pick any vehicle you want for your initial playthrough. I recommend that you set the difficulty to easy in the “options” menu after you’ve picked your vehicle. You need to complete all 6 levels and a boss fight. There’s a few misc trophies that you need to be aware of. Besides the level specific trophies listed below, you need to defeat one opponent with collision damage, one with machine guns and one with a special weapon – they will most likely unlock without even trying.

Misc Trophies:

General gameplay tips:

  • Abuse Health Stations – these stations are marked with a white X on the map. If you get low on health, drive around until the refresh.
  • Abuse Rewind – it’s possible to pause the game at any time and rewind the gameplay to earlier in the level. You can rewind to moments just before you took damage or lost a life. This makes the game almost laughable easy.
  • Go for Weapons – new and more powerful Weapons are mandatory for defeating the enemies efficiently. They spawn all around every level and are often hid behind destructibles like crates or vents.

STEP 2: Defeat the Final Boss with the Other 11 Vehicles

This is easier and quicker than it might seem at first. You start at the final boss if you use a password after selecting your vehicle. This will reduce each “playthrough” with more than 30 minutes! It will take you around 5-6 minutes per vehicle using the code method – see trophy Captain’s Lament for more.


Trophy Guide

Twisted Champion
Unlock all trophies in Twisted Metal.

Unlocks after completing every other trophy.

The Beginning of the End
Complete level 1, Arena Duel.

Automatic story-related trophy, cannot be missed.

Not Here to Deliver
Complete level 2, Warehouse District Warfare.

Automatic story-related trophy, cannot be missed.

Highway to Carnage
Complete level 3, Freeway Free for All.

Automatic story-related trophy, cannot be missed.

Water Is for People, Not Cars
Complete level 4, River Park Rumble.

Automatic story-related trophy, cannot be missed.

Watch Out for Pedestrians
Complete level 5, Assault on Cyburbia.

Automatic story-related trophy, cannot be missed.

Watch the Edge Now
Complete level 6, Rooftop Combat.

Automatic story-related trophy, cannot be missed.

Thank You for the Memories
Complete the final round and defeat Minion.

Automatic story-related trophy, cannot be missed.

After completing the final level: Rooftop Combat, you’ll get a screen with the boss named Minion spawning on the same map.

The best strategy for defeating the boss is to destroy the pyramid (see Pyramid Secret), drop down in the new area, destroy all the plants for additional weapon spawn, and most importantly – use the health station (flashing white X on the map).

When you get low on health, leave the area and drive around until the health station refreshes.

Finally, you can pause the game and then scroll back in time to before you lost a life or took damage! This is basically cheating, but will save you a lot of time. This feature was not present in the PS1 version.

Candy Bag
Collect your winning prize as Sweet Tooth.

See trophy Captain’s Lament for more.

Unfortunate New
Collect your winning prize as Yellow Jacket.

See trophy Captain’s Lament for more.

The Demon’s Keeper
Collect your winning prize as Darkside.

See trophy Captain’s Lament for more.

Space Sheriff
Collect your winning prize as Outlaw.

See trophy Captain’s Lament for more.

South Central Hero
Collect your winning prize as Thumper.

See trophy Captain’s Lament for more.

Special Agent
Collect your winning prize as Crimson Fury.

See trophy Captain’s Lament for more.

Sneaky Snake
Collect your winning prize as Pit Viper.

See trophy Captain’s Lament for more.

To Protect and Serve
Collect your winning prize as Warthog.

See trophy Captain’s Lament for more.

The Bell Tolls for Calypso
Collect your winning prize as Mr. Grimm.

See trophy Captain’s Lament for more.

How Does a Ghost Drive?
Collect your winning prize as Spectre.

See trophy Captain’s Lament for more.

New Tire Discount
Collect your winning prize as Hammerhead.

See trophy Captain’s Lament for more.

Captain’s Lament
Collect your winning prize as Road Kill.

There is a super easy and quick method to complete the game and earn the trophy for a specific vehicle. Using the method below, it’ll take you around 5-6 minutes for each vehicle.

Remember that you can pause the game during the final boss to rewind and recover lost health or lifes.

  • CHEAT CODE METHOD:
  • Pick your desired vehicle
  • Go to options > Password
  • Input the code: :triangle:, :x:, :circle:, :square:, :triangle: > Press start to confirm
  • Optional: set difficulty to Easy
  • Begin Battle & defeat the boss and get your trophy
  • Repeat with all other vehicles

Freefalling
Cause either yourself or your opponent to fall off the rooftop in the Rooftop Combat level.

LEVEL 6: ROOFTOP COMBAT

Simply drive over the edge and die. Pause the game and rewind to keep your life – simple.

Pump ’em Full of Lead
Defeat an opponent with the machine gun.

All vehicles have machine guns as their standard weapon. Hold :r2: to fire them at enemies. You might want to bring your opponents health down using other weapons – machine guns don’t damage that much, and they overheat quickly.

If You Can’t Beat Them, Ram Them
Defeat an opponent with collision damage.

Super simple, ram any opponent with low health to defeat them with collision damage.

I Have a Special Power
Defeat an opponent with a special weapon.

Each vehicle has a “special weapon.” Use :l1: to switch weapons, then use :l2: to fire it. Defeat any opponent using the weapon. You can see which weapon you have equipped in the lower right corner.

Resourceful Driver
Collect 5 weapons in any level.

This can be done on any map and will most likely unlock during your first playthrough or during the final boss. Weapon pickups are purple/red looking orbs, they spawn around every map. Some weapons spawn after you destroy a crate or other type of destructible

Can’t Hide from Me
Destroy all Calypso crates in the Arena Duel level.

LEVEL 1: Arena Duel

There are crates located around the 1st map with the text “Calypso.” Destroy all of them to unlock the trophy.

You Shouldn’t Have Parked There
Eliminate a car in the Warehouse District Warfare level.

LEVEL 2: Warehouse District Warfare

This is another simple trophy. There are cars parked all around the map, destroy one of them to unlock the trophy.

You Thought a Barrier Would Stop Me?
Blast through a road work site on the Freeway Free for All level.

LEVEL 3: Freeway for All

You’ll find the road work site near the middle of the map. You can access the area from small tunnels near the center.

Strategic Break
Drive through an alley in the River Park Rumble level.

LEVEL 4: River Park Rumble

The alleys in Level 4 can be quite hard to spot because of the pixels. The alleys are located near the starting spawn. The alleys are narrow and placed so that it leads through a building, instead of inbetween two buildings.

Can I Ban the Van?
Eliminate a van in the Assault on Cyburbia level.

LEVEL 5: Assault on Cyburbia

Another quick and easy trophy. You’ll see vans parked all around the houses and buildings near the center portion of the map. Destroy it in any way you please in order to unlock the trophy.

Pyramid Secret
Destroy the pyramid on the Rooftop Combat level.

LEVEL 6: Rooftop Combat

This is done on the last level. You can shoot and destroy the big pyramid near the center of the map. It’s highly recommended that you destroy it as it reveals a health station and additional weapons.


Star Wars Jedi Survivor Trophy Guide & Roadmap

Star Wars Jedi Survivor Trophy Guide & Roadmap


Roadmap

  • Estimated trophy difficulty: 3/10 (if you play on Story Mode/Easiest Difficulty)
  • Approximate amount of time to platinum: 20-25+ Hours (if you play on Story Mode/Easiest Difficulty)
  • Offline Trophies: (1trophy, 2trophy, 7trophy, 44trophy)
  • Online Trophies: 0
  • Hardest Trophiestrophy Blood, Sweat, and Tears
  • Number of missable trophies: 1 – trophy You’ve Got a Friend
  • Glitched trophies: 0 (with latest update)
  • Does difficulty affect trophies?: No, everything can be done on Easiest Difficulty
  • Minimum Playthroughs: 1
  • PS4/PS5 Crossbuy: No – Not available on PS4
  • Free-Roam / Chapter Select after Story?: Yes – you can continue exploring after completing the main story
  • Release Date: April 28, 2023

STEP 1: COMPLETE THE MAIN STORY, BE ASSISTED BY BODE 10 TIMES AND SCAN ENEMIES [10-15 HOURS]

Enjoy the main story and complete as many side activities as you like. Exploring might save a bit of time later, if you find Priorite Shards, a few cosmetics and talk with some NPCs that are needed for trophyMax Capacity.

Here is a few boiled down pointers to get the missable trophy trophy You’ve Got a Friend and save some time later on.

  • [MISSABLE] Have Bode assist you at least 10 times before the end of Chapter 4! He is only available in Chapter 1 and 4 throughout the game. You can kite enemies until the assist is available again, or respawn enemies from Meditation Spots.
  • Explore as much as you like. Finding Priorite Shards and Chests unlocking a few different Cosmetics.
  • Talk to NPCs on your way through the main story, you pass most Cantina Recruits – see
  • Enjoy the main story and complete as many side activities as you like. Exploring might save a bit of time later, if you find Priorite Shards, complete Jedi Chamber, a few cosmetics and talk with some NPCs that are needed for trophyMax Capacity.
  • Scan all defeated enemies! You need all 77 enemy types logged in your Tactical Guide for trophy Intergalactic Geographic anyways.

STEP 2: FIND ALL JEDI CHAMBERS, RECRUITS, FISH, SEEDS, FORCE TEARS, BOUNTIES, LEGENDARY ADVERSARIES AND COLLECT ALL 100 PRIORITE SHARDS [4-7 HOURS]

Now is the time for the clean-up. With Air Dash and Force Lift/Slam unlocked, you can access and collect items needed to unlock Platinum. Luckily, you don’t need to collect EVRYTHING in the game.

Here’s a complete list of collectibles and tasks needed for trophies:

Your first priority will be to unlock the Treasures Map Upgrade on Planet Jedha. This upgrade shows you where to find all Treasures in the game, sadly it doesn’t differentiate between Shards, Scrolls and Data Discs – You can find a video on how to unlock the upgrade here: trophy Splurgle.

When you go out to complete all the objectives above, you’ll be able to collect all Priorite Shards you come across.

STEP 3: HOLOTACTICS AND MISC TROPHIES [1-2 HOURS]

Congratulations on making it this far. The final step is quite simple – head to the Holotactics table in Pyloon’s Saloon and defeat all opponents. See trophy Gambler for a guide on how to beat them all.


Trophy Guide

The Jedi Survivor
Unlock all Trophies

Unlocks after completing every other trophy.

Rooftop Duel
Defeat an Inquisitor

Automatic story-related trophy, cannot be missed.

For Saw Gerrera
Break free from the grasp of the Empire

Automatic story-related trophy, cannot be missed.

Grab Some Seat
Chat with the owner of the Koboh cantina

Automatic story-related trophy, cannot be missed.

The Past Made Present
Release the Jedi from the bacta tank

Automatic story-related trophy, cannot be missed.

Survivors, We Adapt
Travel together with a Nightsister

Automatic story-related trophy, cannot be missed.

Among the Masters
Meet the Jedi Masters

Automatic story-related trophy, cannot be missed.

For the Path
Protect Pilgrim’s Sanctuary

Automatic story-related trophy, cannot be missed.

Out of Bedlam
Rescue a friend from the Bedlam Raiders

Automatic story-related trophy, cannot be missed.

Tanalorr Bound
Collect the Abyss Compass

Automatic story-related trophy, cannot be missed.

Tragedy
Defend the Archive

Automatic story-related trophy, cannot be missed.

At the Precipice
Survive Nova Garon

Automatic story-related trophy, cannot be missed.

Into the Abyss
Discover the route to Tanalorr

Automatic story-related trophy, cannot be missed.

A Place You Could Call Home
Complete the story

Automatic story-related trophy, cannot be missed.

Han Slowlo
Defeat 50 enemies under the effect of Slow

You activate Force Slow by pressing :l3: and :r3: at the same time. The problem is that enemies start moving normally after you hit them once, so you need to defeat them with the next attack right after a Force Slow has been activated.

There is a way to make it a lot easier, purchase the Extended Hold skill from the Force > Jedi Conecentration skill tree. There are multiple upgrades that will help you earn the trophy faster, but it will most likely come naturally.

So Uncivilized
Defeat 10 enemies with shots using the Point Blank skill

First, you need to unlock the Blaster stance, it’s unlocked through normal story progression. Next you want to purchase the Point Blank skill.

To use it, press :triangle: just before an enemy hits you with a melee attack to blast them away. You know you times it correct when it looks like a wide blast instead of a normal shot. You need to kill 10 enemies with the blast, so either try it on normal Stomtroopers or weaken stronger enemies first.

If you’re having trouble with the timing, lower the difficulty to increase the parry timing window.

You’ve Got A Friend
Direct your companions to assist in combat 10 times each

[MISSABLE]

You have two companions throughout the game – Bode and Merrin. While in combat, press :r3: to lock on an enemy, then hold :r1: and press :square: to direct companions to assist you in combat.

It’s important that you use Bode to assist you 10 times before the end of Chapter 4. If you miss 10 assists with Bode, you can quickly farm the last couple of assists in New Game+. You are assisted by Bode in Chapter 1 and 4.

Merrin will accompany you on Jedha, even after completing the game – specifically in the Arid Flats area (big open desert).

Catch!
Hit 3 enemies with a single roller mine

This trophy can be done at anytime after you have reached the Fogged Expanse area. Resting at the nearby meditation spot resets the enemies if you happen to mess up.

There will be 3 roller mines nearby. Simply kite the out of the building and use the force to throw one of the mines into the other enemies.

They Never Saw It Coming
Strike an unaware enemy 20 times

This trophy will come naturally. You often attack enemies from high ground (hehe). When you’re above or close to enemies that haven’t noticed you – you’ll see a :square: button prompt above their head. Strike 20 enemies with the button prompt to unlock the trophy.

The trophy can be farmed from any Meditation Point if it’s necessary.

This Is Canon
Push an enemy into the Shattered Moon mining cannon

This trophy becomes possible to achieve late in the story. You need to pass through this section near the end of the main story on your second visit to the Shattered Moon.

Use the force to push an enemy into the beam as it fires. If you don’t get the trophy after all enemies are defeated, respawn them by resting at the nearby Meditation Spot.

I’m a Living Legend
Defeat all legendary adversaries

There is a total of 13 Legendary Adversaries to find and defeat. I recommned that you seek them out after completing the main story, a few of them are locked behind obstacles which requires some story-related abilities to pass.

Get Down From There
Attack 20 Lifted enemies

 You unlock force lift as part of the main story. Hold :r1: and press :triangle: to lift enemies. Certain upgrades will make you lift more enemies at a time and have them in the air for a longer duration.

The fastest way to attack 20 lifted enemies is by quipping the blaster stance, simply shoot them as they are lifted.

One With the Force
Avoid 50 attacks using Focus Sight

Focused Sight is an unlockable ability in the Survival tree, which costs 2 skill points (although it takes 3 total to buy it). To use it, hold :circle: when in battle and this will automatically evade incoming attacks. Using Focus Sight will drain your Force Meter.

Mirror Match
A confused enemy defeats an enemy of the same type

To use Confuse on an enemy, hold :r1: and press :circle:. As soon as you unlock the ability near the start of the game, you will be facing two identical enemies. Use confuse on the first enemy and perfect parry the 2nd enemy, this will give the confused enemy a good chance to defeat the 2nd one.  

There are plenty of other opportunities throughout the game if you miss it a the start of the game.

Pinpoint
Execute 10 perfectly timed precision releases

Precision Release is an ability in the Lightsaber > Dual Wield tree, which can be bought for 2 Skill Points after purchasing Focused Parry for 1 Skill Point. In order to perform a perfectly timed Precision Release, you need to press and hold :triangle:, wait for an enemy to attack and release the button just before the attack connects.

A perfectly time precision release is recognisable by a flashing light animation and a flurry of attacks.

Slam Dunk
Slam 5 enemies with a single use of Slam

Before you can attempt this, you need some specific upgrades in the Telekinesis skill tree:

  • Mass Slam (This skill lets you slam multiple enemies)
  • Gravitational Mastery (This skill lets you lift and slam enemies in a larger radius)

There are many locations in the game with enemies close together, one of the best places is on Planet Coruscant. There will be a large group of Stormtroopers close by. Kite them close together before you initiate a slam. I used lift to count the enemies before I slam them.

It’s important that you hold down the buttons to lift and slam multiple enemies!

It’s important that you hold down :r1: and :cross: to charge up a heavier Slam attack to slam multiple enemies!

Riposte
Parry a Force Pull resisting enemy

First you need to find a “force resisting” enemy, such as BX Droids, wielding electrified batons or cleavers. When you’re facing one, press :l2: to try pulling them towards you. They will resist, but their resistance is followed by a sprint attack. When they sprint attack you, get ready to press :l1: to parry their attack. If you hare having trouble timing your parry, lower the game’s difficulty setting to increase the parry time window.

Star Tours
Discover and complete all Jedi Chambers

There is a total of 7 Jedi Chambers in the game. The first chamber will be completed as part of the story, so you only need to seek out the other 6 and complete their puzzles. All Jedi Chambers are found on Planet Koboh.

King of the World
Reach the highest point of Harvest Ridge

There is a series of small puzzles leading up to the highest point of Harvest Ridge. I recommend that you travel to the Fort Kah’lin Meditation Spot (located on top of a hill not far from the Southern Reach Outpost). From this location you can jump to a warehouse which is the final roadblock in order to reach the highest point, that way you don’t have to do the first series of puzzles in a cavern.

When you’re at the warehouse building, run around it to find two Nekkos, mount one of them and take it to the gate of the warehouse.

Next you want to jump inside the building and force pull the cable which opens the game, summon the Nekko to make it enter to the warehouse.

Then you want to mount the nekko, use it to reach a high ledge. Here you’ll find a mechanism that you can attach the cable to.

Go outside and bring the 2nd Nekko inside. Now you can lower the gate by detaching the cable.

Place the 2nd nekko on the newly lowered platform and raise it again by attaching the cable once more.

Use the 2nd nekko to go outside and use it to jump high enough and up to reach a ledge. Finally, climb to the top of the towe r to unlock the trophy.

There Is No Try
Help lift a ship out of the tar pits

When you first land on Koboh, you pass a droid by his ship that seems to be stuck in tar. Return to this location after learning the Force Lift. You can reach the area quickly from the Derelict Dam Meditation Point.

Use :r1: and :triangle: to raise the ship out of the tar and unlock this trophy. Talk to the Pit Droid afterwards to recruit him to the Cantina for :bronze: Max Capacity.

Now, This Isn’t Podracing
Travel 500m of distance while riding creatures

You unlock your first mount, a nekko, on your first visit to Koboh. This trophy will most likely unlock naturally while playing the game.

If you still need it after completing everything else, find some nekkos by the stables right beside Pyloon’s Saloon and run around in circles – you can rubberband your controller.

Cleaning Up
Refresh the Refresher

This trophy takes place in Pyloon’s Saloon on Planet Koboh. Go to the bathroom by the bare and interact with the “refresher” for the trophy and a Priorite Shard.

They’re Probably Fine
Drop your mount into the great unknown

This is easiest to obtain on Planet Jedha. Travel to the Anchorite Base Meditation Spot and mount one of the Spamels. Run the mount to the opposite cliff and dismount it upon reaching the edge.

The trophy can take some time to unlock. Sometimes the trophy unlocks when you fast travel away from the location, can be a bit buggy – may take a few tries for it to unlock.

Skywalker
Keep your feet off the ground and walls for 60 seconds

There are multiple locations in the game where you can stay airborn for 60 seconds. It can be in multiple ways. One method is gliding with a Relter (airborne creature). There is a spot in the Stone Spires region on Planet Koboh that makes it quite easy, simply fly around in circles and hit the updraft winds to stay in the air.

Another sneaky method is hanging from a pipe. The trophy unlocks when you pull yourself up and stand on solid ground. Again, a another method can be used on ziplines, simply keep switching directions for 60 seconds and then land on solid ground.

It’s a Trap
Explore the Phon’Qi Caverns

You need to find and explore PhonQi Caverns and unlock the map upgrade in order to unlock the trophy. The entrance to the Caverns are right beside the location where you first meet Skoova. It’s highly recommend that you complete this area as soon as possible, the trophy unlocks as you complete the area and unlock the Chests Map Upgrade – this way you can see all Chests in the game on your map.

Note that you need the Air Dash skill to get through the caverns..

Max Capacity
Have a packed cantina

You need to find and recruit all Cantina Recruits in the game to have a packed cantina (Pyloon’s Saloon). There is a total of 11 Cantina Recruits in the game. The first two are automatically unlocked through the main story. You have to find the other other 9 by yourself.

Most of the characters are easy to find and you’ll cross them on your way without even trying, a few of them are found in more hidden areas. Unlocking the Cantina Recruits often involves talking with the characters, and on a few occassions you need to defeat some enemies first in order to save the Recruits.

I recommend hunting down the remaining Recruits you might have missed, after completing the main story. You need the upgrade Air Dash to recruit the Jawa for example.

Can You Pet the Bogling?
You can pet the bogling

Boglings can be found all around Planet Koboh. Interact with any Bogling to unlock the trophy. They can often be found beside Pyloon’s Saloon and the stables area.

Caij Match
Gain the attention of a mysterious stranger

Star Wars Jedi: Survivor contains 17 Bounties. Finding and killing all Bounties unlocks the Caij Match trophy. You unlock Bounties automatically from normal story progress, halfway through Chapter 3 when meeting Caij.

I recommend hunting down all Bounties after completing the Main Story. Most of the Bounties spawn after completing the Main Story.

You can pair this trophy with other clean-up related trophies like Force Tears and all Priorite Shards.

The Bounty questline can be broken down into 4 steps:

  1. Defeat the first 14 Bounties
  2. Return and talk to Caij at Pylon’s Saloon, she gives you the location for the next Bounty – seek him out and defeat him
  3. Return and talk to Caij (again), she gives you the location for the next Bounty – seek him out and defeat him
  4. Return to Caij a final time and interact with the datapad on the table to unlock the final Bounty – seek her out and defeat her to unlock the trophy

Who Gives a Puck
Obtain your first bounty

Automatic story-related trophy, cannot be missed.

Perk of the Job
Equip Perks in all slots

There is 7 additonal Perk slots to collect in the game. You start with 3 which adds up to a total of 10 Perk slots. You can only collect the Perk slots when you have the Air Dash skill (unlocks through the main story).

When you have found all 7 Perk slots, rest at a nearby Meditation Spot and go to Perks and equip Perks to fill al 10 slots.

Greezy Money
Trade 25 collected items

This trophy will come naturally. You need to purchase all merchandise from Doma’s Shop using 100 Priorite Shards for trophySplurgle.

Trading Priorite Shards, Jedha Scrolls and Data Discs counts towards the trophy.

Cobra Cal
Train with your weapons while wearing a headband

First you need to buy the headband from Doma’s Shop on Planet Koboh for 7 Priorite Shards (you will collect all 100 for trophySplurgle anyways), then equip it and head to Jedha.

On Planet Jedha, right beside the spaceship, you’ll find a dummy which you can attack. Striking the dummy with the headband equipped unlocks the trophy.

A Presence I’ve Not Felt Since…
Wear an old wardrobe staple

This trophy is a cool reference to the first game – Star Wars Jedi Fallen Order. You need to find the Poncho Cosmetic and equip it for the trophy.

The Poncho can be found at Fort Kah’lin on Planet Koboh. It’s located on top of a hill not far from the Southern Reach Outpost. When you explore the area you will find an area with a lot of drois and a Priorite Shard. Approaching the Shard you’ll fall through a trapdoor and face a Legendary Adversary – The Spawn of Oggdo. Defeat the boss, collect the Priorite Shard and find the Poncho in the nearby chest.

Hey, Luke At Us
Equip a new cosmetic in every Cal slot

You need to equip cosmetics in the following slots – Hair, Jacket, Shirt and Pants (Beard is not required). You unlock new cosmetics by opening chests around the game. You will have way more than one of each cosmetic type as long as you just explore a little bit throughout.

Road House
Dropkick an enemy while wearing a mullet

First you need to find the Mullet hair Cosmetic in the Derelict Dam area on Planet Koboh, then you need to unlock the Crossguard Stance through normal story progression. Equip the Mullet in the “Hair” Cosmetics menu and equip the Crossguard Stance using a Meditation Spot.

Finally, sprint towards any enemy and hold :square: to perform a dropkick.

Kitted Out
Customize BD-1, the blaster, and Cal’s lightsaber with new parts

Before you can earn the trophy, you need to unlock the blaster – it unlocks through natural story progression.

Once unlocked, head over to any workbench and customise any category for BD-1, the blaster and Cal’s lightsaber. No need to fully customise every single category with parts and different colors.

Skoova Diving
Fill the aquarium in the cantina

There is a total of 12 fish in the game you need to collect in order to fill the aquarium. First you need to find and talk to Skoova on Planet Koboh in the Foothills area. He will then join Pyloon’s Saloon and appear in multiple locations across Koboh and Jedha.

You need to find and talk to Skoova on 12 different locations, which will trigger a little scene where he captures a new fish for the acquarium.

Finding the final spawn and talking to Skoova unlocks the trophy.

Growth Spurt
Find space for a full garden

There are multiple steps to achieve the trophy.

  1. Recruit Pili (You pass her on Planet Jedah during the main story)
  2. Talk to Pili at Pyloon’s Saloon
  3. Find all 10 seed TYPES
  4. Plant 1 of each TYPE
  5. Let the plants fully grow

The catch is that all 10 seeds needs to be fully grown, that will unlock the final space on the rooftop garden. Each plant has multiple stages before its full grown – it takes around 40 minutes total. The plants have 3 stages each of growth.

IMPORTANT: If you stay on the area, the plant wont grow to the next stage, travel away and back to make it grow into the next stage. You can check on each plant from the “Gardening” menu.

Remember to talk to Pili once in a while, it’s required to unlock some of the next Gardening spots on the roof. The final spot is unlocked once all 10 plant types are fully grown.

Gambler
Win all holotactics matches

You find the Holotactics table in Pyloon’s Saloon after recruiting Bhima and Tulli. Follow the steps below:

  1. First you need to recruit Bhima and Tulli in the Boiling Bluff area (accessed from the Devastated Settlement area). They are two of the Cantina Recruits required for :bronze: Max Capacity
  2. Next you want to complete the game (if you haven’t already) while scanning all defeated enemies. Scanned enemies become playable pawns for the holotactics matches.You need to scan all enemies for trophy Intergalactic Geographic anyways.
  3. Recruit all Cantina Recruits, you need Skoova and T-1N8 recruited in order to play against them. See :bronze: Max Capacity
  4. NOW, it’s finally time to battle and defeat all opponents. Most battle can be won solely using the Droidekas and a few Stormtroopers or Droids. The Droideka will annihilate most enemies.

Remember that the game is a bit luck-based, so some opponents can take a few tries to beat.

Intergalactic Geographic
Scan every type of enemy to fill out the Tactical Guide

There is a total of 77 different enemies in Star Wars Jedi Survivor. Note that 13 of the scans are from Legendary Adversaries, they are added automatically to the tactical guide when you defeat them.

This video shows you all enemy types and variants. That includes Bosses, Legendary Adversaries, The Galactian Empire, Droids, Haxion Brood, Flora & Fauna.

Reconnaissance
Use BD-1 to investigate a target in the distance

You unlock BD-1’s Visor ability when you first land on Planet Koboh. Find any unaware enemy, press :down: > :r3: > :square: to scan an enemy through the binoculars. If it’s an enemy you’ve already scanned it will say ” :menu: Show Tactical Guide Entry” – Opening the Tactical Guide will unlock the trophy.

Splurgle
Purchase all of Doma’s merchandise

You unlock Doma’s Shop upon reaching Pylon’s Saloon (it will be marked on the map). In order to purchase all of Doma’s merchandise you need to collect 100 Priorite Shards. The catch is that there are exactly 100 Shards to be found the entire game.

You can find Priorite Shards on Planet Koboh and Coruscant.

This map is ESSENTIAL to earn the Splurgle trophy. The map is earned after completing 3 puzzles on Planet Jedha and picking up the map upgrade near the center of the desert. Completing all 3 puzzles will also unlock 3 new perk slots for Cal which are needed for trophy Perk of the Job anyways.

The Jedi Path
Fully upgrade 3 skill trees

This is a quite simple trophy. You will have way more than enough skill points after completing the game. Pick any 3 skill trees and stick with those throughout the game. You can also respec your skill points from the skill points menu on any Medititation Point.

Blood, Sweat, and Tears
Complete all Force Tears

There is a total of 15 Force Tears to find and complete. Force Tears contain different series of combat and platforming challenges. If you’re struggling with the combat Force Tears, change the difficulty to Story Mode.

The platforming ones are a different story – you need to know where to go and learn the patterns of the obstacles.


Switchback VR Trophy Guide & Roadmap

The Dark Pictures Switchback VR Trophy Guide & Roadmap

Switchback VR Trophy Guide & Roadmap, The Dark Pictures Switchback VR Trophy Guide & Roadmap, Switchback Passengers Guide, Switchback VR all gargoyle locations
Switchback VR Trophy Guide & Roadmap

Roadmap

  • Estimated trophy difficulty: 3/10
  • Approximate amount of time to platinum: 7-9 Hours
  • Offline Trophies: 21 (1trophy, 7trophy, 9trophy, 4trophy)
  • Online Trophies: 0
  • Hardest Trophiestrophy God Mode
  • Number of missable trophies: All 3 Passenger trophies along with weapons and the two Credits trophies
  • Glitched trophies: 0
  • Does difficulty affect trophies?: No
  • Minimum Playthroughs: 3 (1 for each Passenger trophy)
  • PS4/PS5 Crossbuy: No – PS5 Exclusive
  • Free-Roam / Chapter Select after Story?: Yes – you can replay all levels.
  • Release Date: March 16, 2023

STEP 1: Complete the game without dying, misc Trophies, save all Passengers & defeat Belial + Credits last message

For your first playthrough I recommend that you save all Passengers, destroy all 12 Gargoyles, get x10 score multiplier and defeat the final boss. In order to unlock one of the credits trophies, you need to defeat the final boss before a timer runs out, shoot 70% words of the credits appearing and not skipping the final credits section.

If you miss any misc trophies, you have two more playhthorughs to unlock them.

How to save all Passengers:

  • Passenger 1

During the end of Level 2 you will enter a room with a machine on each side with 3 tubes each, along with the Passenger hanging in a cage above you. Shoot the switch on the longest pipe first, then the next two after a couple of seconds – you need to time the 3 pipes filling with water at the same time to stop the waterflow. The will light constant green when done correctly. Repeat for both machines.

  • Passenger 2

During the end of level 5 you reach a big open area with a Passenger tied to a cross with fire beneath them. Use the UV Light (the weapon crate will spawn close to the tracks if you don’t have it in hand) to light on the figures with a rope in hand – shoot them while shining a light on them. DON’T shoot the figures holding torches. When you reach the next track, you want to go left. Dont shoot the gate arrow to change tracks before you have saved the Passenger. When you shoot the 2nd figure holding a rope, the Passenger will be freed.

  • Passenger 3

During the end of level 7, you will a second segment which requires you to shoot specifc panels with the Flare Gun to proceed. There will be a Passenger in the middle of the area in a cage hanging above a pit. Use the Flare Gun to destroy the 2 wooden beams to right (destroying these first are crucial), next you want to destroy the beams holding the caage itself – this will save the Passenger and prevent them from dying.

  • Passenger 4

The final Passenger appears at the end of level 9. You enter a big room with rotating sawblades on both sides. A series of pipes will come down for a total of 5 times. In order to save the Passenger, you need to hit the fuse boxes that are connected to the pipes connected on your top right – that will remove a sawblade near the Passenger. Next you need to hit the fuse box that opens the boom gate so you can proceed. Repeat 3 times to save the Passengers.

Trophies earned:


STEP 2: Abandon all Passengers and let Belial defeat you + Credits Belial’s comment

Go through the game again, but this time you want to abandon all Passengers and let the timer run out during the final fight. During the credits you ant to shoot 70% of the credits and don’t skip the last part, in order to unlock the other credits Trophy which is listening to Belial’s final comment.

How to kill all Passengers:

  • Passenger 1

During the end of Level 2 you will enter a room with a machine on each side with 3 tubes each, along with the Passenger hanging in a cage above you. Simply wait until the cage fills with water to kill the Passenger.

  • Passenger 2

During the end of level 5 you reach a big open area with a Passenger tied to a cross with fire beneath them. Use the UV Light (the weapon crate will spawn close to the tracks if you don’t have it in hand) to light on the figures with a torch in hand – shoot them while shining a light on them. This will make them drop the torches and eventually kill the Passenger.

  • Passenger 3

During the end of level 7, you will a second segment which requires you to shoot specifc panels with the Flare Gun to proceed. There will be a Passenger in the middle of the area in a cage hanging above a pit. Use the Flare Gun to destroy the beams holding the cage to kill the Passenger. DON’T shoot the 2 beams to the right.

  • Passenger 4

The final Passenger appears at the end of level 9. You enter a big room with rotating sawblades on both sides. A series of pipes will come down for a total of 5 times. Simply do nothing and wait for the sawblades to kill the Passenger, then proceed normally through the section.

Trophies earned:


STEP 3: Kill all Passengers

Your last trophy will be to kill all Passengers. Play up until Level 9, kill the last Passenger to unlock the trophy and your Platinum. Congratulations! You survived the nightmare.

How to abandon all Passengers:

  • Passenger 1

During the end of Level 2 you will enter a room with a machine on each side with 3 tubes each, along with the Passenger hanging in a cage above you. Quickly shoot the locks in front of you to open the door and end the level – you need to abandon the Passenger before the cage fills with water and kills him.

  • Passenger 2

During the end of level 5 you reach a big open area with a Passenger tied to a cross with fire beneath them. There will be a series of 2 gates that switches the tracks, shoot both gates to go right both times – this way you abandon the Passenger.

  • Passenger 3

During the end of level 7, you will a second segment which requires you to shoot specifc panels with the Flare Gun to proceed. There will be a Passenger in the middle of the area in a cage hanging above a pit. You need to hit all 3 symbols on first rotation to proceed with the level and abandon the Passenger, If you fail to do so, the Passenger will die instead – restart checkpoint and try again.

  • Passenger 4

The final Passenger appears at the end of level 9. You enter a big room with rotating sawblades on both sides. A series of pipes will come down for a total of 5 times. In order to abandon the Passenger, you need to hit the fuse boxes that are connected to the pipes connected on your top right – that will remove a sawblade near the Passenger. Next you need to hit the fuse box that opens the boom gate so you can proceed. Remove to of the sawblades and quickly open the last boom gates to abandon the Passenger. If you’re to slow the final sawblade will kill him instead.

Trophies earned:


Trophy Guide

Final Nightmare
Collect all trophies

Earn all other trophies in The Dark Pictures Switchback VR to unlock the Platinum.

Mayden Voyage Survivor
Finish “Maiden Voyage”

Automatic story-related trophy, cannot be missed.

Into the Ship’s Heart Survivor
Finish ‘Into the Ship’s Heart’

Automatic story-related trophy, cannot be missed.

Abandon All Hope Survivor
Finish ‘Abandon All Hope’

Automatic story-related trophy, cannot be missed.

Burning Trials Survivor
Finish ‘Burning trials’

Automatic story-related trophy, cannot be missed.

Ancient Temple Survivor
Finish ‘Ancient temple’

Automatic story-related trophy, cannot be missed.

Into the Abyss Survivor
Finish ‘Into the Abyss’

Automatic story-related trophy, cannot be missed.

Enjoy your Stay Survivor
Finish ‘Enjoy your Stay’

Automatic story-related trophy, cannot be missed.

Panopticon Survivor
Finish ‘Panopticon’

Automatic story-related trophy, cannot be missed.

Welcome to Inferno Survivor
Finish ‘Welcome to Inferno’

Automatic story-related trophy, cannot be missed.

Frozen Hell Survivor
Finish ‘Frozen Hell’

Automatic story-related trophy, cannot be missed.

The Destroyer of Gargoyles
Destroy a marked gargoyle

See trophy Death to all Gargoyles.

Death to all Gargoyles
Destroy all marked gargoyles

There is a total of 12 marked gargoyles to destroy in Switchback VR. There’s one located in each of the 10 levels and two located in the credits. Shoot the gargoyles once to destroy them.

The gargoyles carry over between all playthroughs and replays, so don’t worry if you miss one during your first playthrough.

The Collector
Pick up all the weapons at least once

There is a total of 10 weapons to collect in the game.

Weapons:

  • Uzi
  • Grenade Launcher
  • Magnum
  • UV Light
  • Machine Gun
  • Flare Gun
  • Upgraded Pistol
  • Shotgun
  • Stun Gun
  • Belial’s Gun

The Grenade Launcher from Level 2 can be missed if you don’t pay attention. If you don’t have the trophy by the end of the game, check Level 2 first for the Grenade Launcher. All other weapons will most likely come naturally, they are quite hard to miss.

Gunslinger
Reach multiplier 10

You increase your score multiplier by hitting objects with a yellow marker on them. Destroying normal object and killing enemies prevents the multiplier from going down.

I recommend that you attempt this trophy on Level 7, 8 or 9. Each level has A LOT of destructibles. Level 7 is by far the easiest and can be done in about 5 minutes.

The Saviour
Save all the trapped passengers

There’s a total of 4 Passengers in the game. They are located in Level 2, 5, 7 and 9. No matter if ypu want to save, kill or abandon all Passengers, if you fail to achieve the desired outcome, quickly pause the game and restart last checkpoint.

How to save all Passengers:

  • Passenger 1

During the end of Level 2 you will enter a room with a machine on each side with 3 tubes each, along with the Passenger hanging in a cage above you. Shoot the switch on the longest pipe first, then the next two after a couple of seconds – you need to time the 3 pipes filling with water at the same time to stop the waterflow. The will light constant green when done correctly. Repeat for both machines.

  • Passenger 2

During the end of level 5 you reach a big open area with a Passenger tied to a cross with fire beneath them. Use the UV Light (the weapon crate will spawn close to the tracks if you don’t have it in hand) to light on the figures with a rope in hand – shoot them while shining a light on them. DON’T shoot the figures holding torches. When you reach the next track, you want to go left. Dont shoot the gate arrow to change tracks before you have saved the Passenger. When you shoot the 2nd figure holding a rope, the Passenger will be freed.

  • Passenger 3

During the end of level 7, you will a second segment which requires you to shoot specifc panels with the Flare Gun to proceed. There will be a Passenger in the middle of the area in a cage hanging above a pit. Use the Flare Gun to destroy the 2 wooden beams to right (destroying these first are crucial), next you want to destroy the beams holding the caage itself – this will save the Passenger and prevent them from dying.

  • Passenger 4

The final Passenger appears at the end of level 9. You enter a big room with rotating sawblades on both sides. A series of pipes will come down for a total of 5 times. In order to save the Passenger, you need to hit the fuse boxes that are connected to the pipes connected on your top right – that will remove a sawblade near the Passenger. Next you need to hit the fuse box that opens the boom gate so you can proceed. Repeat 3 times to save the Passenger. The series of pipes get more and more complex, but just take your time and make sure to hit the correct ones.

The trophy unlocks after surviving and leaving the area.

The Monster
Kill all the passengers

There’s a total of 4 Passengers in the game. They are located in Level 2, 5, 7 and 9. No matter if ypu want to save, kill or abandon all Passengers, if you fail to achieve the desired outcome, quickly pause the game and restart last checkpoint.

How to kill all Passengers:

  • Passenger 1

During the end of Level 2 you will enter a room with a machine on each side with 3 tubes each, along with the Passenger hanging in a cage above you. Simply wait until the cage fills with water to kill the Passenger.

  • Passenger 2

During the end of level 5 you reach a big open area with a Passenger tied to a cross with fire beneath them. Use the UV Light (the weapon crate will spawn close to the tracks if you don’t have it in hand) to light on the figures with a torch in hand – shoot them while shining a light on them. This will make them drop the torches and eventually kill the Passenger.

  • Passenger 3

During the end of level 7, you will a second segment which requires you to shoot specifc panels with the Flare Gun to proceed. There will be a Passenger in the middle of the area in a cage hanging above a pit. Use the Flare Gun to destroy the beams holding the cage to kill the Passenger. DON’T shoot the 2 beams to the right.

  • Passenger 4

The final Passenger appears at the end of level 9. You enter a big room with rotating sawblades on both sides. A series of pipes will come down for a total of 5 times. Simply do nothing and wait for the sawblades to kill the Passenger, then proceed normally through the section.

The trophy unlocks after surviving and leaving the area.

The Uncaring
Abandon all the passengers

There’s a total of 4 Passengers in the game. They are located in Level 2, 5, 7 and 9. No matter if ypu want to save, kill or abandon all Passengers, if you fail to achieve the desired outcome, quickly pause the game and restart last checkpoint.

How to abandon all Passengers:

  • Passenger 1

During the end of Level 2 you will enter a room with a machine on each side with 3 tubes each, along with the Passenger hanging in a cage above you. Quickly shoot the locks in front of you to open the door and end the level – you need to abandon the Passenger before the cage fills with water and kills him.

  • Passenger 2

During the end of level 5 you reach a big open area with a Passenger tied to a cross with fire beneath them. There will be a series of 2 gates that switches the tracks, shoot both gates to go right both times – this way you abandon the Passenger.

  • Passenger 3

During the end of level 7, you will a second segment which requires you to shoot specifc panels with the Flare Gun to proceed. There will be a Passenger in the middle of the area in a cage hanging above a pit. You need to hit all 3 symbols on first rotation to proceed with the level and abandon the Passenger, If you fail to do so, the Passenger will die instead – restart checkpoint and try again.

  • Passenger 4

The final Passenger appears at the end of level 9. You enter a big room with rotating sawblades on both sides. A series of pipes will come down for a total of 5 times. In order to abandon the Passenger, you need to hit the fuse boxes that are connected to the pipes connected on your top right – that will remove a sawblade near the Passenger. Next you need to hit the fuse box that opens the boom gate so you can proceed. Remove to of the sawblades and quickly open the last boom gates to abandon the Passenger. If you’re to slow the final sawblade will kill him instead.

The trophy unlocks after surviving and leaving the area.

God Mode
Finish the game without getting killed

I recommend that you play on “Story Mode” difficulty to make it a bit easier on yourself. Whenever you think you’re about to die, quit the game and continue. You can also backup your save by uploading it to the PS Cloud to make sure. Remember that you also have 3 full playthroughs to attempt this.

There are only a few sections where you can die quite easily, the game is quite easy by default.

  • Level 5 – near the Passenger in Level 5, there’s an enemy following you – quickly proceed through the area to avoid being killed by him.
  • Level 9 – there will be a bunch of traps which will instantly kill you if you hit the wrong fuse box. I highly recommend that you make a backup of your save before playing this level.
  • Level 10 – during the final showdown, there’ll be a counter going down – if it reaches 00:00 you will die. Backup your save before this section, especially if you only have 2 minutes (all passengers were abandoned/killed).

A Moment of Hope
Unlock the last message after the credits

During Level 10 you fight Belial a couple of times. During the final showdown you’ll have 2 minutes to defeat her + 15 seconds for each Passenger you might have saved – that means you’ll have between 2 and 3 minutes to defear her.

You need to defeat her before the time runs out to unlock the last message after the credits, also shoot at least 70% of the credits. DON’T skip the credts after the shooting sequence of the credits – it’s okay to speed up the credits, just don’t shoot “skip.” After the final set of the credits the last message will play and unlock the trophy.

Eternal Damnation
Unlock the last comment from Belial after the credits

During Level 10 you fight Belial a couple of times. During the final showdown you’ll have 2 minutes to defeat her + 15 seconds for each Passenger you might have saved – that means you’ll have between 2 and 3 minutes to defear her.

You need to let the time run out to unlock her last comment after the credits, also shoot at least 70% of the credits. DON’T skip the credits after the shooting sequence of the credits – it’s okay to speed up the credits, just don’t shoot “skip.” After the final set of the credits the last comment will play and unlock the trophy.