Number of missable trophies: 0 (Nothing is really missable, you can revisit all areas)
Glitched trophies: 0
Does difficulty affect trophies?: No
Minimum Playthroughs: 1 + Replay a single mission
PS4/PS5 Crossbuy: No – PS5 Exclusive
Free-Roam / Chapter Select after Story?: Yes – you can replay Tales and revisit areas after completing the main story.
Release Date: February 22, 2023
STEP 1: Complete the Main Story, Collect all Journal Entries, Droids and some Secondary Tasks
First you want to complete the whole game including the 4 Tales. You need to complete a Secondary Task to unlock the 1st Tale, which also lead the 2nd Tale. Everything is included in the following guide:
Follow the video for each area to unlock all the Journal Entries along with the Tasks that unlock trophies or take you further in the story. Note that most 149 Journal Entries are unlocked automatically by playing the game.
The Collectibles Drois are tied to 2 Journal Entries, but they are included in the guide above because they give you a lot of extra Credits. You need a bunch of Credits to unlock all Upgrades which are tied to the “Gear” Journal Entries.
Besides the Collectibles mentioned above, you want to keep an eye on the three trophies listed below. This way you won’t need to replay the Tales after completing them.
The final thing you want to keep an eye on are the Blaster Challenges. Vary your weapon of choice throughout the game to avoid as much Kill Farming as possbile during Step 2 of the Roadmap.
Now is the time for the “hardest” trophy in the game – Beating a score of 4950 in Repulsor Darts. See for an easy method on how to cheese a Bullseye each shot.
Your final Journal Entries will be tied to Gear (if you followed the 100% guide here). If you still need Credits, complete the Blaster Challenges first as the yield a lot of Credits which will be more than enough for the last items.
A Tale Worth Telling Earn all trophies in Star Wars: Tales from the Galaxy’s Edge.
Earn all other trophies in Star Wars: Tales from the Galaxy’s Edge [Enhanced Edition] to unlock the Platinum.
Get to the Blaster! Find the hidden blaster in the storage room.
Automatic story-related trophy, cannot be missed. Unlocked during the Prologue.
Abandon Ship The ship is going down! Find the escape pod for a hasty exit!
Automatic story-related trophy, cannot be missed. Unlocked upon completing the Prologue.
Showdown at Hissiq Springs Eliminate the pirates and find Threepio.
Automatic story-related trophy, cannot be missed. Unlocked upon completing the Hissiq Springs area.
Save Artoo! Navigate Dead Root Refuge, find the entrance to Splintered Spire, and help C-3PO rescue R2-D2.
Automatic story-related trophy, cannot be missed. Unlocked upon defeating the boss ans saving R2-D2 in the Splintered Spire area.
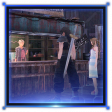
Return to the Cantina You successfuly scanned the cypher. Meet Dok at the Cantina.
Automatic story-related trophy, cannot be missed. Unlocked upon completing the Cavern of the Moons area.
Enemy of the Baron Attsmun droids are flooding the area. Escape the caverns!
Automatic story-related trophy, cannot be missed. Unlocked in Cavern of the Moons area.
Artifact Extraction Escape with the artifact and bring it to Dok-Ondar at the Cantina.
Automatic story-related trophy, cannot be missed. Unlocked upon completing the the Lost Jedi Ruins area.
Get to the Katooni Your friends are coming to pick you up. Get to the ship!
Automatic story-related trophy, cannot be missed. Unlocked near the end of Tale 4: Fury of the First Order
Last Call Bask in the glory of a hard fought victory.
Automatic story-related trophy, cannot be missed. Unlocked in Tale 4: Fury of the First Order.
Temple of Darkness Cleanse the Jedi temple.
Automatic story-related trophy, cannot be missed. Unlocked upon completing Tale 1: Temple of Darkness.
The Bounty of Boggs Triff. Complete the Bounty of Boggs Triff.
Automatic story-related trophy, cannot be missed. Unlocked upon completing Tale 3: The Bounty of Boggs Triff.
The Sacred Garden Instruct your new Padawan in the ways of the Force.
Automatic story-related trophy, cannot be missed. Unlocked upon completing Tale 2: The Sacred Garden.
Pieces of the Pilot Locate J-4X’s missing parts and repair him.
After saving R2-D2, you return to the Mubo’s Workshop – this unlocks the extra mission “Headache.”
Travel to Hissiq Springs to find the head of J-4X, return to the Workshop and place the head on the body, zap it with the All-Kit Tool to power him up and unlock the next mission – Pieces of the Pilot.
Follow the video for the locations of the 4 missing limbs. Return them to the Workshop and zap all the joints to complete the mission and unlock the trophy.
Note that you can’t find J-4X’s arms and legs, before you have returned the head and unlocked the “Pieces of the Pilot” mission.
Dok Delivery Deliver a personal artifact you discovered to Dok-Ondor.
This trophy is tied to a single Journal Entry. You need to pick up an item in Cavern of the Moons and bring back to the Cantina. It’s a part of the following guide –
This trophy is obtainable in the 1st Tale: Temple of Darkness. Unlock the Tale by completing “Seezelsak’s Snacks.”
You need to complete the Challenge “Darkness In Us All” by defeating 25 enemies with melee attacks, 25 with lightsaber throws and 25 using the force. Near the end of the Tale, you need to place your lightsaber but ignore that option and keep defeating enemies. This will eventually fail the Tale, but when the game puts you back at the start of the fight, you’ll still have all your Challenge progress.
Pause the game to see how many kills you got with the lightsaber and force abilities.
Follow the 100% Guide for Batuu Wilds for a visual aid on where to find the ingredients for “Seezelsak’s Snacks.”
Target Practice Eliminate 100 Henchmen in the Bounty of Boggs Triff.
Automatic story-related trophy, cannot be missed. This trophy is earned in Tale 3: The Bounty of Boggs Triff. You unlock this Tale near the end of the game – Seezelsak will place a “Bar Tap” on the bar counter. Scan it to unlock a Journal Entry and the Tale.
There is way more than 100 henchmen present during this Tale, so don’t worry about it.
Investigation Mode Scan all the items of interest in the Bounty of Boggs Triff.
There is a total of 40 items to scan during Tale 3: The Bounty of Boggs Triff. Beware that you need to replay the whole Tale if you miss a scan – some of them are quite tricky to locate because you need to defeat all enemies and backtrack in some instances.
Stay on Target Achieve a score above 4950 in Repulsor Darts.
This video will show you the best method to beating the high score in Repulsor Darts. Luckily there is a cheesing method to complete it easier than doing it legit.
Stand close to the dart board
Aim for the blue spinning target with your left hand
Hold your right hand behind you ready to teleport back into the circle (or else the points wont count)
Release the dart at the same time that you teleport.
Repeat
You need hit the blue target (or bullseye) at least once to get another 3 darts. You need at least 100 points to keep getting more darts after each round of 3 shots.
The blue target is worth a total of 200 points and the Bullseye is worth 100.
Push Through Complete all training challenges in the Sacred Garden.
You can obtain this trophy during the 2nd Tale: The Sacred Garden. Complete 6 Challenges at each of the 3 sites (for a total of 18 Challenges) to unlock the trophy. Make sure that you complete all Challenges before you put your lightsaber at the pedistal at the center of the area.
You can replay this Tale from the Pause Menu like every other.
Gunslinger Complete all blaster challenges.
Follow this video for the best locations to find the different weapons and where to farm kills. It can be a bit annoying to locate the different weapons after game completion – you just need where to look.
If you used a lot of different weapons throughout the game and keept an eye on the Challenges, this can be done in about 1-2 hours.
No matter how you’ve played the game, you need to farm 100 kills with two different First Order weapons. They were only present during Tale 4: Fury of the First Order. Luckily they spawn in the Cantina after completing the game. Pick up the F-110 machine gun and F-11ABA shotgun and store them. Travel back and forth to make the weapons respawn. You can store up to 4 weapons if you have purchased the Shoulder Holsters in Mubo’s Workshop.
Another annoying point these Challenges can be the pistols – they run out of shots pretty quick. Buy the Charging Holsters in Mubo’s Workshop to charge the Pistols when they are holstered on your hip (only work with pistols). Then you only need to find them once each.
Farm all kills in Hissiq Springs – there are a lot of Acid-Spitter spawn throughout.
The Bullseye Challenge are probably not needed for the trophy, but it’s included in the video guide.
https://www.ben-gun.com/wp-content/uploads/2023/03/333049829_225223593409916_5691499071965816469_n.jpg7201280Ben-Gunhttps://www.ben-gun.com/wp-content/uploads/2022/12/cropped-Bengun-logo-new-300x257.pngBen-Gun2023-03-12 19:44:142023-03-13 19:19:37Star Wars: Tales from the Galaxy’s Edge [Enhanced Edition] Trophy Guide & Roadmap
Welcome to my Horizon Call of the Mountain Trophy Guide & Roadmap and the wonderful world of PSVR 2.
This game will without a doubt, shock and awe you in every way. Prepare for the world’s best VR climbing simulator and neck workout. This might be a quick and mostly pain-free Platinum, but I highly recommend that you keep your play sessions between 30 to 60 minutes. You look up most of the time and reach out for different cliffs and handholds 70% of the time, which can really sprain your neck during longer sessions.
Play with care and your health in mind.
Horizon Call of the Mountain is a action-adventure video game developed by Guerrilla Games and Firesprite. As a spin-off of the Horizon series, the game was released by publisher Sony Interactive Entertainment in February 2023 as a launch title for the PlayStation VR2 virtual reality headset.
The game is played from a first-person perspective. Described as “a master at climbing and archery”, Ryas, the game’s protagonist, is equipped with a hunter bow which can be used to defeat various robotic creatures in the game. While the game is largely linear, there are multiple paths for players to explore and approach their objectives. As the player progresses in the game, they will unlock additional tools and gears, allowing players to be more efficient in both exploration and combat. In addition to the main story, the game also features a scenic mode named “River Ride”, a guided tour of the game’s landscape.
The game’s story follows Ryas, a former Shadow Carja rebel who is sentenced to atone for his crimes by joining an expedition sent to investigate a new threat to the Sundom. During his journey, Ryas will meet numerous new and returning characters, including franchise protagonist Aloy.
Number of missable trophies: 19 (You will get most trophies naturally, just follow the roadmap for specifics)
Glitched trophies: 0
Does difficulty affect trophies?: No
Minimum Playthroughs: 1 + Replay a single mission
PS4/PS5 Crossbuy: No – PS5 Exclusive
Free-Roam / Chapter Select after Story?: Yes – you can replay missions after completing the main story.
Release Date: February 22, 2023
STEP 1: Complete the Main Story, Collect most Collectibles & Earn All Missable Trophies (6-8 Hours)
Complete all 12 missions in the game while following the 100% Collectible Guide + make sure that you get the mission specific trophies listed below. Most of the missable trophies involves Collectibles, Gear or completing a certain action. Most of the missable trophies can be completed later during replay if neccessary, and it will only take a couple of minutes because of the missions length.
Besides the listed trophies, play the game and enjoy it, most trophies will come naturally – for example damaging a machine with a Blaze Barrel or Ballista, crafting an Elemental Arrow, etc.
The only reason that you collect most Colelctibles and not all are because of Mission 2: Pilgrim’s Trail. Near the beginning of the mission there’s a split path – both of those paths lead to different Collectibles. During step 2 of the Roadmap, you need to replay the mission to pick the opposite path and collect the last Collectibles.
STEP 2: Replay Pilgrim’s Trail for Collectibles and Complete the two Challenges + Machine Safari
You should only need 2 Collectibles (Lore) and 5 Warning Beacons by now. The 5 Beacons and 1 Collectible (Lore) are located down the right path in Mission 2: Pilgrim’s Trail, and the last Collectible (Lore) is located in Dawn’s Grasp (Hub area).
After your replay, go to the Challenge Hub in Dawn’s Grasp, collect the last piece of Lore and beat the highscore on both the Archery Range and Assault Course.
Finally, go on a Machine Safari for yout last trophy (can be accessed from the Collectible Room in Dawn¨s Grasp or from the main menu).
Answered the Call Earned all Trophies in Horizon Call of the Mountain
Earn all other trophies in Horizon Call of the Mountain to unlock the Platinum.
Defeated a Thunderjaw Defeated the Thunderjaw at the top of Talonreach
Automatic story-related trophy, cannot be missed.
Unlocked in Mission 5: Talonreach Ascent.
Defeated a Stormbird Defeated the Stormbird at the top of Devil’s Anger
Automatic story-related trophy, cannot be missed.
Unlocked in Mission 9: Devil’s Anger Ascent.
Defeated a Fireclaw Defeated the Fireclaw in Day’s End
Automatic story-related trophy, cannot be missed.
Unlocked in Mission 12: Day’s End.
Defeated a Bellowback Defeated a Bellowback
Automatic story-related trophy, cannot be missed.
Unlocked in Mission 6: Mother’s Tears.
Defeated a Shellwalker Defeated a Shellwalker
Automatic story-related trophy, cannot be missed.
Unlocked in Mission 7: Elder’s Calling.
Defeated a Scrapper Pack Defeated a Scrapper Pack
Automatic story-related trophy, cannot be missed.
Unlocked in Mission 3: Upper Slopes of Brightdawn.
Defeated a Glinthawk Flight Defeated a Glinthawk Flight
Automatic story-related trophy, cannot be missed.
Unlocked in Mission 2: Pilgrim’s Trail at the earliest.
Defeated a Grazer Defeated a Grazer
Right after you get your bow in Brightdawn (1st mission), look down to your right to locate some Grazers. Defeat one of them to unlock the trophy. You can restart the last checkpoint if you miss your shots and they get away.
A Rock to the Head Climbed Brightdawn to the view of Dawn’s Grasp
Automatic story-related trophy, cannot be missed.
Unlocked by completing Mission 1: Brightdawn.
The Sunspear Completed the Pilgrims’ Trail to the top of the Sunspear
Automatic story-related trophy, cannot be missed.
Unlocked by completing Mission 4: The Sunspear.
A New Threat Discovered the Powerful Machine Lure at the top of Talonreach
Automatic story-related trophy, cannot be missed.
Unlocked by completing Mission 5: Talonreach Ascent.
The Metal Devil Repaired the Transmitter Box to Ascend to the Metal Devil on Devil’s Anger
Automatic story-related trophy, cannot be missed.
Unlocked by completing Mission 8: Talonreach Tower.
Asera’s Fall Stopped Asera from reaching Meridian on her Tallneck
.Automatic story-related trophy, cannot be missed.
Unlocked by completing Mission 10: Devil’s Anger.
Crafted Pickaxes Crafted your Pickaxes
Automatic story-related trophy, cannot be missed.
Fully Equipped Crafted and Collected all of the Tools
Automatic story-related trophy, cannot be missed. You craft all 4 Tools as part of the story.
Mastered the Elements Crafted Elemental Ammo
Automatic story-related trophy, cannot be missed. The game will put you through a tutorial as soon as you pick up some crafting materials.
Fully Armed Collected all of the Weapon and Ammo types
You collect the Bow and Blast Sling as part of the story. Then there’s 3 Bomb types and 5 Arrow Types. They should unlock naturally when you loot different areas. The ammo types for the Bow are unlocked when you collect the crafting materials.For the blast Sling you just need to collect one of each bomb type.
Ammo types for the Bow:
Normal Arrows
Fire Arrows
Shock Arrows
Tearblast Arrows
Precision Arrows
Ammo types for the Blast Sling:
Stones
Fire Bomb
Freeze Bomb
The trophy can unlock near the start of Devil’s Anger Ascent. Throughout the mission you’ll find arrowheads for the Precision Arrow which is most likely your final Ammo type.
In Your Element Triggered an Elemental Explosion by Destroying a Machine’s Canister
This will most likely unlock by just playing the game. The best way to take down enemies are by hitting their weakpoints, which often triggers different Elemental Explosions. The blast don’t need to defeat the enemy, simply triggering the blast is enough.
Lights Out Shoot a Watcher in the eye before it spots you
There are two missions that contain stealth sections – Pilgrim’s Trail and Mother’s Tears. I recommend that you do it on Mother’s Tears since it’s a bit easier. Physically crouch don’t in the tall grass to avoiud getting spotted. Move in close for an easier shot.
Restart checkpoint if you get spotted or miss, or replay one of the missions after completing the main story if you miss the trophy completely.
Heavy Hitter Used the Ballista or Blaze Barrels to Damage a Machine
This will most likely come naturally. When you fight Bellowbacks and Thunderjaws throughout the game, the combat arenas will contain Blaze Barrels (and in Talonreach Ascent – a Ballista). Shoot the barrels when a machine is close to them to trigger the trophy. There’s at least 4 sections in the game where you can earn this trophy.
Carja in Shadow Got through a Watcher Stealth Area Undetected
There are two missions that contain stealth sections – Pilgrim’s Trail and Mother’s Tears. I recommend that you do it on Mother’s Tears since it’s a bit easier. You have to complete a stealth section without the Watcher’s eyes turning red – it can be a bit buggy, but in a good way. I got the trophy even though I got spotted in the end of a stealth section.
Restart checkpoint if you get spotted just to be sure, or replay one of the missions after completing the main story if you miss the trophy completely.
Disc Shot! Shot a Thunderjaw Disc out of the Air
This trophy can only be obtained in two missions – Talonreach Ascent and Devil’s Anger. Shoot out one of the Thunderjaw Discs out of the air to unlock the trophy. The Discs can be recognized as the flying objects aiming at you with a colored laser.
If you miss the trophy on your first playthrough, replay one of the missions after completing the story.
Clean Run Completed a Mission without Dying
This will most likely be one of your first trophies. The 1st mission Brightdawn is the easiest and shortest mission in the whole game. Complete the mission without falling down a cliff and survive the one and only enemy encounter.
You can replay the mission (or any other mission) after completing the main story.
Top of the Class Achieved the highest score at the Dawn’s Grasp Assault Course
Access the Challenge Hub from the main menu or from the tower in Dawn’s Grasp.
This is bý far the hardest trophy in the game. You have to be super fast and fly up most grips and ropes – swing your hands down while releasing the trigger to gain momentum and extra height.
Remember to change you Grip Reaching distance to 2.0x in the accessibility menu. You can also play around with the different controls. Teleporting and selecting Tools in different ways will save you some seconds.
On Target Achieved the highest score at the Dawn’s Grasp Archery Range
Access the Challenge Hub from the main menu or from the tower in Dawn’s Grasp.
The key to beating the highscore is obviously speed but also hitting every yellow target – it’s located far back and center in front of the waterfall. If you miss to many shots or you’re to slow, turn around and pull the handle back and forth to reset the challenge.
Machine Safari Embarked on a Machine Safari
You can access the Machine Safari in two ways:
Select “Machine Safari” from the main menu
Pick up the Toy Boat in the Collectible Room at Dawn’s Grasp (Hub area)
The trophy unlocks as soon as the Machine Safari starts.
https://www.ben-gun.com/wp-content/uploads/2023/02/331818639_1278965659689270_5385168134992259090_n.jpg7201280Ben-Gunhttps://www.ben-gun.com/wp-content/uploads/2022/12/cropped-Bengun-logo-new-300x257.pngBen-Gun2023-02-25 19:43:062023-02-25 19:51:03Horizon Call of the Mountain Trophy Guide & Roadmap
Does difficulty affect trophies?: Yes, you need to complete the game on Impossible Difficulty
Minimum Playthroughs: 2
PS4/PS5 Crossbuy: Yes
Free-Roam / Chapter Select after Story?:
Release Date: January 27, 2023
STEP 1: Complete the Game on any Difficulty using only the Plasma Cutter + All Collectibles + 3 Side Missions (7-9 Hours)
I recommend that you complete the game on “Story” or “Easy” difficulty using only the Plasma Cutter on your first playthrough. On lower difficulties you can save up more Credits, you can sell Med Packs and excess ammo. This can potentially save some time later on.
Completing the game using only the Plasma Cutter is quite easy, so don’t worry to much about the difficulty, no matter which you choose.
You need to collect all Collectibles and complete the 3 Side Missions. Then you can skip them on your New Game Plus playthrough (beside Nodes which are used for all upgrades). The 3 Side Missions can be completed up until the point-of-no-return in Chapter 11. Be sure to have completed the Side Missions by then. The Missions are included in the linked guide above with minimal back-tracking. Also keep and eye out for the 3 chapter-specific trophies listed below.
Side Mission overview:
Mission 1: Scientific Methods (Whole Again) – Can be started in Chapter 2, and completed as early as Chapter 10.
Mission 2: Premeditated Practices (Final Regeneration) – Can be started in Chapter 6, and completed as early as Chapter 7.
Mission 3: You Are Not Authorized (Full Clearence) – Can be started in Chapter 2, and completed as early as Chapter 10.
STEP 2: Complete New Game Plus and earn the Secret Alternate Ending + Fully Upgrade Everything + 30 Kills with every Weapon (6-8 Hours)
Complete the game again using your save from your first playthough. Start New Game Plus from the main menu. This time you need to collect all the Nodes again, and purchase enough Nodes to upgrade all weapons and the suit.
There’s a new Collectible that spawns in New Game Plus – the 12 Marker Fragments. You need to collect all 12 and place them at a specifc spot in Crew Quarters, this will unlock the Secret Alternate Ending (Reunion). Be sure that you place the 12 Markers as soon as you collect the last one in Chapter 11.
STEP 3: Complete the game on Impossible (6-8 Hours)
The Impossible difficulty as not nearly as difficult as the original game. The only issue is that you difficulty reverts to “Hard” if you die, making this a kind of permadeath mode.
There are multiple workarounds to this trophy. The first option is to upload your save to the PS+ cloud – that way you can download your uploaded save if you die.
Another option is to quickly pause the game if you happen to die (watch a death animation or red screen), quit to main menu and hit continue. That way the game won’t have time to register the death and you’ll be able to continue on Impossible.
Set A Benchmark Complete the game on Medium difficulty or above.
Difficult-related trophies stack. You can complete the game on “easy” or “story” for your first two playthroughs if you want. This trophy will unlock when you complete the game on “Impossible.”
Untouchable Complete the game in Impossible Mode.
This trophy has been changed from the original Dead Space. This time the difficulty setting is “hard,” and the only catch is that dying reverts your save to a lower difficulty – meaning you have to beat “Impossible” difficulty without dying.
There are multiple workarounds to this trophy. The first option is to upload your save to the PS+ cloud – that way you can download your uploaded save if you die.
Another option is to quickly pause the game if you happen to die (watch a death animation or red screen), quit to main menu and hit continue. That way the game won’t have time to register the death and you’ll be able to continue on Impossible.
Trusted Contractor Complete New Game Plus on any difficulty mode.
You unlock New Game Plus after completing the game. Simply complete the game again to unlock the trophy. The only difference in NG+ is the appearence of a new Collectible (Marker Fragments) along with the option to unlock the Secret Alternate Ending.
You can only choose the difficulty you previously completed the game on, which means you can’t choose Impossible difficulty in NG+ to make it easier.
Note: The trophy unlocks when you visit the Bench and look on every weapon branch, after finding and purchasing every upgrade at the shop.
Autofire Kill 30 enemies with the Pulse Rifle.
Simply kill 30 enemies with the Pulse Rifle. You can get all weapon related trophies on your second playthrough in NG+, after you completed the game using only the Plasma Cutter.
Live with the Hot Ones Kill 30 enemies with the Flamethrower.
Simply kill 30 enemies with the Flamethrower. You can get all weapon related trophies on your second playthrough in NG+, after you completed the game using only the Plasma Cutter.
A Cut Above Kill 30 enemies with the Ripper.
Simply kill 30 enemies with the Ripper. You can get all weapon related trophies on your second playthrough in NG+, after you completed the game using only the Plasma Cutter.
Pusher Kill 30 enemies with the Force Gun.
Simply kill 30 enemies with the Force Gun. You can get all weapon related trophies on your second playthrough in NG+, after you completed the game using only the Plasma Cutter.
Eviscerator Kill 30 enemies with the Line Gun.
Simply kill 30 enemies with the Line Gun. You can get all weapon related trophies on your second playthrough in NG+, after you completed the game using only the Plasma Cutter.
Full Contact Kill 30 enemies with the Contact Beam.
Simply kill 30 enemies with the Pulse Contact Beam. You can get all weapon related trophies on your second playthrough in NG+, after you completed the game using only the Plasma Cutter.
One Gun Beat the game using only the Plasma Cutter.
This trophy is actually quite easy – the Plasma Cutter is easily the best weapon in the game. You’ll collect all upgrades on your first playthrough which is also your “Plasma Cutter only run” – put every Node into your Plasma Cutter branch and Suit branch.
Play on “Story” difficulty if you want to breeze through the game. But even on “Normal” it won’t be much of a challenge, but a more balanced challenge for any player.
Late in the story you can find the last Plasma Cutter upgrade which powers up your melee. This is very over-powered, even for Impossible difficulty. It can give you a bit more of an edge if your struggling.
Pack Rat Place 25 items in Storage.
Simply visit any shop and put a total of 25 items into storage. This will come naturally over the course of the game.
There is a total of 188 Logs in the game. Most Logs will unlock while following the main story. Story-related Logs counts towards your trophy progress. Realistically you only need to collect around 40-50 Logs.
There is a total of 13 Schematics in the game, but the trophy unlocks after collecting 12 of them. The reason behind it is because a Schematic in Chapter 9 is missable. You can’t return to the area after completing that specifc Chapter.
The best ways to eliminate enemies is by dismembering limbs. That is one of the core mechanics in Dead Space. This will come naturally on your first playthrough.
Wishbone Rip off a dangling limb using Kinesis.
This trophy sounds easy, but it’s not – it can prove quite frustrating. Whenever you shot a Necromorph, their limbs will take damage and start to deteriorate.When the limb is dangling, you need to use Kenesis to pull it off. The issue is that the limb falls off by itself quite fast.
Spam Stasis and focus on damaging a specifc shoulder joint with the Pulse Rifle. As soon as the limb starts to dangle, activate Kinesis and pull it off (Aim high with Kinesis, or else you pull of the bladed bone at the end of the Necromorphs hand).
Raise The Stakes Pin an enemy.
This will most likely come naturally. There are two ways to pin enemies. First option is to pick up spike looking items around the ship with Kinesis and shoot them at the Necromrophs. The spikes have a white glow to them.
The other and far better option is to shoot of a necromorph arm/hand, use Kinesis on the bladed bone and shoot it back at them. The Necromorph needs to be pinned to a wall for the trophy to unlock.
Freeze Use Stasis on 50 enemies.
This will unlock naturally on your first playthrough.
Backbreaker Kill 10 enemies with a stomp attack.
This will most likely unlock naturally on your first playthrough.
Maxed Out Fully upgrade all weapons and equipment.
You need to fully upgrade all 7 weapons along with the suit. Before that’s even possible, you need to collect/purchase all 21 Weapon Upgrades and purchase the Level 6 Suit.
It takes a total of 189 Nodes to fully upgrade everything. 59 Nodes can be picked up (found around the map and dropped from Brutes), then you get 10 Nodes for completing the game, and the last option to acquire Nodes is to purchase them at the shop for 10,000 Credits each.
That means that you can get at least 90 nodes on your forst playthrough (without purchasing any Nodes), then you can recollect the 59 Nodes in NG+. That leaves the last 42 Nodes to be purchased at the shop for a toal of 420,000 Credits. If you conserve ammo and sell everything else, you’ll have way more than enough Credits by the end of your NG+ playthrough.
There’s Always Peng! Find the Peng Treasure.
The Peng Treasure have moved location since the original Dead Space. You find the Treasure near the start of Chapter 11.
As soon as you go down an elevator (your objective is to transport the Marker), turn around and move the objects with Kenesis to reveal som lockers. The Peng Treasure is located in the locker to the left.
Front Toward Enemy Survive the Shooting Gallery.
(MISSABLE)
This trophy is only achievable in Chapter 9: Dead on Arrival. After fixing the elevator, you’ll pass the Shooting Gallery.Activate the Shooting Gallery and defeat all enemies present to unlock the trophy. Remember to pick up the Node and other resources from the lockers (they unlock after you defeat the enemies.
This trophy is only achievable in Chapter 10: End of Days. You need a total of 220 Points to reach level 6. It can take a couple of tries, but focusing on the glowing goals and only missing one or two shots will ensure that you get the trophy – the glowing goals grant double points.
Reunion See the alternative ending on any difficulty mode.
The Secret Alternate Ending are only obtainable in New Game Plus. You need to collect all 12 Marker Fragments and place them in the Crew Quarters to unlock the secret ending.
All of this needs to be done before you leave the USG Ishimura in Chapter 11.
https://www.ben-gun.com/wp-content/uploads/2023/02/330498484_504510125161800_5774653673861789545_n.jpg206366Ben-Gunhttps://www.ben-gun.com/wp-content/uploads/2022/12/cropped-Bengun-logo-new-300x257.pngBen-Gun2023-02-18 12:49:242023-03-12 17:28:42Dead Space Remake Trophy Guide & Roadmap
Does difficulty affect trophies?: No – there are no difficulty settings
Minimum Playthroughs: 1
PS4/PS5 Crossbuy: Yes
Free-Roam / Chapter Select after Story?: Yes – you can revisit every area after completing the main story.
Release Date: January 13, 2023
STEP 1: Complete the Main Story
Complete the Main Story and enjoy the game. If you want, collect some of the Cube Fragments for each character (used to upgrade abilities) and some (or all) 99 Yaya Cubes. Keep an eye on the 2 Collectible Guides below if you want to save some time during the later steps. If not, you’ll revisit all locations more than you have to while going for 100%. There will be plenty of backtracking and revisiting old locations as part of the Main Story and Side Stories.
I recommend that you run around as Sanji, Nami and Robin when you’re exploring. You need to find 20 Robin Items, 25 Sanji Items and 25 Nami Items. But don’t worry there are way more than 20 and 25 hidden in the game, they can just be hard to find. If you play as the characters above, you can spot the Items from a distance. Whenever you are close to one of the Items, that specific character will call it out, somehing like “Oh!… My money!” – then switch to the specific character and pick up the Item. You unlock the last ability tied to these trophies in Chapter 4 – Robin’s Appraisal ability.
IMPORTANT: Don’t craft to many Recipes with Sanji and Trick Balls with Usopp. You need to craft one of each Recipe of food and Trick Ball for 2 different trophies. Many of the ingredients are sadly random spawns. Make a list of which Recipes you’ve already made, there’s no in-game counter or way identify which you still need to make. These can potentially be your last 2 trophies.
STEP 2: Complete All Side Stories and Collect All Collectibles
Now is the time for the huge clean-up, completing what you have left of side activities. That Includes:
71 Side Stories
14 Memory Links
30 Bounties
22 Locked Chests
25 Sanji Items
25 Nami Items
20 Robin Items
10 Bridges (Franky)
27 Recipes
18 Trick Balls
296 Character Cube Fragments
99 Yaya Cubes
Focus on completing all Side Stories and Memory Links first, while collect all 99 Yaya Cubes, Locked Chests and the last Cube Fragments you may or may not need along the way. Refer to the following guides:
Besides that, collect the character specific Items when you run back and forward betweeen locations. You may already have unlocked multiple of the trophies listed below during Step 1. Hopefully you’ll have enough ingredients by now to make the last Recipes and Trick Balls.
STEP 3: Defeat All Powerful Enemies and Farm to LVL 70
When you complete Side Story #71: Challenge Cube, you unlock all 11 Powerful Enemies (Yellow Cubes). These cubes contain different Boss Fights from the Main Story. You have to defeat each Boss twice for the Challenge Enemy Conqueror trophy. Equip your best accessories and fuse as many effects as you like. Note that if you fuse, for example, 100% Damage Resistance to Technique, then you’ll be immune to that specific enemy type, only recieveing 1 hitpoint damage every attack. Refer to One Piece Odyssey Challenge Enemy Conqueror Guide (All Powerful Enemies) for more.
Farming to LVL 70 (or higher) before the Boss Fights will make them even easier – See High Leveler.
Earn all other trophies in One Piece Odyssey to unlock the Platinum.
High Leveler Got everyone past level 70.
You will be at around Level 50 after defeating the Final Boss. Defeating all powerful enemies twice and completing all Side Stories will get you to around Level 60-63. Luckily there is a quick way to farm the last Levels up to 70. It will take you 30-60 minutes to reach Level 70 with the method above.
Challenge Enemy Conqueror Defeat all the powerful challenge enemies twice or more.
There is a total of 30 Bounties in the game. Complete Side Story #3: Meditator Marzin’s Quest located in Nanohana (Alabasta) to unlock bounties – refer to One Piece Odyssey All Side Stories Guide.
The Bounties are spread out on 3 Memorias:
Alabasta (10 Bounties)
Water Seven (10 Bounties)
Dressrosa (10 Bounties)
You accept bounties from taverns, they are found in the big city areas. Note that some bounties need to be completed before you unlock the new ones. For example, the Bulbro Brothers – there are 4 bounties tied to them alone. You have to complete the first in Alabasta (Side Story #3) before you unlock the next in Water Seven, then the 3rd in Dressrosa and then the 4th after completing every other Bounty.
If you don’t have the option to hunt all 10 Bounties in Water Seven, go to Alabasta anc complete all the Bounties in that Memoria. Another option is to complete the available Bounties in Water Seven and then check back to the Bounty Board in the Tavern to accept new ones.
Certified Fray Fixer Cleared all Memory Links.
You are introduced to Bond Arts in Chapter 2 (Alabasta). This unlocks the Memory Links spread across the 4 Memorias. There is a total of 14 to complete.
You can see all Memory Links from the pause menu under Episode > Memory Links. They are listed with the area they are located it along with a map marker.
Top Cook Made all recipes.
There is a total of 27 Recipes in the game. It’s possible to upgrade Sanji’s Cook Skill upon completing Chapter 6 (Marineford). You can cook with Sanji at every Camp and Tavern. Each Recipe require specific ingredients to be made. Note that many of the ingredients in the game are RANDOM drops.
Go to the Pause Menu > Crew > Press on Sanji > to view Field Skills > Put 6 Cube Fragments into “Cook” > This unlocks all of Sanji’s Recipes.
This trophy and Trick Ball Whiz share the same issue and solution. If you find yourself needing specific ingredients after completing everything else, I recommend going to the Water Seven City Area. Run around as Luffy and grab every ingredient you can. Also switch to Usopp to shoot down bird nests and collect the ingredients.
You can get ingredients like Ringing Apple, Cold Plant Juice, Tree Melon all kinds of Bugs and more. That are usually some of the ingredients people need for the last Recipes or Trick Balls.
Trick Ball Whiz Made all Trick Balls.
There is a total of 18 Trick Balls in the game. It’s possible to upgrade Usopp’s Make Skill upon completing Chapter 6 (Marineford). You can make Trick Balls with Usopp at every Camp and Tavern. Each Trick Ball require specific ingredients to be made. Note that many of the ingredients in the game are RANDOM drops.
Go to the Pause Menu > Crew > Press on Usopp > to view Field Skills > Put 6 Cube Fragments into “Make” > This unlocks all of Usopp’s Trick Balls.
This trophy and Top Cook share the same issue and solution. If you find yourself needing specific ingredients after completing everything else, I recommend going to the Water Seven City Area. Run around as Luffy and grab every ingredient you can. Also switch to Usopp to shoot down bird nests and collect the ingredients.
You can get ingredients like Ringing Apple, Cold Plant Juice, Tree Melon all kinds of Bugs and more. That are usually some of the ingredients people need for the last Recipes or Trick Balls.
Treasure Hunter Opened all the locked treasure chests.
There’s a total of 22 Locked Chests in the game. You can unlock the key for the chests in Chapter 8 (Dressrosa). You need to complete a total of 12 Side Stories to unlock the key. There are 3 quiz Side Stories tied to 4 different characters. They have to be completed in the right order to unlock next series of Side Stories.
NOTE: 2 of the Locked Chests in Alabasta require certain materials to reach – Franky needs to build the bridges to reach them. Refer to Franky Skywalk for the material locations.
Challenge Enemy Beginner Defeat one powerful challenge enemy.
This trophy will be one of your last before you earn the Platinum. You can farm battle in the deserts in Alabasta, run around and defeat enemies. I recommend enabling “Auto Battle” to make it a bit easier on yourself.
Robin’s Mystery Craft unlock upon completion of Chapter 2 (Alabasta). There will be a small tutorial on how you fuse accessories, Pick any two accessories and fuse them together. Repeat for a total of 30 times to unlock the trophy. This game mechanic is essential to surviving the Boss Battles later in the game.
Upon completing Chapter 6 (Marineford), you unlock the opportunity to upgrade Robin’s Mystery Craft. Go to the pause menu and press when hovering over Robin. This access her Upgrade Abilities screen, next you want to press to acces her Field Skills – Put 6 Cube Fragments into “Fuse” to unlock the ability to fuse accessories with 4 effects.
You can take Cube Fragments from her Battle Skills if you don’t have enough to upgrade “Fuse.” You can move the Cube Fragments around as much as you like.
You are introduced to parties in Chapter 2 in the area “Desert near Nanohana.” You can hold a party at Camps and Taverns/Inns. When you are at a Camp, interact with the bonfire to start the party. If you are in a Tavern/Inn, talk with the person behind the bar and choose “Have a Party.” Holding a party increases your EXP for the next couple of fights.
Saving Savant Obtained a total of 20,000,000 berries.
This trophy will come naturally. When you have completed everything (Bounties, Side Stories etc.) in the game, you’ll have amassed way over 20 million berries.
Bond Battler Activated 20 Bond Arts.
You are introduced to Bond Arts in Chapter 2 (Alabasta). Completing the story-related Memory Link unlocks your first Bond Art. Whenever you are in battle, you have 4 options – Items, Attack, Skill and Bond Art.
Activate 20 Bond Arts to unlock the trophy.
Singular Strike Did more than 10,000 damage to an enemy with a single attack.
This trophy will come naturally near the end of the game, or when you defeat all Powerful Enemies twice (end-game). Equipping new and better Accessory with good ATK stats, increase your damage and makes it possible to damage way over 10,000.
Gum-Gum Rocket Traveled with Gum-Gum Rocket 100 times.
This trophy comes naturally. Many sections in the game require you to use Luffy and grapple around various Ruins and Caves.
Iron Door Slicer Cut 20 doors with Zoro’s Door Slice.
The first time you visit the Lake Shore Cave, you reach a steel door. There will be a little tutorial on how Zoro can cut these doors. All steel doors in the game respawn over time. This trophy will most likely come naturally. If you need to farm the trophy, go to Tower of Law (Water Seven) and cut up all the cell doors – there’s about 8-10.
NOTE: If you come across a steel door you can’t cut, go to the pause menu and press when hovering over Zoro. This access his Upgrade Abilities screen, next you want to press to acces her Field Skills – Put 6 Cube Fragments into “Door Slice.”
Usopp’s Slingshot Used Usopp’s Shot 100 times.
You are indtroduced to Usopp’s Slingshot in Chapter 2 (Alabasta). Usopp can shoot down bird nests or destructibles around the different areas. There is an easy way to get the trophy, this will save you a lot of time running around.
Go to the Dust or Ice Block Ruins in Waford. You can shoot some of the buttons in the enviroment. Shoot any of these buttons a total of 100 times to unlock the trophy.
Archaeologist’s Appraisal Robin collected 20 items with Archaeologist’s Appraisals.
Archaeologist’s Appraisal unlock during Chapter 4 (Water Seven) when you’re in the Tower of Law. There are more than 20 items to find the game, but because you unlock this skill about halway into the game, you won’t get this naturally. Just like Nami’s and Sanji’s skills, Robin will call out when you are near one of her items. Switch to Robin to locate it and pick it up. When you play as Robin, you can spot the items from a distance, then you don’t have to be atop of the item before she call it out.
Robin’s items are usually located in Ruins in Waford or around different monuments or archaelogical wonders. You might have to revisit the Ruins in Waford to collect 20 of Robin’s items.
Cook’s Nose Sanji collected 25 items with Cook’s Nose.
Sanji’s Cook’s Nose ability unlocks in Chapter 2 (Alabasta). There are more than 25 of Sanji’s items throughout the game. Whenever you play as Sanji, you can spot the items from a distance (the icon looks like a blue fish).
A lot of Sanji’s items can be found in City Areas (Alubarna, Water Seven City Area and Dressrosa City Area).
Treasure Sensor Nami collected 25 items with Treasure Sensor.
You are indtroduced to Nami’s Treasure Sensor in Chapter 2 (Alabasta). There are more than 25 of Nami’s items throughout the game. Whenever you play as Nami, you can spot the items from a distance (the icon look like a dollar sign).
A lot of Nami’s items can be found in City Areas (Alubarna, Water Seven City Area and Dressrosa City Area).
Franky Skywalk Built a bridge 10 times with Franky Skywalk.
You unlock Franky’s Skywalk after completing Chapter 4 (Water Seven). There is exactly 10 bridges in the whole game. The bridges that Franky build during cutscenes does not count towards the trophy. Before you can even build the bridges, you need different materials to build them.
Steel Bolts and Junk are the two you’ll need the most, they are found pretty much anywhere, especially in the Dressrosa Memoria. Bolts and Junk can be picked up from the ground like normal items or found in chests.
Next is the Wotz Steel Bolts, there are exaclt 2 of them in the whole game – they are needed to built the bridge in Marienford. The Bolts are located near the bridge.
Last on the list is the Carbon Bolts, they can only be found in chests around Dressrosa. Carbon Bolts are needed for 4 of the bridges.
This is a complete Remake of the PS1 classic Pac-Man World. The remake includes a lot better graphics but still stays true to the original.
How many Levels does Pac-Man World Re-Pac have?
The game have a total of 23 Levels spread across 6 different Areas. Beside the Main Levels there’s 36 Maze Levels and the option to play the Original Pac-Man.
How long is Pac-Man World Re-Pac?
It will take the average player 6-8 hours to complete the main story. If you want to get 100%, it can take around 8-12 hours, depending on how long it takes you to complete the Original Pac-Man.
Roadmap
Estimated trophy difficulty: 7/10
Approximate amount of time to platinum: 8-12 Hours
Does difficulty affect trophies?: No – there are no difficulty settings
Minimum Playthroughs: 1
PS4/PS5 Autopop & Save Transfer: No
PS4/PS5 Crossbuy: Yes
Free-Roam / Chapter Select after Story?: Yes – you can replay all levels, including the boss fights
Release Date: August 25, 2022
STEP 1: Complete The Game + Collect Everything + Complete All Bonus Stages + Earn a Total of 765,000 Points
Keep and eye on PAC-MAN WORLD RE-PAC All Collectible Locations when you are playing through the game. You need to collect all the Collectibles along with every pac-dot and fruit – you need to havea total of 765k points after beating the final boss (This unlocks Open Sesame / The Magic Key). See the trophy on how to get maximum points on every level. Be sure that you don’t skip the Slots (you play the Slots after each Level), try to get as points as possible, along with the misc trophies involving this feature.
Be aware of the 2 level specific trophies on your first playthrough – Space Ace (Level 3-4) and Speed Racer (Level 4-4). If you don’t get them during this step, replay the levels during step 2 of the roadmap.
Now is the time to get all the different trophies related to defeating enemies in a certain way. Replay any level and start farming the defeats with the moves that you need. You also have a total of 99 Lives, if you haven’t unlocked it already during step 1, the same with the 765.000 points – now is the time to replay Levels and get higher scores if you need to.
This step can be a bit repetitive. You need to complete all 36 Maze Stages (6 from each Area), and then complete the Maze Marathon Mode, which is all 36 Stages in one stiting. Go to the Pirate Ship Area and interact with the signpost (there’s a picture of a Galaxian on the sign) to enter Maze Mode.
This will be the only difficult part about this trophy list – completing Round 9 of Original Pac-Man will be super frustrating, if you don’t know the correct technique. The secret to completing the Original Pac-Man is knowing the different patterns.
Earn every trophy in Pac-Man World Re-Peac to unlock the Platinum.
Windbag Loser Defeat Windbag.
Automatic story-related trophy, cannot be missed.
Sick of Magma Defeat Anubis.
Automatic story-related trophy, cannot be missed.
Space Explorer Defeat King Galaxian.
Automatic story-related trophy, cannot be missed.
Radical Racer Defeat Clown Racers.
Automatic story-related trophy, cannot be missed.
Back to the Scrap Heap Defeat Krome Keeper.
Automatic story-related trophy, cannot be missed.
The Real Deal Defeat Toc-Man.
Automatic story-related trophy, cannot be missed.
Speed Racer Finish Clown Prix in 140 seconds or less.
LEVEL 4-4: Clown Prix
Completing this boss under 140 seconds can be a bit tight. If you hit a bomb, restart the episode to try again. Cut corners close to the edge and use your speed boost on long stretches.
Space Ace Clear the King Galaxian Episode with no misses.
LEVEL 3-4: King Galaxian
The trophy description can be a bit confusing – when they write “misses,” it doesn’t refer to your shots, it refers to your lives. Complete the boss fight without losing a single life and you unlock the trophy.
There is a total of 6 Family Members to rescue, 1 in each of the 6 areas. Rescuing a Family Member consists of two steps, finding the Key and then finding the cage. Below you can see an overview of where to find all Keys and Family Members.
Friendly Talk to all family members on Ghost Island.
Before you can talk to all 6 family members, you need to rescue each and everyone of them. After rescuing a family member, you’ll find them standing in the hub world.
Bonus Stage Master Clear all types of bonus stages.
Collecting all 6 Pac-Man letters in a level unlocks a bonus stage at the end of the level. There are a total of 6 different types of bonus stages (1 for each world). Collect all the fruit in each bonus stage type to unlock the trophy. They are all pretty simple and can be completed without to much trouble.
Pirate Ship Area Maze Clear all Pirate Ship Area Maze Stages.
You access Maze Stages by interacting with the signpost located in the Pirate Ship Area (main hub world). There are 6 Maze Stages tied to each world. 3 Maze Stages are unlocked from the start and the last 3 are unlocked by completing the levels in that specifcic world. Complete all 6 Maze Stages to unlock the trophy.
You access Maze Stages by interacting with the signpost located in the Pirate Ship Area (main hub world). There are 6 Maze Stages tied to each world. 3 Maze Stages are unlocked from the start and the last 3 are unlocked by completing the levels in that specifcic world. Complete all 6 Maze Stages to unlock the trophy.
See Maze Master for a video covering all Maze Stages.
Space Area Maze Clear all Space Area Maze Stages.
You access Maze Stages by interacting with the signpost located in the Pirate Ship Area (main hub world). There are 6 Maze Stages tied to each world. 3 Maze Stages are unlocked from the start and the last 3 are unlocked by completing the levels in that specifcic world. Complete all 6 Maze Stages to unlock the trophy.
See Maze Master for a video covering all Maze Stages.
Funhouse Area Maze Clear all Funhouse Area Maze Stages.
You access Maze Stages by interacting with the signpost located in the Pirate Ship Area (main hub world). There are 6 Maze Stages tied to each world. 3 Maze Stages are unlocked from the start and the last 3 are unlocked by completing the levels in that specifcic world. Complete all 6 Maze Stages to unlock the trophy.
See Maze Master for a video covering all Maze Stages.
Factory Area Maze Clear all Factory Area Maze Stages.
You access Maze Stages by interacting with the signpost located in the Pirate Ship Area (main hub world). There are 6 Maze Stages tied to each world. 3 Maze Stages are unlocked from the start and the last 3 are unlocked by completing the levels in that specifcic world. Complete all 6 Maze Stages to unlock the trophy.
See Maze Master for a video covering all Maze Stages.
Boss Mansion Area Maze Clear all Boss Mansion Area Maze Stages.
You access Maze Stages by interacting with the signpost located in the Pirate Ship Area (main hub world). There are 6 Maze Stages tied to each world. 3 Maze Stages are unlocked from the start and the last 3 are unlocked by completing the levels in that specifcic world. Complete all 6 Maze Stages to unlock the trophy.
See Maze Master for a video covering all Maze Stages.
Maze Master Clear the Maze Marathon Mode.
Complete all 36 Maze Stages to unlock Maze Marathon Mode. This mode consists of all the previous completed Maze Stages which you need to complete in one siting. After completing everything else, you will have more than enough lives to get through this mode. You will probably only lose about 10-15 lives completing the Maze Marathon.
Gambler Play Slots 100 times.
You enter the Slots after every level. The amount of “Plays” you have depends on the amount of coins you have collected. This trophy will come naturally while playing the game.
Fever! Activate a Fever in Slots.
You need to get an equal amount of points (1.000, 2.000, 10.000 etc.) after any level (when you reach Slots) to activate Fever.
I recommend doing this on the level 1-2: Corsair’s Cove, it’s a short and easy level. This might take a couple of tries, sometimes you land on a dot unintentionally and get 10 points to much, or mess up in another way.
Jackpot! Line up a Galaxian in Slots.
This trophy can be a bit tricky. Lining up 3 of the same images can be a bit tedious. The Galaxian is the token with yellow, red and blue color (used to unlock Maze Stages in the regular levels).
You need to memorise the 2-3 fruits that are shown before the Galaxian. When the Slots show the fruits you have memorised, press to stop the wheel from spinning – hopefully it will land on the Galaxian. The hardest Galaxian to land is the 3rd and the last one (the last wheel will spin really fast). Whenever you complete a level, attempt to land a Galaxian to get avoid replaying levels later on, just to get a chance to earn this trophy.
Beginner’s Luck Line up a pattern of two in Slots for the first time.
You enter the Slots after every level. The amount of “Plays” you have depends on the amount of coins you have collected. This trophy will come naturally while playing the game.
This will most certainly unlock naturally. You need to collect everything point related throughout the game anyways – you need a lot of points for the Open Sesame trophy.
What Does This Key Do? Obtain a Key for the first time.
Boom! Boom! BOOM! Defeat 50 Enemies with Bomb Dot.
Bomb Dots are white Dots which defeat every enemy in the area. You will most likely still need this trophy after completing the game – there’s not that many Bomb Dots located in the game.
You can farm 50 defeats in Level 3-4: King Galaxian. Simply replay the Level as much as you need.
Pac-Dot Attack! Defeat 100 enemies with Pac-Dot and/or Bomb Attacks.
Use to throw a Pac-Dot. Defeat a total of 100 enemies to earn the trophy. To avoid farming after game completion, use the Pac-Dot throughtout the game to occasionally defeat some enemies.
Bowling For Bad Guys Defeat 100 enemies with Rev Roll.
Use to perform a Rev Roll (you need to hold the button down and release it after gaining some speed). To avoid farming after game completion, use the Rev Roll throughtout the game to occasionally defeat some enemies.
Tough Tushy Defeat 100 enemies with Butt Bounce.
Press + to perform a Butt Bounce, this will most likely be your main attack since – it’s a lot more precise than other moves. If you haven’t earned the trophy after game completion, replay any level and farm defeats with Butt Bounce.
Big Eater Get 1600 points by eating Ghosts successively. (Original Mode excluded.)
In order to eat Ghosts, you need to pick up the big Dot power-up (it’s yellow and blinks over and over). They are located in almost every level in the game.
This trophy will come naturally while playing the game.
In order to eat Ghosts, you need to pick up the big Dot power-up (it’s yellow and blinks over and over). They are located in almost every level in the game. This trophy will come naturally while playing the game.
The arcade machine unlocks after completing the main story, it’s located in the Pirate Ship Area. The trick is to follow a specific pattern according to which round you are playing. The ghosts DO have specific behavior according to how you move. 1st round is one pattern, 2nd-4th round is a second pattern, and from then on it´s a third pattern for the rest of the rounds.
I messed up on round 9 because I got super nervous. Keep trying and you will get it.
Round 1 – easy pattern, follow video.
Round 2-4 – almost the same, except you turn back near the start and go up to avoid the blue ghost.
Round 5+ – this is where it gets tricky. Follow the video for every move. Pause when you play it yourself to check back on the video and follow the next steps.
Open Sesame Get a Magic Key.
You need a total of 765.000 points to earn the Magic Key. Press to check your total score (it’s listed on your save file).
Here a few tips to get the best high score possible for every Level:
Don’t die (miss) during a Level – The fewer misses you have, the more points you earn.
Defeat all Ghosts – Whenever there is a section with a yellow poer-up, eat all ghosts to get the maximum bonus of 1600 points.
Defeat all normal enemies – Every single enemy will yield some extra points.
Collect everything – Collect all Dots, Fruit, Letters and Keys.
Play the Slots – Line up as many Fruits and Galaxians as possible, this is where you can get a lot of extra points for a better high score.
Invincible Get 99 or more extra lives.
Some people will earn this by the end of the game. If you still need to reach 99 lives – replay Level 4-1: Clowning Around. There are 3 lives right at the start of the level, collect them > leave the Level > repeat. You don’t need to complete the Level to save your progress.
https://www.ben-gun.com/wp-content/uploads/2023/01/321913920_856270562264392_5583186779314367180_n.jpg7201280Ben-Gunhttps://www.ben-gun.com/wp-content/uploads/2022/12/cropped-Bengun-logo-new-300x257.pngBen-Gun2023-01-08 14:30:142023-01-10 16:25:14PAC-MAN WORLD RE-PAC Trophy Guide & Roadmap
Is Crisis Core Final Fantasy VII Reunion before the Final Fantasy VII Remake (2020)?
Yes, this is a prequel to FF7. The story takes place before the FF7 Remake and introduces some new characters like Zack and Angeal.
How long does it take to complete Crisis Core?
It will take the average player around 8-10 hours to complete the main story. It will take less if you skip cutscenes and don’t do any optional missions.
Is Crisis Core Final Fantasy VII Reunion a remaster or remake?
This game is a remaster of the original PSP game Crisis Core from 2007. Every scene got the make-over treatment and looks superb. They changed a few things like the combat and summon cinematics.
How does Crisis Core combat work?
Crisis Core uses a real-time battle system -not turn-based like earlier titles. You can move around, attack, block, cast materia, initiate special abilities, use items and more. One of unique features in Crisis Core are the DMW (Digital-Mind-Wave). It’s a spinning wheel in the top-left corner which are active during combat – it grants the player different status effects and special attacks, limit breaks and summons.
Roadmap
Estimated trophy difficulty: 5/10
Approximate amount of time to platinum: 20-25 hours
Number of missable trophies: All trophies, except trophies that are unlocked by completing specific Chapters.
Glitched trophies: 0
Does difficulty affect trophies?: Yes – Luckily, beating just the final boss on Hard difficulty unlocks the trophy SOLDIER of Legend (you can change difficulty via the pause menu).
Minimum Playthroughs: 1 on Normal difficulty – change difficulty to Hard before the final boss.
Free-Roam / Chapter Select after Story?: No – there´s no Chapter-Select or Free-Roam in the game
Release Date: December 13, 2022
STEP 1: NORMAL DIFFICULTY PLAYTHROUGH + EVERY MISSABLE COLLECTIBLE & TROPHY [8-10 HOURS]
Follow The Collectibles Guide for your playthrough – it´s your companion guide for getting all missable Collectibles and Trophies. There are a lot of Collectibles in the game, but luckily only a few are actually missable. The Collectibles Guide also show you how to get the missable chapter-specific Trophies. Everything is listed in chronological order.
Play through the game while following the Collectibles Guide. Play up until Chapter 10 (which is the last Chapter) and the very last Save Point in the game. There will be a bright white light, and the game prompts you with a menu, asking if you want to continue – this is right beside the final Save Point.
MISSABLE WARNING: Like it’s mentioned above, everything is missable! If you miss a Chapters-specific trophy you have to play through the whole game again. Every time you complete a Chapter, the game prompts you with a save option – save at least once for every Chapter, this way you don’t have to go all the way back to the start of the game, IF you miss anything.
This next step involves completing most of the missions. While completing misssions, you automatically get progress towards your 100% in the DMW. Refer to the DMW Image Locations Guide to earn all the different images. Some of the images are earned in some high-level missions, that is why you need complete most of the missions while working towards the images. You will raise in level and earn some new materia which will help you complete them.
Recommended materia and upgrades (materia fusion):
Costly Punch – It can 1-hit many enemies and deal 99,999 dmg with the right equipment – there are multiple ways to break the damage barrier. You can create Costly Punch by fusing Goblin Punch (reward for earning the trophy Waterfall Chaser in Chapter 9) with any purple materia from the QMC+ Shop (also unlocked in Chapter 9).
Jump materia – This can be better than Costly Punch during the earlier missions. Jump is an AOE (area-of-effect) attack which hits multiple enemies. This helped me to complete about half of all missions as quickly as possible. Many encounters are over after a single use of Jump.
Cure/Cura/Curaga – Used to heal Zack. Curaga is the strongest verison and heals you the most.
Other than that, use anything that you like! Just remeber to fuse materia to increase your percentages in health and other usable stats. I recommend focusing on increasing your VIT and SPR stats – they are essential in step 3 of the roadmap and defeating the boss Minerva.
NOTE: Always enter Buster Sword Stance (SQUARE + X) before using Costly Punch or Jump – it will increase your damage.
When you have collected all DMW images, refer to the 100% DMW Guide (AFK Farming Method). Getting DMW progress to 100% unlocks the Genji Armor. It´s part of a trophy in step 3, but it will also help you complete the last missions. The Genji Armor increases your health limit to 99,999 amd grants Endure and Regen status effects.
STEP 3: COMPLETE ALL MISSIONS + MINERVA SUPERBOSS [8-10 HOURS]
Now you want to complete the last of the missions, beside M.9-6-6 which is the Minerva boss fight. Keep an eye out for the last pieces of Genji Equipment. Completing all missions (beside M.9-6-6) will give you a lot of materials for materia fusion. Take a look on the Minerva Boss Guide for the list of materia you want to use and upgrade.
You earn the last collectibles during this step. The last Mail Senders and Shops are automatically unlocked when you complete the last missions. See the Collectibles Guide for the list of remaining Collectibles.
STEP 4: FINAL BOSS ON HARD DIFFICULTY [30-60 MIN.]
When you have defeated Minerva, change your difficulty to Hard from the Pause Menu. Defeating just the final boss on Hard, unlocks the trophy for beating the whole game. Note that this may be a bug and CAN be patched in the future.
Earn every trophy in Crisis Core Final Fantasy VII to unlock the Platinum.
Embrace Your Dreams Cleared the Prologue.
Automatic story-related trophy, cannot be missed.
He Wouldn’t Betray Us Cleared Chapter 1.
Automatic story-related trophy, cannot be missed.
We’re Not Monsters Cleared Chapter 2.
Automatic story-related trophy, cannot be missed.
Angels Dream of One Thing Cleared Chapter 3.
Automatic story-related trophy, cannot be missed.
Where Did Everyone Go? Cleared Chapter 4.
Automatic story-related trophy, cannot be missed.
Protect Your SOLDIER Honor Cleared Chapter 5.
Automatic story-related trophy, cannot be missed.
Did Genesis Really Die? Cleared Chapter 6.
Automatic story-related trophy, cannot be missed.
I May Abandon Shinra Cleared Chapter 7.
Automatic story-related trophy, cannot be missed.
I’ll Come Visit Cleared Chapter 8.
Automatic story-related trophy, cannot be missed.
We’ll All Be Heroes Cleared Chapter 9.
Automatic story-related trophy, cannot be missed.
Thanks to You, Zack Cleared Chapter 10.
Automatic story-related trophy, cannot be missed.
Come and Get It Won a battle for the first time.
Automatic story-related trophy, cannot be missed. This will be your very first trophy. After the first cutscene of the game, you will be fighting a group of enemies – defeating all of them triggers the next story cutscene and earns you the trophy.
Prove Your Honor to Me Performed a limit break for the first time.
Automatic story-related trophy, cannot be missed. You will automatically enter Limit Break when fighting enemies – Limit Break is activated when 3 identical images line up in the DMW (The spinning object in the upper-left corner). This will be one of your very first trophies.
Got Materia Fusion Down Performed materia fusion for the first time.
Automatic story-related trophy, cannot be missed. You unlock Materia Fusion in Chapter 3. Press OPTIONS > Materia Fusion > Fuse any 2 materia to unlock the trophy. There will be a little tutorial guiding you through it.
Overpowered Dealt 99,999 damage to an enemy.
Your max damage output is 9,999 by default. You need to break the damage barrier in order to do 99,999 damage with one attack – there are multiple ways to achieve this.
1st option – In Chapter 6 you unlock something called Buster Sword Stance. Increasing the Proficiency to 25% breaks the damage limit. Defeating enemies while in Buster Sword Stance increases proficiency. The benefit of using this stance is taht your next attack deals increased damage.
2nd option – Equip any accessory that breaks your damage limit. One of the earliest accessories you can get, that increase your damage limit to 99,999 is the “Brutal” accessory. The accessory is earned by completing Mission 7-4-6 or 9-5-1. You can also find the accessory in a chest in M9-6-3.
Next step is to actually deal 99,999. I highly recommend that you use the Costly Punch materia – it’s the same materia you will use for the Minerva Superboss near the end of the game.
You can get the Costly Punch materia at the earliest in Chapter 9. You need to craft the materia following this method.
When you reach Gongage, after a cutscene with Cissnei, turn around and open a chest to find the QMC+ Shop. Next you want the Goblin Punch materia earned by completing the waterfall minigame (See Waterfall Chaser on how to complete the minigame).
With both the Shop and materia unlocked – buy any purple DMW materia from the QMC+ Shop and fuse it with Goblin Punch, this will give you the Costly Punch.
When your stats get hgher as you level up and fuse materia, you’ll end up damaging 99,999 without even trying. Note that damaging enmies from behind will increase your damage even more.
Limit Break Collector Obtained all DMW images.
There are a total of 18 DMW images to collect. Luckily only one of the images are missable. Rest of the images are unlocked by playing just the story (automatically unlocked) or by completing missions.
Before you can earn this trophy, you need to collect all 18 DMW images – see Limit Break Collector on how to collect them all. After finding every image, refer to the guide below.
I recommend leaving most of the missions for the end-game. You can complete half or more of the missions in about 1 minute, when you’re just a bit overpowered. This makes the process a bit more bearable.
You only need to recieve 1 Mail per Sender to earn this trophy. There are only 6 missable Mail Senders. 5 of them are from the 5 Fan Clubs (which are tied to another trophy), and the last Mail Sender is the Reporter on the street in Midgar (choose NOT to report him).
Hero of the Wutai War? Received highest evaluation from Lazard for Assault on Fort Tamblin.
CHAPTER 1
After the “Mt. Tamblin – Mountain Path” Save Point, you storm Fort Tamblin. You’ll see a box appear in the upper-left corner. Here you can see how many enemy forces you have defeated in the area. You need to defeat all enemies before you leave the area. If you open the map, you can see some of the enemy locations. A few of the enemies enemies only spawn when you interact with a watchtower or some of the rotating walls. There are 2 enemies in and watchtowers and 3 enemies hiding behind the rotating walls.
Make sure that all 16 enemy encounters have green checkmarks in the upper-left corner, before you leave through the gate and continue to the next area.
The trophy unlocks later in the chapter. When you have completed the boss fight, you meet up with Lazard and he’ll evaluate you. If you defeated all the enemies you get the highest evaluation and the trophy.
Master Mako Stone Miner Prevented the Materia Room from being shut down.
CHAPTER 2 (Can be earned up until Chapter 7)
This trophy is obtainable between Chapter 2 and the point of no return in Chapter 7. You need to unlock and complete 6 missions for a researcher in the Shinra Building.
From the start of the Chapter, don’t talk to Tseng (this will trigger the next story segment), instead leave the area to trigger a little cutscene. You will be transported to Midgar Streets by the fountain. Go back into the Shinra Building, head to the elevator and select the SOLDIER Floor. Next you want to enter the Materia Room (the text is written on the door), it´s located left of a Save Point.
Talk to a Researcher to unlock the missions M8-2-1 through M8-2-6. Complete all 6 missions, this can be done from any Save Point. Completing all missions will reward you with Mako Stones. Give all the Stones to the Researcher to unlock the trophy.
If the missions are to difficult to complete, you can wait up until Chapter 7 to complete them.
Banora Treasures Collected all items and arrived at Angeal’s house before the Banora airstrike.
CHAPTER 2
After you talk to Tseng in the Shinra Building, you’ll find yourself in Banora. After meeting with Angeal’s mother, you get the objective to meet up with Tseng at the factory. Before meeting up with Tseng, you need to interact with 5 glowing items lying around the area. There are 3 located close together in the village, and 2 located on the way up the hil to meet with Tseng. Interacting with them makes the available to you later in the Chapter.
After the Shells minigame (Slicin’ SOLDIER) you get a call from Tseng. You will get 45 seconds to head back to Angeal’s mother. On the way, you need to collect all 5 glowing items (2 on the hill and 3 in the village). Collecting all 5 will earn you the trophy when you reach the house, before the timer runs out.
Everyone’s Hero Saved everyone calling for help during the assault on the Shinra Building in Chapter 3.
CHAPTER 3
This trophy takes place after you go to the Director’s Room to talk to Lazard. An alarm will go off and the whole building will be under attack. When you are riding the elevator down, be sure to choose “Get off and look around.” You will find yourself on the SOLDIER floor. There are 3 NPC’s you need to save. 1 as soon as you get off the elevator, 1 lying on the ground to the left, and a pair of NPC’s in the Materia Room.
Head back to the elevator and complete the next 2 story-related fights. After a cutscene where you’re introduced to Cissnei, you will find a NPC to your left and 1 to your right in the LOVELESS Avenue destrict.
Saving all 5 groups of NPC’s earns you the trophy.
First-Rate SOLDIER Defeated all virtual data in the Training Room.
CHAPTER 3
Right at the start of Chapter 3, head to the Training Room on the SOLDIER Floor (Shinra Building). Talk to Hojo and complete all 4 virtual fights to unlock the trophy. They are all super simple and quick to complete. The only one that can be a bit annoying is the last fight. Just play it safe and heal with Cure whenever you are low on health.
Precise Restoration Achieved 100% recovery with the Mako Recovery Unit.
CHAPTER 4
After leaving the Slums, you will follow a highway and end up in the Shinra Building with Hojo. To his left you’ll see a console you can interact with. The console will count down from 5 and hide the number on the screen when it reaches 3. Continue counting down by yourself and press X as soon as you reach 0. It can take a couple of tries to get the timing right, but you can keep trying as many times as you want.
Of Significant Worth Judged by Hojo to be a “SOLDIER member of significant worth” in the Fusion Chamber.
CHAPTER 4
After leaving the Slums, you will follow a highway and end up in the Shinra Building with Hojo. You can see a big blue champer in between two consoles, this is the Fusion Chamber. Enter the chamber to start a little minigame. Hojo will ask you a series of questions, choosing the dialogue listed below will earn earn you the trophy.
A SOLDIER operative like Sephiroth
State-of-the-art science and technology
A person unafraid to challenge Shinra
Cell Raider Checked all cells on the 67th floor of the Shinra Building.
CHAPTER 4
After leaving the Slums, you will follow a highway and end up in the Shinra Building with Hojo. There will be a console to the right of the Fusion Chamber. Before you interact with the console, equip the “steal” materia (Bruno gives it to you earlier in the Chapter). You need to steal 6 keys from 6 enemies, enter the 6 cells (using the keys) and open 3 chest in each cell (18 chests total) and return to Hojo before the timer runs out.
Wutai’s Nemesis Caught all the Wutai spies that had infiltrated Midgar.
CHAPTER 5
Head to the LOVELESS Avenue in Sector 8. Find and talk to a SOLDIER 2nd Class, agree to help him find the Wutai spies. To reveal a spy, you need to talk to the character 3 times – this will reveal there true identity. The order of which you need to find them are fixed. Here’s the list:
Man in front of the LOVELESS Avenue Theater.
Shinra Trooper in Sector 5 Market. He is walking around the area.
Male Shinra employee. Located upstairs by the elevators in the Shinra Building Entrance. Run up and down the stairs to make the spy spawn.
Woman talking to a man in the Fountain area. She is located right by the entrance to the Sector 1 Train Station.
Shinra Employee in the Exhibit Room. He’s standing by the big rocket.
Little kid running around the Park in the Sector 6 Slums. The kid wears a hat.
Fan Club Savior Helped every fan club continue their activities.
CHAPTER 7
There are a few steps to earn this trophy – they are as follows:
Talk to Genesis Fan by the fountain – Choose: “Merge with a rich Fan Club!”
Talk to other Fan in LOVELESS Avenue.
Talk the first Fan again.
Talk to the boy running around near the first Fan.
Find and talk to his mother on the Sector 1 Platform.
Midgar Full of Flowers Constructed every flower wagon type.
Cage Opener Opened the path to the Cage of Binding.
CHAPTER 10
This trophy can be earned near the start of Chapter 10. You need to interact with 4 gravestone-looking tablets and defeat 5 specific enemies. The first tablet is looking where you enter the Dephts of Judgement, you will see it right by the Save Point. The last 3 can be found in Portal of Severance, Howling Fang and right beside the entrance to the Lake of Oblivion.
After interacting with all 4 tablets, enter the Lake of Oblivion – here you will find 5 Mako Springs (they look like crystals hanging from the ceiling). Interact with a Mako Spring to spawn an enemy. Defeat all 5 enemies spawned from each of the springs to open the Cage of Binding.
Slicin’ SOLDIER Cut down every incoming shell.
CHAPTER 2
This trophy can be earned in Chapter 2, after being to factory with Tseng. There will be a little tutorial on how to complete the minigame. Whenever the reticle on the shell turns blue, press SQUARE to slice them. You need to hit all 10 without missing to earn the trophy.
If you miss a shell, reload your latest auto-save to try again (you have to complete the minigame to reload the auto- save).
Master Blender Blended a perfume with the perfect amount of oil.
CHAPTER 4
This trophy takes place in the Sector 5 Slums Market area, after getting your wallet back. Interact with the “Shopping Paradise” store to start this minigame. You need to count the correct number of oil drops needed to craft a perfect perfume.
Drip = 1 drop
DripDrip = 2 drops
Splash! = 10 drops
When the correct number has been reached – press X. There is a Save Point beside the shop. I recommend backing up your save before attempting this. You need to complete this minigame 3 times, without failing, for another trophy – See Good Match For Aerith for more info.
Bingo! Guessed the exact number in the number-guessing game.
CHAPTER 4
This trophy takes place in the Sector 5 Slums Market area, after getting your wallet back. Talk to a lone boy standing in the corner. This will start the number-guessing minigame. Aerith will mention 2-3 numbers, and then you have to pay the boy 50 gil for him to mention 3 more numbers. Now, the trick to finding the correct number is to compare Aerith’s and the boy’s numbers. The number that is mentioned twice is the correct one.
Example: Aerith mentions 1, 2 and 3. The boy mentions 2, 5 and 6 – the correct number is 2 because it’s mentioned by both.
Godlike Rated to have “godlike speed” in collecting materia.
CHAPTER 4
This trophy takes place in the Sector 5 Slums Market area. After getting your wallet back, head over to the store with the “Item World” sign to start this minigame. You need to collect 20 pieces of materia under 14 seconds. Press L3 to sprint and spam X to pick up all the materia along the way. When the Shopkeeper rates you with “godlike speed” – you earn the trophy. Retry the minigame if you failed to complete it under 14 seconds.
Shinra’s Squats Champion Achieved victory against the SOLDIER 2nd Class in the physical fitness test.
CHAPTER 5
At the start of the Chapter, head to the Training Room and talk to the man present – this starts the squat minigame. You need to beat the first 4 opponents for the trophy. You have to press TRIANGLE when Zack’s hands are behind him to perform a squat.
The reason why this is one of the hardest trophies, is because of the timing for performing a successful squat. After a series of successful squats, Zack speeds up, this makes the timing different from the previous set of squats. There are a total of 4 different speeds of which he performs his squats. This will take a couple of tries, but just keep trying – the more you try the more you learn the pattern.
Note: turn on controller vibration to help with the timing – this will give you a little cue for the right timing.
Master Infiltrator Infiltrated the mako excavation facility without being discovered once.
CHAPTER 5
You will reach a snowy mountain area as part of the story. You need to infiltrate a facility without getting spotted. Before you attempt it, make a backup save at the Save Point right next to the facility. You reach the facility right after a cutscene with Tseng and the Shinra Trooper.
You will see a couple of blue zones when you infiltrate the facility – enter the zone and use L1 to crouch and hide from the patrolling guards. If you get spotted before entering the facility, reload your backup save to try again.
Immovable Object Defeated all enemies in Defense of the Junon Perimeter.
CHAPTER 6
When you’re chasing down Hollander, you reach a story-related minigame where you need to defend the area and keep enemies from reaching a gate. There are a total of 30 enemies you need to defeat. Run side to side on the road to engage combat encounters with incoming enemies. I recommend staying near the ned of the road – this will give you more time to react and stop the incoming enemies.
Zack the Sniper Did not allow a single gun bull head to escape while sniping.
CHAPTER 9
When you’re leaving Nibelheim, you will find sniper rifles laying on the path to the next objective. You have to pick up the sniper at all 8 sniper spots (some are hidden away from the main path), and defeat all gun bull head enemies – if 1 escape, you have to reload your last autosave and start all over.
There is a method to make it alot easier. After the 3rd sniping spot, run back and forward to encouner more enemies. Farm as many kill points as you like and use them on the next sniping spot to upgrade it’s damage. The upgrades are shared between every sniper spot. The more points you farm, the more upgrades you can buy and give yourself a good chance of successfully completing all 8 sniping spots on your first try. It’s not necessary to fully upgrade the sniper.
The trophy unlocks when you reach the next Save Point, located a bit further ahead after the last sniping spot.
Waterfall Chaser Collected ten chests coming down the waterfall in the hills of Gongaga.
CHAPTER 9
After a cutscene with Genesis in Gongaga, you’ll find yourself on a map called “Hills.” Run around the area and complete 7 random combat encounters. Now, when you try to leave the area, you get the chance to complete the waterfall minigame. You have to collect 10 chests falling down the waterfall, while dodging the monsters. The chests follow the same pattern:
Center > left > right > center > left > right > center > left > right > center – Trophy unlocked.
If you get hit by a monster or miss a chest, you have to leave the area, come back, and complete 7 random combat encounters to triger the minigame again.
Good Match For Aerith Told by Bruno that you and Aerith “make a good couple.”
CHAPTER 4
For this trophy, you need to get a high affection level with Aerith before you leave the Sector 5 Slums. Here’s an overview of all the steps:
Make sure that you have 5 potions in your inventory before entering the Sector 5 Market (Buy 5 from a Shop using the pause menu). We need to trade them in a later step.
Talk to the 3 different shops around the Market. (+10 affection)
Find the little girl standing by some crates, talk to her and choose: “Wait a little longer” for a total of 10 times.
Trade 5 potions to the little boy standing on the opposite side of the Market. (+10 affection)
When you get a cutscene with Aerith and the thief – select the 2nd dialogue option: “I’ll buy the medicine for you.” (+10 affection)
Get your wallet back from the monsters.
Head over to the store with the “Item World” sign and talk to the man to start a minigame. You need to collect 20 pieces of materia under 14 seconds. Press L3 to sprint and spam X to pick up all the materia along the way. When the Shopkeeper rates you with “godlike speed.” (+5 affection)
Interact with the “Shopping Paradise” store to start this minigame. You need to count the correct number of oil drops needed to craft a perfect perfume. When the correct number has been reached, press X. There is a Save Point beside the shop. I recommend backing up your save before attempting this. NOTE: If you fail you LOSE points with Aerith! Succesfully make 3 perfect perfumes without failing. (+15 affection)
When you leave the Slums (as part of the story), Bruno will stop you. He’ll say that you and Aerith will “make a great couple.” If he says “good couple,” then you missed something above or made a bad perfume.
There is a wuick and easy way to earn this trophy – simply change the difficulty to Hard before the final boss. Defeating the final boss on Hard difficulty is enough to earn the trophy. This may be a bug and can be patched in the future. To change the difficulty – open the pause menu, go to Options > Gameplay Settings > Difficulty > Hard.
I recommend doing this after completing all 300 missions and defeating Minerva – this wil make the final boss a walk in the park.
https://www.ben-gun.com/wp-content/uploads/2023/01/Adobe_Express_20230103_2010100_1.png7201280Ben-Gunhttps://www.ben-gun.com/wp-content/uploads/2022/12/cropped-Bengun-logo-new-300x257.pngBen-Gun2023-01-03 20:30:312023-01-10 17:33:42Crisis Core Final Fantasy VII Reunion Trophy Guide & Roadmap
Call of Duty Modern Warfare 2 Trophy Guide & Roadmap (2022)
FAQs
Is Call of Duty Modern Warfare II (2022) a remake of the original MW2 (2009)
The new Modern Warfare 2 is a sequel to the 2019 reboot. This is a not at remake or a remaster – it´s a retelling of the original story from the old Modern Warfare games.
Is Modern Warfare Warzone 2.0 free to all players?
Just like the oiriginal Warzone, it´s completely free to play and does not require a copy or purchase of Call of Duty: Modern Warfare 2. Simply download Warzone 2.0 free from the PlayStation Store. Note that there are no trophies related to Warzone or PVP.
Is Realism harder than Veteran?
Yes – luckily you only need to complete the game on Veteran difficulty for 100%.
Roadmap
Estimated trophy difficulty: 5/10
Approximate amount of time to platinum: 9-15 Hours (Campaign 6-10 hours, co-op 3-5 hours)
Does difficulty affect trophies?: Yes – You have to complete the game on Veteran (2nd highest difficulty)
Minimum Playthroughs: 1
PS4/PS5 Autopop & Save Transfer: –
PS4/PS5 Crossbuy: –
Free-Roam / Chapter Select after Story?: Yes – Mission select is available from the start
Release Date: October 27th, 2022
STEP 1: COMPLETE THE GAME ON VETERAN + MISC TROPHIES
If you feel confident and want to get most if not all trophies in one playthrough, start the game on Veteran difficulty. If you miss 1 or 2 misc trophies during step 1, you can get them during step 2 on Regular difficulty using mission select. Some misc trophies can be quite challenging on Veteran. If you are struggling, complete the mission and replay it later.
STEP 2: POTENTIAL CLEAN-UP OF MISC CAMPAIGN TROPHIES
If you missed any trophies during your 1st playthrough, go to mission select and clen up what you may have missed. Many missions can be completed super quick on the lowest difficulty.
STEP 3: ONLINE SPEC OPS MODE (CO-OP)
This is your last roadblock to achieve the Platinum trophy. If you have a friend or good partner, this step will be a lot easier than playing with randoms. You need to complete the missions, Low Profile, Denied Area and Defender: Mt. Zaya with a 3-star rating. Besides that you need to complete Low Profile without triggering an alarm and collect 20 Intel Fragments (over 50 Intel Fragments available across old and new missions).
Crocodile Shoot three enemies while underwater in ‘Wetwork’.
MISSION 3: WETWORK
This is a pretty simple trophy. As soon as the mission starts, kill the first enemy and pick up his pistol. While underwater, shoot and kill 3 enemies. If it´s to hard hitting headshots while underwater, go for bodyshots.
Nessie Reach the barge without being seen in ‘Wetwork’.
MISSION 3: WETWORK
You want to kill most if not all enemies with headshots. Sometimes if you miss and hit their body, quickly shoot them again and kill them, before they trigger the alarm. If an alarm is triggered just reload from last checkpoint.
You want to pick off the enemies one by one, to the left and to the right. Keep a lookout for the boat patrolling down the middle of the map. After killing the enemies on the piers, line up your shots to kill the 2 enemies on the boat. Afterwards you need to go the barge, here are some enemies partolling and 2 standing still. You want to take out the patrolling enemies first, then the last 2 standing still. This way you won´t trigger any alarm. Just make sure that the patrolling enemies are far enough away from the others.
Daredevil While affected by one Flashbang, kill two enemies in the Campaign or in Co-op.
MISSION 6: CARTEL PROTECTION
This trophy can be earned almost anywhere in the game, as long as you have some flashbangs equipped. An easy play to get this is the start of Mission 6: Cartel Protection. The trophy probably won´t unlock right away, it will take you a couple of tries to get it. It has to be at the exact moment you are blinded, for the kills to count.
Nobody was There Never trigger the alarm in ‘Recon by Fire’.
MISSION 9: RECON BY FIRE
This can be a bit tedious. To unlock the trophy, you need to complete BOTH sniping sections without triggering an alarm. Before you shoot any enemies, wait for Price´s the callout on how low or high, you need to aim to kill the enemies. If you trigger an alarm, reload your checkpoint. It´s okay if you trigger an alarm during other sections of the missions – only the 2 sniping sections count for the trophy.
The trophy unlocks, when you kill the last enemy at the lighthouse, if you didn´t trigger any alarms.
Test Drive Drive five vehicle types in ‘Violence and Timing’.
MISSION 10: VIOLENCE AND TIMING
After falling out of the helicopter near the start of the mission, you will find yourself on the roof of a vehicle. From here you need to hijack it – this is the first vehicle type. There is a total of 6 different types you can hijack.
Big Transport Truck (the one you first land on falling out the helicopter)
Truck with enemies on it
Pickup Truck with enemies on it
Hummer (they have turrets on the top)
Civillian Truck
Civillian Car
The 2 civillian vehicles can be found on the side of the road. Park next to them for the opportunity to enter them – you can´t hijack the moving civillian vehicles driving on the road. Commandeer a total of 5 different types for the trophy.
Keeping this One Reach Price using the first vehicle you hijack.
MISSION 10: VIOLENCE AND TIMING
Near the start of the mission, you fall out a helicopter and land on the roof of a big truck. Hijack it and stay in it until you reach Price. This trophy can be really hard on “Veteran” difficulty. I recommend playing on “Recruit.” Avoid all collions with vehicles and obstacles. If you take a hit and suffer a lot of damage, reload last checkpoint. The hardest part about this trophy is halfway when you face an enemy throwing mines on the road. Again, if you hit a mine – reload last checkpoint.
The trophy unlocks when you reach Price and jump onto his vehicle.
Ghost-in-Training Reach the penthouse in ‘El Sin Nombre’ without killing anyone or triggering the alarm.
MISSION 11: EL SIN NOMBRE
The trophy can be earned right after the interrogation scene. Reach Alejandro without killing anyone or triggering an alarm. Reload your last checkpoint if you´re spotted. You need to pick up bottles you can throw to lure enemies away from your path.
The only difficult part is the last section when you´re on the roof. Throw multiple bottles to your right, to lure most of the enemies, peak over cover, and when it´s clear vault over it and crouch to the ladder. As soon as you reach the top, go prone to avoid detection. The trophy unlocks when you get out of the elevator and meet Alejandro.
Gentleman Thief Open three safes in the Campaign.
MISSION 11: EL SIN NOMBRE
MISSION 13: ALONE
There are 3 safes in the game, spread across 2 missions. The first safe is located in the mission El Sin Nombre. The last 2 are in the mission Alone.
EL SIN NOMBRE – After getting up to the first floor. Lure the guard away or kill him. Go down the walkway/balcony to reach a room. Open the closet to reveal the safe. The code is 02-02-19.
ALONE – When you reach the café, Ghost will make a joke about tea, Soap will respond: “F*cking brits.” Facing a case you can pry open, head left to find a door. Pry it open to reveal the safe. The code is 10-10-80.
ALONE – Right after the 2nd safe, at the mechanic with all the cars. Head into the office to your left after passing some parked cars – the safe is in the corner. The code to the safe is 37-60-80.
A Crappy Way to Die Kill the enemy in the porta-potty.
MISSION 12: DARK WATER
Near the very start of the mission, you group up with some teammates and head up a set of stairs. When you reach the top, there are two porta-potties. Shoot the one to the left before Alejandro does. There is an enemy behind the door.
Don’t touch the deck! In ‘Dark Water’ advance 90 meters towards the front of the ship without touching the deck.
MISSION 12: DARK WATER
Near the end of the mission, you´re sailing with Graves and end up crashing into the big freigther. The trophy starts here. Jump onto one of the moving containers or boxes. You need to time your jumps, and vault onto the various moving objects on the deck. If you fall down and hit the deck, reload your last checkpoint. You need to reach the very end without falling down. I recommend doing this trophy on Recruit difficulty. This can take alot of tries on Veteran before you get it, depending on your skill.
Gunless Finish ‘Alone’ without firing a gun.
MISSION 13: ALONE
I recommend attempting this trophy on Recruit difficulty, the last section on Veteran is almost impossible without firing a gun. You need to rely on your different throwables and melee for the entirety of the mission. Smoke bombs are especially good to evade the enemies. On recruit you can run past most enemies. When you reach the café area with enemies everywhere, use the smoke bombs to cover your run to the aqueduct. You can also just run up to enemies and melee them if you want. Complete the mission and the trophy is yours.
No time to lose Complete the CCTV sequence in four minutes.
MISSION 14: PRISON BREAK
The time requirement on this trophy is super tight. You want to make a practice run or two before attemting this. You need to time Ghost´s moments and attacks exactly to avoid getting spotted or killed. You can make a backup save before attempting this, if you don´t want to play the first part of the mission again.
Backpack Guy Kill gassed or blinded enemies using a Molotov, Semtex and Frag in ‘Prison Break’.
MISSION 14: PRISON BREAK
When you enter the prison, it´s possible to open your backpack and switch throwables. Hold UP on the D-pad to switch between them. Kill 3 different enemies which are blinded by flashbangs, with each type of lethal throwable. First throw a flashbang, then kill the enemy with a molotov for example. Switch to the next lethal throwable and repeat. Get a kill which each lethal on enemies blinded by flashbangs.
There are multiple options throughout the mission to restock all throwables.
Wall of Duty Kill three Enemies with the Riot Shield in the Campaign or in Co-op.
MISSION 14: PRISON BREAK
When you get to a long hallway inside the prison, you´re greeted by some enemies with riot shields. Kill them and equip one of their shields. Run up to enemies and melee them with the shield. Kill 3 enemies to unlock the trophy.
Practice makes Perfect Shoot all the targets in the training area in ‘Ghost Team’.
MISSION 16: GHOST TEAM
This trophy is best to attempt on Recruit difficulty, but it is doable on Veteran. At the very end of the mission, you fight a tank. This will take place in a training area with a total of 33 targets. Hit all targets and the trophy is yours. Do note that if you die, you need to hit all targets again.
Must be Wind Rescue the hostages in ‘Countdown’ without the enemies firing their weapons.
MISSION 17: COUNTDOWN
This trophy stretches over 3 different hostage situations at the start of the mission. You are rapelling down the side of a skyscraper and need to save all hostages. This trophy is all about timing, speed and lining up your shots.
1st hostage situation is super simple. Headshot the 2 enemies.
2nd hostage situations is a bit more tricky. Kill the 2 enemies to the left first, then the next enemy closest to the window. Finally there´s an enemy in the back – sometimes he spots you if you aren´t fast enough.
3rd hostage situation has 5 enemies present. Go all the way to the right first and line up the 2 enemies. Next you want to position yourself so you can kill the last 3 enemies at the same time. It´s possible to hit all 3 with 1 bullet.
Time for Pints Finish the Campaign on any difficulty.
Automatic story-related trophy, cannot be missed. Complete all 17 missions on any difficulty to unlock the trophy.
Cutting Heads off Snakes Finish all Campaign missions on Veteran or Realism difficulty.
If you have played previous Call of Duty games on Veteran, this shouldn´t be a problem. Alot of the sequences in the game is about stealth or involves set pieces. There are only a few areas that can be a bit troublesome.
Whenever you suffer damage – take cover! Stay in cover until your health has fully recovered. Always play it safe and don´t take chances. Pick the enemies off one by one and take it slow. Luckily checkpoints are plentiful. Use the riot shields whenever they are available – this is by far the best weapon on Veteran difficulty. You can run up to every enemy and melee them. This is especially useful during mission 14: Prison Break and mission 17: Countdown. You can complete the campaign in about 6 hours, even on Veteran.
When you start the game and continue your Veteran run, pause the game and make sure that you are on Veteran difficulty. Some players have reported that the game switch you back to Regular difficulty, when you continue your campaign.
The 1st mission in the Spec Ops Campaign is Low Profile. You only have to complete the mission under 16 minutes to get 3 stars and the trophy.
This is the easiest mission to earn 3 stars. It can be done with multiple deaths and still under 16 minutes.
Hellride Earn three Stars in ‘Denied Area’.
Deniead Area is the 2nd co-op mission. We completed the mission in 9:09 – even faster than Infinity Ward´s time! You only have to complete the mission under 16:00 to get 3 stars and the Hellride trophy. This is by far the hardest of the 3 missions, in my opinion.
You need kill RPG wielding enemies and Helicopters as soon as they spawn! This will take some practice. You need to know their spawns and have the correct equipment at the right time. 1 player drives while the other is on the roof destroying incoming vehicles. At every SAM Site (where your objective is), there will be some self-revive kits. Make sure you have one at all times. Sometimes high speed is best. Quickly plant the explosives and then run towards the nearest vehicle. Make sure that you shoot enemy RPG´s in the watchtowers on your way out.
Kings of the Mountain Earn three Stars in ‘Defender: Mt. Zaya’.
The 3rd mission is a bit different than the others. You have to complete the mission while keeping the enemies from planting no more than 3 bombs to earn 3 stars.
Always keep an eye on the radar to see if any enemies are nearing one of the zones. Sometimes they can plant a bomb right next to you, without you even realising it. They can be hard to spot at times. You need to use cash at your spawn point to give yourself an edge. But consider saving some cash for the later waves, like wave 4-6. Make use of the Demon Dogs AI and Sentry Turrets. They can keep and area clear for almost a full round. Beware of the Juggernaut thats spawn in wave 6, leave him for last – he can´t place any bombs.
Going Dark Complete ‘Low Profile’ without triggering any alarms.
This trophy can be super difficult if you play with a random. I highly recommend finding a friend with the same goal. You have to complete objective A, B and C without raising an alarm. The trophy unlocks when the exfil objective comes up on screen,. When you are in an objective area, use your geiger counter with L1 to find the crates you need to collect.
If you get spotted by the enemies, both you and your teammate can die on purpose and then reload last checkpoint – it doesn´t void the trophy. Sometimes when you get spotted and shot at, it does not necessarily set off an alarm.
Only the Beginning Earn at least one Star in Co-op.
This trophy will come naturally while going for 3 stars in each mission.
Full SSE Find 20 intel fragments in Co-op.
There is well over 20 Intel Fragments to collect in Spec Ops (co-op mode). At launch there was 3 available co-op missions –
Low Profile (20 Intel)
Denied Area (20 Intel)
Defender: Mt. Zaya (10 Intel)
Follow the video guide, and collect any Intel Fragments for a total of 20 to unlock the trophy. I recommend completing the mission after collecting Intel. Some players have reported that it can bug the in-game counter, when leaving a mission before completing it.
https://www.ben-gun.com/wp-content/uploads/2022/12/Adobe_Express_20221222_1207440_1.png7201280Ben-Gunhttps://www.ben-gun.com/wp-content/uploads/2022/12/cropped-Bengun-logo-new-300x257.pngBen-Gun2022-12-21 13:06:172023-01-10 19:58:09Call of Duty Modern Warfare II Trophy Guide & Roadmap
There is a total of 13 playable heroes – The Hunter (You), Blade, Ghost Rider, Iron Man, Nico, Magik, Captain Marvel, Doctor Strange, Spider-Man, Wolverine, Scarlet Witch, Captain America and Hulk.
Is Midnight Suns open world?
Midnight Suns have a hub world, much like the Mortal Kombat 11. You have a confined area where you can walk around, collect ingredients, open chests and complete different tasks to earn rewards.
Is Midnight Suns a turn-based game?
Midnight Suns is a tactical turn-based role-playing-game.
How long is Midnight Suns?
It will take the average player around 25-35 hours to complete the main story. The amount of hours depends on how much exploring you do in the hub world, how many general missions you complete and how much you explore other side activities.
Marvel´s Midnight Suns – Trophy Roadmap
Estimated trophy difficulty: 5/10
Approximate amount of time to platinum: 40-50 Hours
Free-Roam / Chapter Select after Story?: You can free-roam after completing the final mission
Release Date: December 2nd, 2022
STEP 1: COMPLETE THE MAIN STORY, MAKING ONLY LIGHT CHOICES + DAILY TASKS
Start the game on any difficulty, put it on Story Difficulty (Easiest Difficulty available) if you want less frustrations throughout. The game can be a bit challenging on Normal Difficulty at times. The most important part about your initial playthrough, is picking an alignment (Light or Dark) and sticking with it throughout the game. See A Shining Light for more.
Besides that, you want to talk with Heroes at the Abbey with a blue exclamation mark above their head, both day and night. They often have different alignment dialogue choices. New dialogue becomes available every time you get back from a mission, and wake up after sleeping (start a new day). Another easy way to get Light or Dark alignment points, is by completing Requests for Heroes around the Abbey.
Before you start a mission, make sure that you start a Research Project at the Forge – this will save alot of time later in Step 2. This works towards all Abbey Upgrades in one campaign.
The important thing to look out for is the missable trophy Extracurricular Activities. Accepct invites for the 3 different Clubs as soon as you recieve them. One of the Clubs are tied to story progression and lock out certain meetings if you progress to far without completing them. See the trophy for more info.
Each time you get back for a mission, look at your map to see if it´s “Waxing Moon.” You need to find 10 Wundagore Everbloom which only spawns during this time. See Wisdom of the Woods for more info.
Next point, you need to look out for the dog Charlie. You can open the map everyday to see where he´s located (the same with Heroes and available dialogue). You need to “Pet” or “Praise” him for 15 days straight – If you forget it before a mission, be sure that you find him before going to sleep – or else it resets your day count.
Last point is to find Ebony the cat and “Praise” her for a total of 4 days (have to be different days). She rarely spawns around the Abbey, or even further away around the map – again check your map every day and night to find her. This will save you some time later, better get this trophy out of the way as soon as possible.
Besides that, enjoy the game and explore the different features the game has to offer – this can save a bit of time later during Step 2.
After completing the main story, you want to focus on all the trophies you can get around the Abbey Grounds (hub area), completing the T.H.R.E.A.T. Room with all 13 Heroes, and all misc trophies that involves defeating enemies in certain ways or turns etc. See each individual trophy for more info. Some of these trophies are also earned automatically during Step 1. Like buying cosmetics, crafting Cards, modding Cards.
Before starting New Game+, you want to make sure that you got every trophy, besides A Gowing Darkness. Then, start New Game+ while making only Dark alignment dialogue choices. If you want to speed up the process, build a card deck using more Dark Balance Cards than Light Balance. See A Shining Light for a explanation on the alignment system.
Did We Just Become Best Friends? Reach the maximum Friendship Level with any hero.
The max Hero Friendship Level is 5. It takes a lot of XP to reach level 5. Focus on the same Heroes from the start. You will most likely earn this after completing the game the first time. Take the same Heroes with you during general missions, and always exhaust their dialogue at the Abbey.
Friendship is Magic Reach the maximum Team Friendship Level in the Abbey.
There are many different ways to increase your Friendship level with each Hero, and at the same time, your overall Team Friendship level.
Overview of ways you can improve all Friendships:
Completing missions with Superheroes
Spar with Superheroes at the Yard (available 1 time a day)
Complete Superhero Requests (ocassionally they have a request for you)
Take a Superhero to a Haven (discovered around the Abbey)
Complete Hangouts
Give Gifts during Hangouts
Complete Abbey Club Meetings (remember to accept invites via Superlink)
Give Compliments (you unlock Compliments by leveling up the Yard and completing Research Projects among others)
Pet Charlie (Pet Charlie every single day for some easy Friendship XP)
All of the above contributes to your overall Team Friendship Level – it´s level is determined by your Friendship Level with each indvidual Hero. You will most likely earn this near the end of the game, or when you´re cleaning up misc trophies in the end-game.
Hunter the Explorer Find every Haven on the Abbey Grounds in a single campaign.
There is a total of 15 Havens to discover around the Abbey. Havens look like a blue circle, with wind circling it – interact with it for it to register. You need to unlock all Words of Power around the Abbey Grounds, before you can unlock all Havens – some are hidden behind rocks where you need the Word of Power Break. See the trophies Atum´s Call (Reveal), Hyppus´Aid (Purify) and Set´s Favor (Break) on how to unlock each of them.
Cape of Many Colors Apply a Suit palette to every Hero in a single campaign.
To apply a Suit pallette to a Hero, you need to go the Hero you want to customise. Switch to the “Customization” tab and pick combat outfit. Here you can see a lot of color palettes to the right. Buy one for each Hero to unlock the trophy.
And Look Good Doing It Spend 1500 Gloss on cosmetic options for the Hunter.
Same as above – this time you just need to customise the Hunter. Buy any cosmetics that you like, for a total cost of 1500 Gloss.
Make a House a Home Purchase 10 different upgrades for the Hunter’s Quarters.
To customise the Hunter´s Quarters, you need to go to the Warderobe in your room, switch to the Quarters and buy any 10 upgrades. You unlock new Hunter´s Quarters upgrades by opening Arcane Chests around the Abbey.
Might Need Pockets Craft a combat item at the Item Bench.
First step is to research “Science Fair” in the Forge. After waiting a day, come back to the Forge to unlock the option to buy the Item Bench with Credits. After doing so, interact with it to craft any Combat Item for the trophy.
Fire Burn and Cauldron Bubble Use Agatha’s Cauldron to complete a Recipe.
Early in the game, Agatha will ask you to find a tunnel. You get a notification in the top left corner, where you see all your messages. Here you can toggle a waypoint to find the tunnel more easily. It´s located just north of the Abbey near the crater. There´s a ladder down which leads to an Ember. Interact with it, return to Agatha and pick up the Recipe Book when told. This unlocks Agatha´s Caludron for crafting different Resources, Gifts and more.
Craft any item to unlock the trophy. If you need to find specific ingredients, refer to Wisdom of the Woods.
With a Box of Scraps Craft a hero ability card in the Forge.
You unlock Card crafting by researching the Book of Vishanti, but there are a couple of steps to unlock it:
Finish two missions with Doctor Strange in your team.
Research Artifacts until you reach Forge Level 3.
Complete the Book of Vishanti research and spend credits to construct this Forge Upgrade.
After purchasing the upgrade in the Forge, you unlock the option “Card Crafting.” Craft any Card and your trophy will unlock.
You Absolute Legend Complete a Midnight Sun Challenge in the Forge.
Before you can complete a Midnight Sun Challenge (Unlocks legendary abilities), you´ll need to research “Forged In Hellfire.” You need to be Research Level 4 to research it. When you come back after a day, you´ll have unlock your very first Challenge which is for the main character Hunter. Watch the video below for a solution on Hunter´s Challenge.
If you want to unlock Midnight Sun Challenges for other characters, you need to level up their friendship to level 5. Except with Hulk – you need to research a level 15 item for his to unlock.
Fully Operational Build every Abbey upgrade in a single campaign.
There are 3 types of Abbey upgrades – upgrades for the Yard, War Room and the Forge. All upgrades starts in the Forge. You need to research them before you unlock them for purchase at their respective area. You need ALOT of Credits for all upgrades. If you still haven´t bought or researched all upgrades by the end of the game, keep replaying General Missions that yield a lot of Credits. The trophy unlocks after buying the final upgrade.
The Best Girl Pet Charlie 15 days in a row.
This is a pretty simple trophy, but you need to remember to “Pet” or “Praise” Charlie every day, for 15 days straight. You can use your map to find Charlie, he has a marker like every Hero. If you forget to pet Charlie before going on a mission, you´ll need to pet him when you get back, before going to bed – or else you´ll lose your Pet streak and have to start over.
NOTE: “Praise” does count as a “Pet.”
Unrequited Love Pet Ebony on 4 different days.
This trophy is a bit more tricky than petting Charlie. Ebony the cat has randoms multiple spawns around the map, Ebony usually spawns in Caretakers room or in the Library. You need to find and “Praise” her for a total of 4 days (have to be different days). Check your map before and after missions to find her.
Extracurricular Activities Attend all Abbey Club meetings in a single campaign.
This trophy will be one of your last during your clean-up. To attend a Club meeting, you need an invitation from Nico (EMO Kids), Robbie Reyes (Shop Class) or Blade (Book Meeting). When you have recieved an invitation, you´ll get a notification at the top of the screen, then open your Superlink to accept them. This trophy is missable because of the EMO Kids Club. They are tied to the main story. Accept invites as soon as you get them – this way you´re sure to get the missable meetings (EMO Kids). The last EMO Kids meeting is triggered when Scarlet Witch joins the team.
After accepting an invite, you´ll be able to talk to Nico, Robbie or Blade outside Hunter´s Quarters, depending on which meeting you have accepted (during nighttime after a mission). The first two Clubs, EMO Kids and Shop Class spawns as the story progresses. For the Book Meetings to spawn you´ll need to interact with the e-reader near the back of the library. After each Book Meeting there will be new book to interact with, to trigger the next Book Meeting.
This will take a couple of extra days after completing the main game. I was still missing 2 Book Meetings after the final story mission.
Spread the Pain Complete a Daily Sparring session with every hero.
Once a day, you can pick a Hero at the Yard to spar with – earning Friendship and Level XP. You can earn this trophy, when you have unlocked all characters near the end of the game. It´s a good idea to note which Heroes you have sparred with. There are no in-game indication of which Heroes you have left for the trophy.
List of Heroes you need to spar with:
Blade
Captain Marvel
Ghost Rider
Doctor Strange
Iron Man
Magik
Nico
Captain America
Wolverine
Spider-Man
Scarlet Witch
Hulk
Some Minor Adjustments Apply mods to 10 different hero abilities.
There is a few steps to unlock Card Modding. You need to research the Crucible at the Forge, then you´ll need to buy it at the Yard for 300 Credits.
Mod any 10 Hero Ability Cards to unlock the trophy. You will get this naturally, because you need stronger Cards for some of the last combat encounters in the story. Plus it makes the game less frustrating.
T.H.R.E.A.T. Eliminated Survive 3 turns in the THREAT Room with every hero.
Before you can attempt this trophy, you need to unlock the actual T.H.R.E.A.T. Room. Complete 3 missions with Magik and upgrade the forge to research level 4. Next you want to research “New Threat” and wait a day for the task to completed. The last step is to purchase the upgrade for 175 Credits in the Yard.
I highly recommend doing this after completing the main story. You need some good Cards for each Hero (preferably modded) and good Combat Items that can aid you in surviving the 3 turns.
The whole point of the T.H.R.E.A.T. Room is to survive for 3 turns, and wipe out most if not all enemies every turn. You are fighting alot of Soulless. If even 4 or 5 are left alive at the end of your turn, you´ll most likely end up dead. Whenever you defeat an enemy, you get your Card Play refunded. If it´s a yellowísh Soulless you defeat, then you draw a new Card. That´s why it´s important to defeat at least 1 enemy, each Card Play you use. I highly recommend using Combat Items that give Heroism and let you draw more cards. Like Overdrive Serum (Gain Heroism equal to the cost of all Heroic cards in your hand) and Utility Belt (Draw 2 cards).
List of characters you need to beat the T.H.R.E.A.T. Room with:
Elemental, My Dear Agatha Solve the mystery of Agatha’s Altar.
This mystery, like any other, takes place at the Abbey Grounds. Each Mystery tied to a trophy, is required to unlock a Word of Power. This mystery is tied to Reveal. See Atum´s Call on how to unlock it. There are a only two steps to completing Agatha´s Altar mystery.
Find all 4 Elemental Rods
Place them at Agatha´s Altar
Remember to collect the Moon Seal – it´s used for getting the Word of Power Reveal.
Atum’s Call Acquire the “Reveal” Word of Power.
This Word of Power is tied to Agatha´s Altar mystery. See the solution under Elemental, My Dear Agatha or watch the video below.
After completing the Mystery and earning the Moon Seal, you need to head over to the Blood Gate which is located to the east on the map. Note that it has to be night before you can interact with it. Complete the challenge to open the gate, and you´ll unlock the Word of Power, when you place the Moon Seal earned from Agatha´s Altar mystery.
Hyppus’ Aid Acquire the “Purify” Word of Power.
This Word of Power is tied to Miram Shaw´s Church mystery. See A Coven Restored for a text description on how to solve the mystery, or watch the video guide.
After completing the mystery and earning the Moon Seal, go to the next Blood Gate near the Everflowing Glade. You can find the gates by looking to the sky – there´s a light beam shining down on it.
Like the other gates, complete the Challenge to open it. Head inside and place the Moon Seal on the pedistal to unlock “Purify.”
Set’s Favor Acquire the “Break” Word of Power.
This is the last and one of the simplest Words of Power to unlock. You need the other Words of Power, before you can access this area.
The Keymaster Open 25 Arcane Chests.
You need to open 25 Arcane Chests, located around the Abbey Grounds. Each Chest require a Arcane Key to open. Throughout the game, you can earn Arcane Keys in various ways. You can complete Requests for Heroes, spar with them in the Yard, find the keys around the Abbey and more. You will have opened way over 25 Arcane Keys before you start your New Game+ playthrough.
The only thing you need to be aware of, is that Arcane Chests respawn after a few days. Just open a couple of Chests once in a while – it would be a pain to need all 25 by the end of the game because of respawn time.
A Coven Restored Solve the mystery of Hiram Shaw’s church.
This is the longest mystery in the game, it stretches over a few Days. You need to have unlocked the Word of Power Reveal to unlock this area. See Atum´s Call on how to unlock it the word.
Get to Hiram Shaw´s Church
Talk to Agatha at the Church (if she isn´t there, wait a Day)
Explore the Church (you need to use “Open” on the doors, and “Reveal” near the papers on the table)
Talk to Dr. Strange
Wait 1 Day, then you can talk to Dr. Strange again the next morning
Retrieve the Vial of Symbiote (unlocks after fighting Fallen Venom in the clocktower as a part of the main story)
Return to the cave, and interact with the bones
Inspect the drawings on the table
Wait 1 Day, and then talk to Agatha to start the Stained Soil search
You can find all 3 locations in the video below
Talk to Agatha again
Find the Hanging Tree near the Everflowing Glade (use “Reveal” near the tree)
Pick up the Moon Seal
That completes the mystery and unlocks the next Blood Gate. Here you unlock the next Word of Power Purify. See Hyppus´Aid for more.
A Mother’s Gift Solve the mystery of Lilith’s Garden.
See Set´s Favor on how to earn the Word of Power Break, and complete the mystery of Lilith´s Garden – it´s only possible after earning the last Word of Power.
After earning “Break,” go back to Lilith´s Garden, you´ll see a stone wall behind the statue of Agatha. Use “Break” on the wall to reveal a ladder going down to a new area. Simply interact with it to complete the mystery – the trophy unlocks after the cutscene.
A Shining Light Reach maximum Light Balance.
Near the start of the game you´ll be introduced to the Light and Dark Balance system. To reach maximum Light or Dark alignment you need a total of 200 points. There are a different couple of ways you can affect this Balance, which are:
Dialogue – Light and Dark dialogue choices are marked with a white (Light) or black (Dark) icon.
Completing specific requests for heroes – some requests give muiltiple Dark or Light alignment points.
Playing specific Hunter cards – if you use 3 Light cards (Heal for example) and 1 Dark (Whip for example, then you wil get 1 Light point at the end of the fight.
If you stick with one alignment through the whole game, then you will achieve maximum Light/Dark Balance before the end of the game.
A Growing Darkness Reach maximum Dark Balance.
See A Shining Light for more info of the Light/Dark Balance system.
You need to start a New Game+ to earn this trophy, if you want to earn it the quickest way possible. If you start by getting 200 Light points (max alignment level), then you will need 400 Dark points to reach maximum Dark Balance. That´s why it´s faster to start a New Game+ – you will win the encounters easier and quicker, and get all the story-related dialogue where you can get alot of points towards Dark Balance.
On New Game+ it took me 27 in-game days to reach maximum Dark Balance.
Fully Armed Acquire every Hunter ability.
You will naturally unlock most of the Cards while playing the game. When you study Gamma Coil and new Hunter Cards show up (marked by “new” in the bottom), pick them to save them to your deck. Another method is simply crafting the Cards you don´t own. If you don´t have the trophy by the end of the game, go to Card Crafting and craft the last ones you need – see With a Box of Scraps on how to unlock Card Crafting.
List of Hunter abilities/Cards needed for the trophy:
All Out
Annihilation
Bands of Fire
Bladestorm
Call to Arms
Charge
Dark Blessing
Dark Heal
Deadly Ground
Fortify
Fury
Guarding Strike
Heal
Holy Burst
Holy Flame
Holy Gift
Holy Spark
Inspire
Last Sight
Merciless
Mindbender
Mindbreaker
Morning Star
Patience
Quick Slah
Slash
Whip
Wild Strike
Wrath
See You Absolute Legend on how to unlock Midnight Suns Challenges, and unlock the Legendary Card “Bladestorm” for the Hunter.
NOTE: You don´t need Legendary Cards earned from the Light or Dark Balance system to unlock this trophy.
In order to unlock Mission Challenges, you need to research “Sitrep” which unlock the T.A.L.O.N. upgrade in the War Room. Purchase the upgrade for Credits and it will unlock Challenges on each general mission. Before starting a general mission, you will see the Challenges to the right – here you need to activate them in order to complete them. It costs Intel to activate these Challenges, so if you feel like you aren´t going to complete the challenge, restart the encounter or reload your autosave from before you started the mission. This way you keep your Intel and can try again.
Complete any 10 Mission Challenges to earn the trophy.
You Have the Lead Complete a general mission led by every hero
When you look on a generel mission, you´ll see at Hero icon – that´s the Hero leading the mission. Complete 12 generel missions led by every Hero to unlock the trophy. There is no in-game counter or indication on which you have completed, take notes yourself to keep track.
List of characters that need to lead a general mission:
Blade
Captain Marvel
Ghost Rider
Doctor Strange
Iron Man
Magik
Nico
Captain America
Wolverine
Spider-Man
Scarlet Witch
Hulk
Back in Time for Lunch Complete a general mission in 2 turns or less.
I recommend playing an Easy difficulty mission, where you need to defeat a Nest Mother. Abuse the best Combat Items you have and use your best Heroes. If you fail to complete a specific mission in 2 turns or less, simply pause the game and restart the encounter.
If you pick a mission with “Defeat the Nest Mother” as the objective, first you want to destroy the enemies shield – the one guarding the next mother, next you want to damage her with everything you got, also use Cards with Quick to destroy some of her totems This causes some damage to her even though she´s protected. You can also use Shove to push an enemy into a totem for a bit of extra damage, without expending a Card Play. Again, restart encounter if you fail to defeat her in 2 turns or less.
We Have Ways Interrogate 5 enemies.
Before you can interrrogate enemies, you need to go through a couple of steps:
Complete one Hero Op with Captain Marvel
Reach research level 4 by studying Artifacts in the Forge
Research “Truth Serum”
Build the Strike Terminal in the War Room
Now, when you go on missions and defeat Hydra personnel, there´s a small chance that they become vulnerable for interrrogation. You need to play the “Interrogation” card which spawns in your hand, before the enemy is completely knocked out. The card show how many moves you can perform before you lose the option to interrogate the enemy.
Interrogate a total of 5 enemies for the trophy. Interrogating enemy gives you a bunch of Intel, which you can use on completing Mission Challenges.
KKRRAKATHOOM Spend 10 Heroism with a single ability.
The easiest way to get this trophy is to use an ability, marked with “X” in Heroism cost. Captain Marvel has an epic card called “Rain of Blows” which expends all available Heroism. Go to any mission, or the T.H.R.E.A.T. Room (if you want to keep your Combat Items completing/failing the encounter), build up a total of 10 Heroism. Wait until you have the “Rain of Blows” Card in your hand, and use it on any enemy to expend all your Heroism.
Quantity is Quality Use 8 hero abilities in a single turn.
You will get this trophy while going for T.H.R.E.A.T. Eliminated. When you are in the THREAT Room, all your Card Plays are refunded as long as you defeat at least one enemy with that Card. This extends your turn to as many enemies that you can defeat in one turn. There are way over 8 enemies when starting, simply defeat 8 using 8 Cards or more – as long as it´s during the same turn, you unlock the trophy.
Collateral Damage KO 4 enemies with a single environmental.
This trophy can be really frustrating, but there is an easy way to achieve. First you need to unlock the T.H.R.E.A.T. room – See T.H.R.E.A.T. Elimintated on how to unlock this option.
You need to use Magik and equip some specific Cards, which are:
Gather (brings enemies together. Modded version of the cards increases it´s area of effect)
Trap Door (moves an enemy to a desired spot)
It can be a bit tricky to get 4 enemies together during the first round + getting the desired Cards. Equip some Combat Items like Utility Belt, it lets you draw 2 more Cards. You can also equip Overdrive Serum to give yourself more Heroism (it´s unlocked late in the game), but you can do it without it.
Get enemies close to each other and get them to low health, again it can be a bit tricky and take a couple of tries. Gather enemies in one place, and move single enemies with Trap Door to set them up for an Enviromental explosive. Trigger the explosives when 4 enemies are close to each other and low on health.
Dream Team KO a villain with a Hero Combo.
First you need to unlock Hero Combo Cards. These type of Cards unlock pretty early in the game. You need to level up a Hero´s Friendship level to 1 and bring them into battle. The damage of these Cards are tied to the specific Hero´s Friendship Level that you are comboing with. These Cards have small chance of appearing in your hand when you draw Cards, so it is a bit luck-based. KO any Villian with any Hero Card to unlock the trophy.
Villians include:
Fallen Venom
Crossbones
Fallen Sabretooth
Fallen Scarlet Witch
Fallen Hulk
Dread Maiden
Speed Kills KO a villain with a Quick ability.
This trophy can earned on many occations during your regular playthrough. Many Heroes have Cards with “Quick.” This is usually a low damage Card that refunds a Card Play if it K.O.´s the targeted enemy. Lower any villians health low enough, activate your Quick Card and hover over the Villian. If he has a K.O. above his head, then you´ll know that he/she will get knocked out by the attack.
Villians include:
Fallen Venom
Crossbones
Fallen Sabretooth
Fallen Scarlet Witch
Fallen Hulk
Dread Maiden
Kitchen Sink Use 5 environmentals in a single turn.
This trophy is earned the easiest during an encounter in the T.H.R.E.A.T. Room. See T.H.R.E.A.T. Eliminated on how to unlock this option.
Equip any Combat Items that give Heroism (this is used for triggering the 5 enviromentals), and pick any Hero that you like. I recommend building your Heroism the first round, if you don´t have any good Combat Items that give Heroism. It´s important that you don´t knock any enemies into the explosives, you need these available during the turn you attempt this trophy.
With 5 Heroism, start by interacting with the platform in the middle and hit 1 enemy. Next you want to explode all 4 explosives around the center. If all 5 are used in on turn, the trophy unlocks.
Wilhelm Scream Knockback 2 enemies into Drops in a single turn.
This trophy requires you to insta-kill two enemies by dropping them into Drops. This can be the edge of the map, or Drops created with Hero Cards. First you need to Knockback Cards in hand, then you need to line up your Heroes. Line them up so you can knockback the enemies into your desired Drop area.
The easiest way is to drop two minion enemies – they have a 100% chance to K.O. when dropped, or damaged by anything. Keep an eye for an opportunity through the course of the game, then it will come naturally.
Not a Scratch Complete a general mission where no hero takes Health damage.
This trophy can be a bit tricky. I would recommend attempting this later in the story, because you´ll have better Hero Cards and more and better Combat Items. Pick a general mission with “Easy” as difficulty. The goal is to end the mission as quickly as possible. Do note that it is HEALTH damage, it´s okay that enemies chip away on your block.
You can abuse Combat Items to give 1 Hero Block and taunt all enemies. Wolverine could be good for this strategy, or even Captain America.
Pinball Wizard KO multiple enemies with a single Knockback 25 times.
This is easiest done on the minion enemies – they take one hit to K.O. Use one card which has “Knockback,” direct the line so it hits another enemy. The game needs to display K.O. above the two enemies for it to count towards the trophy.
You will most likely get this without even trying, and also pretty early in the game.
Needful Things Use 25 combat items.
You will most likely get this trophy by just playing the game. Combat Items are single-use Cards you can use 1-3 times during one encounter, depending on the amount of slots you have (You get more slots by researching projects at the Forge).
Trading Up Redraw 75 cards.
Throughout the course of the game, you´ll end up redrawing a lot of Cards. This is done by holding [square] during your turn. This trophy will come naturally while playing the game.
Big Guns Use 3 different Legendary hero abilities in a single mission.
This trophy is almost impossible to miss. During the final mission of the game you will get alot of legendary Cards (only for the duration of the mission). You need to play many of these to actually complete the missions, because of the amount of enemies. If you didn´t get during your first completion of the mission, you can simply replay it over and over. You are teleported back to the point before you started the mission, after completing it.


 , 7
, 7 , 6
, 6 , 10
, 10 )
)


 Ben-Gun


 on Sanji >
  to view Field Skills > Put 6 Cube Fragments into “Cook” > This unlocks all of Sanji’s Recipes.


 to stop the wheel from spinning – hopefully it will land on the Galaxian. The hardest Galaxian to land is the 3rd and the last one (the last wheel will spin really fast). Whenever you complete a level, attempt to land a Galaxian to get avoid replaying levels later on, just to get a chance to earn this trophy.
 to throw a Pac-Dot. Defeat a total of 100 enemies to earn the trophy. To avoid farming after game completion, use the Pac-Dot throughtout the game to occasionally defeat some enemies.
 to check your total score (it’s listed on your save file).