One piece odyssey 100% guide. Trophy guide. All collectibles. One piece trophy guide. One piece Odyssey all 99 yaya cubes, one piece odyssey 100%

One Piece Odyssey Trophy Guide & Roadmap
One Piece Odyssey Trophy Guide

Roadmap

  • Estimated trophy difficulty: 3/10
  • Approximate amount of time to platinum: 30-40 Hours
  • Offline Trophies: 51 (1trophy, 2trophy, 9trophy, 39trophy)
  • Online Trophies: 0
  • Hardest Trophiestrophy Challenge Enemy Conqueror
  • Number of missable trophies: 0
  • Glitched trophies: 0
  • Does difficulty affect trophies?: No – there are no difficulty settings
  • Minimum Playthroughs: 1
  • PS4/PS5 Crossbuy: Yes
  • Free-Roam / Chapter Select after Story?: Yes – you can revisit every area after completing the main story.
  • Release Date: January 13, 2023

STEP 1: Complete the Main Story

Complete the Main Story and enjoy the game. If you want, collect some of the Cube Fragments for each character (used to upgrade abilities) and some (or all) 99 Yaya Cubes. Keep an eye on the 2 Collectible Guides below if you want to save some time during the later steps. If not, you’ll revisit all locations more than you have to while going for 100%. There will be plenty of backtracking and revisiting old locations as part of the Main Story and Side Stories.

I recommend that you run around as Sanji, Nami and Robin when you’re exploring. You need to find 20 Robin Items, 25 Sanji Items and 25 Nami Items. But don’t worry there are way more than 20 and 25 hidden in the game, they can just be hard to find. If you play as the characters above, you can spot the Items from a distance. Whenever you are close to one of the Items, that specific character will call it out, somehing like “Oh!… My money!” – then switch to the specific character and pick up the Item. You unlock the last ability tied to these trophies in Chapter 4 – Robin’s Appraisal ability.

IMPORTANT: Don’t craft to many Recipes with Sanji and Trick Balls with Usopp. You need to craft one of each Recipe of food and Trick Ball for 2 different trophies. Many of the ingredients are sadly random spawns. Make a list of which Recipes you’ve already made, there’s no in-game counter or way identify which you still need to make. These can potentially be your last 2 trophies.

Trophies earned during this step:


STEP 2: Complete All Side Stories and Collect All Collectibles

Now is the time for the huge clean-up, completing what you have left of side activities. That Includes:

  • 71 Side Stories
  • 14 Memory Links
  • 30 Bounties
  • 22 Locked Chests
  • 25 Sanji Items
  • 25 Nami Items
  • 20 Robin Items
  • 10 Bridges (Franky)
  • 27 Recipes
  • 18 Trick Balls
  • 296 Character Cube Fragments
  • 99 Yaya Cubes

Focus on completing all Side Stories and Memory Links first, while collect all 99 Yaya Cubes, Locked Chests and the last Cube Fragments you may or may not need along the way. Refer to the following guides:

Besides that, collect the character specific Items when you run back and forward betweeen locations. You may already have unlocked multiple of the trophies listed below during Step 1. Hopefully you’ll have enough ingredients by now to make the last Recipes and Trick Balls.

Trophies earned during this step:


STEP 3: Defeat All Powerful Enemies and Farm to LVL 70

When you complete Side Story #71: Challenge Cube, you unlock all 11 Powerful Enemies (Yellow Cubes). These cubes contain different Boss Fights from the Main Story. You have to defeat each Boss twice for the trophy Challenge Enemy Conqueror trophy. Equip your best accessories and fuse as many effects as you like. Note that if you fuse, for example, 100% Damage Resistance to Technique, then you’ll be immune to that specific enemy type, only recieveing 1 hitpoint damage every attack. Refer to One Piece Odyssey Challenge Enemy Conqueror Guide (All Powerful Enemies) for more.

Farming to LVL 70 (or higher) before the Boss Fights will make them even easier – See trophy High Leveler.


Trophy Guide

Odyssey Master
The Mark of a True Adventurer

Earn all other trophies in One Piece Odyssey to unlock the Platinum.
High Leveler
Got everyone past level 70.

You will be at around Level 50 after defeating the Final Boss. Defeating all powerful enemies twice and completing all Side Stories will get you to around Level 60-63. Luckily there is a quick way to farm the last Levels up to 70. It will take you 30-60 minutes to reach Level 70 with the method above.

Challenge Enemy Conqueror
Defeat all the powerful challenge enemies twice or more.

> One Piece Odyssey Challenge Enemy Conqueror Guide (All Powerful Enemies)

Final Chapter Clear
Cleared the final chapter.

Automatic story-related trophy, cannot be missed. This trophy unlocks when you complete chapter 9.

Pit Stop Pro
Cleared all side stories.

> One Piece Odyssey All Side Stories Guide

Bounty Hunter
Turned in all bounties.

There is a total of 30 Bounties in the game. Complete Side Story #3: Meditator Marzin’s Quest located in Nanohana (Alabasta) to unlock bounties – refer to One Piece Odyssey All Side Stories Guide.

The Bounties are spread out on 3 Memorias:

  • Alabasta (10 Bounties)
  • Water Seven (10 Bounties)
  • Dressrosa (10 Bounties)

You accept bounties from taverns, they are found in the big city areas. Note that some bounties need to be completed before you unlock the new ones. For example, the Bulbro Brothers – there are 4 bounties tied to them alone. You have to complete the first in Alabasta (Side Story #3) before you unlock the next in Water Seven, then the 3rd in Dressrosa and then the 4th after completing every other Bounty.

If you don’t have the option to hunt all 10 Bounties in Water Seven, go to Alabasta anc complete all the Bounties in that Memoria. Another option is to complete the available Bounties in Water Seven and then check back to the Bounty Board in the Tavern to accept new ones.

Certified Fray Fixer
Cleared all Memory Links.

You are introduced to Bond Arts in Chapter 2 (Alabasta). This unlocks the Memory Links spread across the 4 Memorias. There is a total of 14 to complete.

You can see all Memory Links from the pause menu under Episode > Memory Links. They are listed with the area they are located it along with a map marker.

Top Cook
Made all recipes.

There is a total of 27 Recipes in the game. It’s possible to upgrade Sanji’s Cook Skill upon completing Chapter 6 (Marineford). You can cook with Sanji at every Camp and Tavern. Each Recipe require specific ingredients to be made. Note that many of the ingredients in the game are RANDOM drops.

Go to the Pause Menu > Crew > Press :triangle: on Sanji > :r1: to view Field Skills > Put 6 Cube Fragments into “Cook” > This unlocks all of Sanji’s Recipes.

This trophy and trophy Trick Ball Whiz share the same issue and solution. If you find yourself needing specific ingredients after completing everything else, I recommend going to the Water Seven City Area. Run around as Luffy and grab every ingredient you can. Also switch to Usopp to shoot down bird nests and collect the ingredients.

You can get ingredients like Ringing Apple, Cold Plant Juice, Tree Melon all kinds of Bugs and more. That are usually some of the ingredients people need for the last Recipes or Trick Balls.

Trick Ball Whiz
Made all Trick Balls.

There is a total of 18 Trick Balls in the game. It’s possible to upgrade Usopp’s Make Skill upon completing Chapter 6 (Marineford). You can make Trick Balls with Usopp at every Camp and Tavern. Each Trick Ball require specific ingredients to be made. Note that many of the ingredients in the game are RANDOM drops.

Go to the Pause Menu > Crew > Press :triangle: on Usopp > :r1: to view Field Skills > Put 6 Cube Fragments into “Make” > This unlocks all of Usopp’s Trick Balls.

This trophy and trophy Top Cook share the same issue and solution. If you find yourself needing specific ingredients after completing everything else, I recommend going to the Water Seven City Area. Run around as Luffy and grab every ingredient you can. Also switch to Usopp to shoot down bird nests and collect the ingredients.

You can get ingredients like Ringing Apple, Cold Plant Juice, Tree Melon all kinds of Bugs and more. That are usually some of the ingredients people need for the last Recipes or Trick Balls.

Treasure Hunter
Opened all the locked treasure chests.

There’s a total of 22 Locked Chests in the game. You can unlock the key for the chests in Chapter 8 (Dressrosa). You need to complete a total of 12 Side Stories to unlock the key. There are 3 quiz Side Stories tied to 4 different characters. They have to be completed in the right order to unlock next series of Side Stories.

Order of completion

  • Grand Line Quiz Kid Level 1-3 (Alabasta)
  • Grand Line Quiz Lady Level 1-3 (Water Seven)
  • Grand Line Quiz Madam Level 1-3 (Marineford)
  • Grand Line Quiz Mister Level 1-3 (Dressrosa)

You earn the key upon completion of the 12th Side Story. Refer to One Piece Odyssey All Side Stories Guide if you need help with unlocking the key.

NOTE: 2 of the Locked Chests in Alabasta require certain materials to reach – Franky needs to build the bridges to reach them. Refer to trophy Franky Skywalk for the material locations.

Challenge Enemy Beginner
Defeat one powerful challenge enemy.

> One Piece Odyssey Challenge Enemy Conqueror Guide (All Powerful Enemies)

Battle Master
Won 300 Battles.

This trophy will be one of your last before you earn the Platinum. You can farm battle in the deserts in Alabasta, run around and defeat enemies. I recommend enabling “Auto Battle” to make it a bit easier on yourself.

Chapter 1 Clear
Cleared Chapter 1

Automatic story-related trophy, cannot be missed.

Chapter 2 Clear
Cleared Chapter 2

Automatic story-related trophy, cannot be missed.

Chapter 3 Clear
Cleared Chapter 3

Automatic story-related trophy, cannot be missed.
Chapter 4 Clear
Cleared Chapter 4

Automatic story-related trophy, cannot be missed.

Chapter 5 Clear
Cleared Chapter 5

Automatic story-related trophy, cannot be missed.
Chapter 6 Clear
Cleared Chapter 6

Automatic story-related trophy, cannot be missed.
Chapter 7 Clear
Cleared Chapter 7

Automatic story-related trophy, cannot be missed.

Chapter 8 Clear
Cleared Chapter 8

Automatic story-related trophy, cannot be missed.

Trick Ball Beginner
Made 10 Trick Balls.

See trophy Trick Ball Whiz for more info.

Chasing Champion
Fused 30 accessories.

Robin’s Mystery Craft unlock upon completion of Chapter 2 (Alabasta). There will be a small tutorial on how you fuse accessories, Pick any two accessories and fuse them together. Repeat for a total of 30 times to unlock the trophy. This game mechanic is essential to surviving the Boss Battles later in the game.

Craft Enthusiast
Fused 5 accessories.

See trophy Chasing Champion for more info.

Jewelry Master
Made an accessory with 4 effects.

Upon completing Chapter 6 (Marineford), you unlock the opportunity to upgrade Robin’s Mystery Craft. Go to the pause menu and press :triangle: when hovering over Robin. This access her Upgrade Abilities screen, next you want to press :r1: to acces her Field Skills – Put 6 Cube Fragments into “Fuse” to unlock the ability to fuse accessories with 4 effects.

You can take Cube Fragments from her Battle Skills if you don’t have enough to upgrade “Fuse.” You can move the Cube Fragments around as much as you like.

I smell an adventure!
Cleared 10 side stories.

> One Piece Odyssey All Side Stories Guide

Journeyman Hunter
Turned in 10 bounties.

See trophy Bounty Hunter for more info.

Fixed a Fray
Cleared 5 Memory Links.

See trophy Certified Fray Fixer for more info.

Party Animal
Had 30 parties

You are introduced to parties in Chapter 2 in the area “Desert near Nanohana.” You can hold a party at Camps and Taverns/Inns. When you are at a Camp, interact with the bonfire to start the party. If you are in a Tavern/Inn, talk with the person behind the bar and choose “Have a Party.” Holding a party increases your EXP for the next couple of fights.

Repeat 30 times to unlock the trophy.
Collector
Collected 99 Yaba Cubes

> One Piece Odyssey All 99 Yaya Cube Locations
Cube Collector: Luffy
Collected 50 of Luffy’s cube fragments.

> One Piece Odyssey All Cube Fragment Locations
Cube Collector: Zoro
Collected 50 of Zoro’s cube fragments.

> One Piece Odyssey All Cube Fragment Locations

Cube Collector: Nami
Collected 30 of Nami’s cube fragments.

> One Piece Odyssey All Cube Fragment Locations
Cube Collector: Usopp
Collected 40 of Usopp’s cube fragments.

> One Piece Odyssey All Cube Fragment Locations

Cube Collector: Sanji
Collected 40 of Sanji’s cube fragments.

> One Piece Odyssey All Cube Fragment Locations

Cube Collector: Chopper
Collected 30 of Chopper’s cube fragments.

> One Piece Odyssey All Cube Fragment Locations

Cube Collector: Robin
Collected 30 of Robin’s cube fragments.

> One Piece Odyssey All Cube Fragment Locations
Cube Collector: Franky
Collected 20 of Franky’s cube fragments.

> One Piece Odyssey All Cube Fragment Locations

Cube Collector: Brook
Collected 6 of Brook’s cube fragments.

> One Piece Odyssey All Cube Fragment Locations

Saving Savant
Obtained a total of 20,000,000 berries.

This trophy will come naturally. When you have completed everything (Bounties, Side Stories etc.) in the game, you’ll have amassed way over 20 million berries.

Bond Battler
Activated 20 Bond Arts.

You are introduced to Bond Arts in Chapter 2 (Alabasta). Completing the story-related Memory Link unlocks your first Bond Art. Whenever you are in battle, you have 4 options – Items, Attack, Skill and Bond Art.

Activate 20 Bond Arts to unlock the trophy.

Singular Strike
Did more than 10,000 damage to an enemy with a single attack.

This trophy will come naturally near the end of the game, or when you defeat all Powerful Enemies twice (end-game). Equipping new and better Accessory with good ATK stats, increase your damage and makes it possible to damage way over 10,000.
Gum-Gum Rocket
Traveled with Gum-Gum Rocket 100 times.

This trophy comes naturally. Many sections in the game require you to use Luffy and grapple around various Ruins and Caves.
Iron Door Slicer
Cut 20 doors with Zoro’s Door Slice.

The first time you visit the Lake Shore Cave, you reach a steel door. There will be a little tutorial on how Zoro can cut these doors. All steel doors in the game respawn over time. This trophy will most likely come naturally. If you need to farm the trophy, go to Tower of Law (Water Seven) and cut up all the cell doors – there’s about 8-10.

NOTE: If you come across a steel door you can’t cut, go to the pause menu and press :triangle: when hovering over Zoro. This access his Upgrade Abilities screen, next you want to press :r1: to acces her Field Skills – Put 6 Cube Fragments into “Door Slice.”

Usopp’s Slingshot
Used Usopp’s Shot 100 times.

You are indtroduced to Usopp’s Slingshot in Chapter 2 (Alabasta). Usopp can shoot down bird nests or destructibles around the different areas. There is an easy way to get the trophy, this will save you a lot of time running around.

Go to the Dust or Ice Block Ruins in Waford. You can shoot some of the buttons in the enviroment. Shoot any of these buttons a total of 100 times to unlock the trophy.

Archaeologist’s Appraisal
Robin collected 20 items with Archaeologist’s Appraisals.

Archaeologist’s Appraisal unlock during Chapter 4 (Water Seven) when you’re in the Tower of Law. There are more than 20 items to find the game, but because you unlock this skill about halway into the game, you won’t get this naturally. Just like Nami’s and Sanji’s skills, Robin will call out when you are near one of her items. Switch to Robin to locate it and pick it up. When you play as Robin, you can spot the items from a distance, then you don’t have to be atop of the item before she call it out.

Robin’s items are usually located in Ruins in Waford or around different monuments or archaelogical wonders. You might have to revisit the Ruins in Waford to collect 20 of Robin’s items.
Cook’s Nose
Sanji collected 25 items with Cook’s Nose.

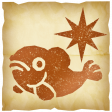
Sanji’s Cook’s Nose ability unlocks in Chapter 2 (Alabasta). There are more than 25 of Sanji’s items throughout the game. Whenever you play as Sanji, you can spot the items from a distance (the icon looks like a blue fish).

A lot of Sanji’s items can be found in City Areas (Alubarna, Water Seven City Area and Dressrosa City Area).

Treasure Sensor
Nami collected 25 items with Treasure Sensor.

You are indtroduced to Nami’s Treasure Sensor in Chapter 2 (Alabasta). There are more than 25 of Nami’s items throughout the game. Whenever you play as Nami, you can spot the items from a distance (the icon look like a dollar sign).

A lot of Nami’s items can be found in City Areas (Alubarna, Water Seven City Area and Dressrosa City Area).

Franky Skywalk
Built a bridge 10 times with Franky Skywalk.

You unlock Franky’s Skywalk after completing Chapter 4 (Water Seven). There is exactly 10 bridges in the whole game. The bridges that Franky build during cutscenes does not count towards the trophy. Before you can even build the bridges, you need different materials to build them.

Steel Bolts and Junk are the two you’ll need the most, they are found pretty much anywhere, especially in the Dressrosa Memoria. Bolts and Junk can be picked up from the ground like normal items or found in chests.

Next is the Wotz Steel Bolts, there are exaclt 2 of them in the whole game – they are needed to built the bridge in Marienford. The Bolts are located near the bridge.

Last on the list is the Carbon Bolts, they can only be found in chests around Dressrosa. Carbon Bolts are needed for 4 of the bridges.

Victor
Won 50 battles

See trophy Battle Master for more info.

Escape is Victory
Ran from three battles.

During any battle, press :triangle: and scroll down to “Run From Battle.” Repeat for a total of 3 times to unlock the trophy

One piece odyssey 100% guide. Trophy guide. All collectibles. One piece trophy guide. One piece Odyssey all 99 yaya cubes, one piece odyssey 100%

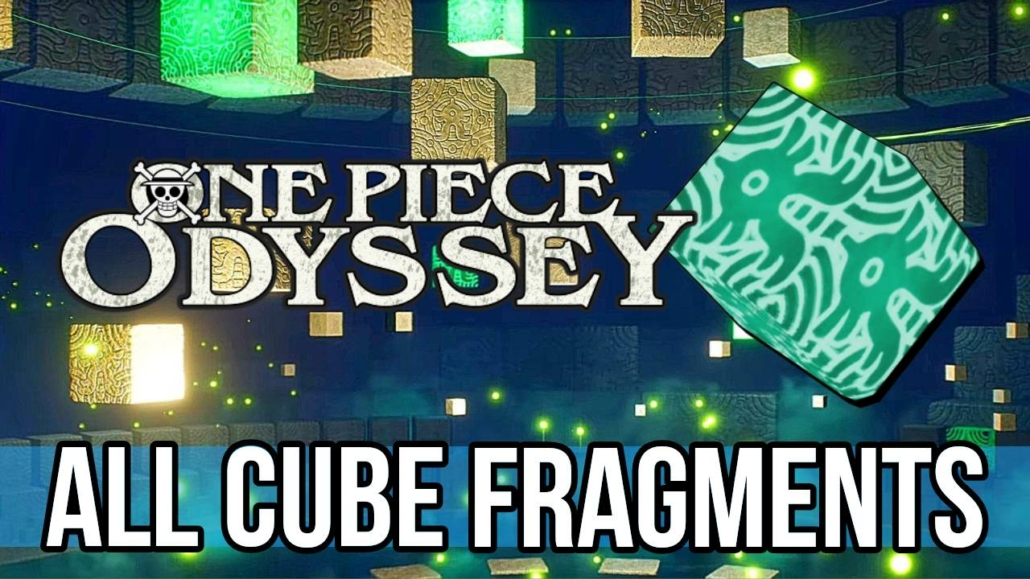
One Piece Odyssey All Cube Fragment Locations

Character Cube Fragments are used to upgrade each character’s abilities and skills. They look like green cubes and are scattered across every area in the game. They are also included as rewards on some Side Stories. You need to collect a total of 296 Character Cube Fragments divided across the 9 main characters. This may sound like a lot, but actually this have a chance of unlocking naturally by the end of the game, depending on how much exploring you’ve done and how many Side Stories you’ve completed.

Trophies earned following this guide:

  • trophy Cube Collector: Luffy – x50 Cubes required
  • trophy Cube Collector: Zoro – x50
  • trophy Cube Collector: Usopp – x40
  • trophy Cube Collector: Sanji – x40
  • trophy Cube Collector: Nami – x30
  • trophy Cube Collector: Robin – x30
  • trophy Cube Collector: Chopper – x30
  • trophy Cube Collector: Franky – x20
  • trophy Cube Collector: Brook – x6

If you need some Cube Fragments for a specific character after completing the main story, I recommend following the videoes for the last areas of the game. 1 cube pickup can give up to 6 Cube Fragments in the Dressrosa Memoria and Sky Tower (Waford). For example, you pick up one green cube and get Usopp’s Cube Fragment x3 + Franky’s Cube Fragment x3.

Jump to a specifc section:

Related posts:

Waford

Alabasta

Water Seven

Marineford

Dressrosa

One piece odyssey 100% guide. Trophy guide. All collectibles. One piece trophy guide. One piece Odyssey all 99 yaya cubes, one piece odyssey 100%

One Piece Odyssey All Side Stories Guide

There is a total of 71 Side Stories in One Piece Odyssey. They are located across all 4 Memorias and Waford. Most of the Side Stories become available as soon as you enter a new Memoria. 1 Side Story (Waford) become available after defeating the Final Boss.

NOTE: Nothing is missable! Everything can be completed after finishing the Main Story.

There are a few Side Stories that need to be completed in a specific order. For example:

  • The Truth About Eye-Lashes > Why Eye-Lashes Enlisted
  • Master and Student Showdown > Master and Student Rematch > Master and Student Final
  • Grand Line Quiz Kide Level 1-3 > Grand Line Quiz Lady Level 1-3 >Grand Line Quiz Madam Level 1-3 > Grand Line Quiz Mister Level 1-3
  • God Usopp 1 > God Usopp 2 > God Usopp 3

The easy way to find your next Side Story is to open the pause menu, go to Episode > Side Stories. Here you can see where the Side Stories are located, along with the next objective.

Completing all 71 Side Stories can take anywhere from 5-10 hours. It depends on how many Yaya Cubes you have collected throughout the main story and how many Side Stories you have completed along the way.

Side Story Overview

Alabasta (16 Side Stories)

Nanohana (4 Side Stories)

Side Story #1: Master and Student Showdown

Side Story #2: More Important Than Berries

Side Story #3: Meditator Marzin’s Quest

Side Story #4: Hungry Navi Bird

Great Sandy Desert (6 Side Stories)

Side Story #5: The Truth About Eye-Lashes

Side Story #6+#7+#8: Grand Line Quiz Kid Level 1-3

Side Story #9: Night Exterminator

Side Story #10: Master and Student Rematch

Desert near Alubarna (2 Side Stories)

Side Story #11: Master and Student Final

Side Story #12: Battlefield Courier

Alubarna (4 Side Stories)

Side Story #13: That Tea Tastes Thorny

Side Story #14: Why Eye-Lashes Enlisted

Side Story #15: Talented Doctor

Side Story #16: Dance Rehearsal

Water Seven (9 Side Stories)

Water Seven City Area (9 Side Stories)

Side Story #17+#18+#19: Grand Line Quiz Lady Level 1-3

Side Story #20: Tavern Troubles

Side Story #21: My Treasure

Side Story #22: Natural Underground Enemies

Side Story #23: Helping Iceberg 1

Side Story #24: Helping Iceberg 2

Side Story #25: Helping Iceberg 3

Marineford (5 Side Stories)

Marineford City Area (5 Side Stories)

Side Story #26+#27+#28: Grand Line Quiz Madam Level 1-3

Side Story #29: For Whom the Bell Tolls

Side Story #30: A Prisoner’s Desire

Dressrosa (11 Side Stories)

Dressrosa City Area (11 Side Stories)

Side Story #31+#32+#33: Grand Line Quiz Mister Level 1-3

Side Story #34: Taken by Tontattas

Side Story #35: God Usopp 1

Side Story #36: God Usopp 2

Side Story #37: God Usopp 3

Side Story #38: Rebuilding Dressrosa

Side Story #39: Respected Elder

Side Story #40: Someone I Must Meet

Side Story #41: My Dearest Violet

Waford (30 Side Stories)

Waford South (30 Side Stories)

Side Story #42 – #60: Yaya Cube Collector 1-19

> One Piece Odyssey All 99 Yaya Cube Locations

Side Story #61+#62+#63: Madam Julie’s Pupil 1-3

Side Story #64 – #70: Waford History 1-7

Side Story #71: Challenge Cube – NOTE: Minor Spoilers (Available after defeating the Final Boss)

> One Piece Odyssey Challenge Enemy Conqueror Guide (All Powerful Enemies)

One Piece Odyssey Guide 100%

One Piece Odyssey Challenge Enemy Conqueror Guide (All Powerful Enemies)

You need to defeat the Final Boss before you can challenge the Powerful Enemies. There are a total of 11 Powerful Enemies in the game. You need to defeat them all twice. The 2nd fight can prove a bit tedious, but you’ll be allright with the right preperation. All 11 fights are Boss Fights from the main story, just a lot harder.

I highly recommend that you buy white accessories from Yoisa in Dressrosa. Fuse your purple accessories with the white ones to get better stats. I focused on increasing my Attack and Defense. Increasing for example your Burn Resistance, will make the fight against Akainu almost laughable. If you fuse a characters accessories with 100%+ Burn Resistance, then he’ll only damage you 1 hitpoint each time.

Above and beyond all other consideration, abuse the food items that are made by Sanji. These can give you increased ATK and DEF and make the fights even easier. The same goes for the Trick Balls, abuse as many of them as you can.

After defeating the Final Boss, head over to Adio’s House and talk with Lim to unlock a new Side Story. Next you want to head to the Desert near Alubarna in Alabasta – here you’ll find a Yellow Cube (It’s located where you fight Smoker in the story). Defeat the Boss and head back to Lim, she will give you an item with the locations of the other 10 fights. Complete all 11 Boss Fights twice to unlock the trophy.

All 11 Yellow Cube Locations

Both Fights for Each Boss

BOSS #1

BOSS #2

BOSS #3

BOSS #4

BOSS #5

BOSS #6

BOSS #7

BOSS #8

BOSS #9

BOSS #10

BOSS #11

One piece odyssey all 99 yaya cubes

One Piece Odyssey All 99 Yaya Cube Locations

There is a total of 99 Yaya Cubes in the game. All 99 are required for the trophy trophy Collector. None of the Yaya Cubes are missable. You need to give 98 of the Yaya Cubes as part of a Side Story – note that this won’t void the trophy, you don’t need to have all 99 in your possession at the same time.

There are no in-game counter to show you where the Yaya Cubes are located. They can only be found in the 4 Memorias – Alabasta, Water Seven, Marineford and Dressrosa. You can collect all Cubes around Chapter 8. I recommend that you follow the video below as you progress through the different areas, or at least note how many you have picked up in that specifc area – this can help you keep track of which you have missed or still need to collect.

You can travel to each Memoria by talking to Lim in Waford South after defeating the Final Boss.

All 99 Yaya Cubes Overview

Alabasta: Nanohana
Yaya Cube 1
Yaya Cube 2
Yaya Cube 3
Yaya Cube 4
Yaya Cube 5

Alabasta: Desert Near Nanohana
Yaya Cube 6
Yaya Cube 7
Yaya Cube 8
Yaya Cube 9

Alabasta: Great Sandy Desert
Yaya Cube 10
Yaya Cube 11
Yaya Cube 12
Yaya Cube 13

Alabasta: Desert Cave
Yaya Cube 14
Yaya Cube 15
Yaya Cube 16
Yaya Cube 17

Alabasta: Desert Near Alubarna
Yaya Cube 18
Yaya Cube 19
Yaya Cube 20
Yaya Cube 21

Alabasta: Alubarna
Yaya Cube 22
Yaya Cube 23
Yaya Cube 24
Yaya Cube 25
Yaya Cube 26

Alabasta: Alubarna Royal Mausoleum
Yaya Cube 27
Yaya Cube 28
Yaya Cube 29
Yaya Cube 30

Water Seven: Water Seven Lower Coast
Yaya Cube 31
Yaya Cube 32

Water Seven: Water Seven City Area
Yaya Cube 33
Yaya Cube 34
Yaya Cube 35
Yaya Cube 36
Yaya Cube 37
Yaya Cube 38
Yaya Cube 39
Yaya Cube 40
Yaya Cube 41
Yaya Cube 42
Yaya Cube 43
Yaya Cube 44
Yaya Cube 45
Yaya Cube 46
Yaya Cube 47
Yaya Cube 48
Yaya Cube 49
Yaya Cube 50
Yaya Cube 51

Water Seven: Dock One
Yaya Cube 52
Yaya Cube 53
Yaya Cube 54
Yaya Cube 55
Yaya Cube 56
Yaya Cube 57
Yaya Cube 58

Water Seven: Sewer
Yaya Cube 59

Water Seven: Tower of Law
Yaya Cube 60
Yaya Cube 61
Yaya Cube 62
Yaya Cube 63

Marineford: Marineford City Area
Yaya Cube 64
Yaya Cube 65
Yaya Cube 66

Dressrosa: Dressrosa City Area
Yaya Cube 67-68
Yaya Cube 69
Yaya Cube 70-71
Yaya Cube 72
Yaya Cube 73
Yaya Cube 74
Yaya Cube 75
Yaya Cube 76
Yaya Cube 77
Yaya Cube 78
Yaya Cube 79
Yaya Cube 80
Yaya Cube 81
Yaya Cube 82
Yaya Cube 83
Yaya Cube 84
Yaya Cube 85
Yaya Cube 86
Yaya Cube 87
Yaya Cube 88
Yaya Cube 89
Yaya Cube 90
Yaya Cube 91
Yaya Cube 92

Dressrosa: New Royal Plateau Bottom
Yaya Cube 93-94
Yaya Cube 95
Yaya Cube 96
Yaya Cube 97

Dressrosa: New Royal Plateau Top
Yaya Cube 98
Yaya Cube 99

Ratchet & Clank 2: Going Commando All Platinum Bolts & Skill Points

There are a total of 40 Platinum Bolts and 30 Skill Points to collect and earn in Ratchet & Clank 2. The Platinum Bolts are hidden around the different planets, while the Skill Points needs to be earned by completing specifc tasks.

Collecting all of them will unlock the following trophies, trophyPlatinum Power (Obtain All 40 Platinum Bolts) & trophySuper Skilled (Attain All 30 Skill Points)

You will also get most trophies for the game following this guide – some trophies are tied to 1 specific Skill Point.


Oozla – 2 Platinum Bolts & 2 Skill Points

SKILL POINT #1: Prehistoric Rampage – Shoot 4 Pterodactyls.

There are a total of 4 flying around. You can see all of them from your ship. Use your Lancer in 1st person view to kill all 4 Pterodactyls.

SKILL POINT #2: Smash and Grab – Bust up the Megacorp store.

The Megacorp store is right after you have acquired the Dynamo gadget. You will use it to get up to a higher level and then you will walk through a big door. It’s here the store begins so start smashing everything with Hyper strike ( + . You need the Box Breaker).

PLATINUM BOLT #1

This is right after you have purchased the Tractor Beam from the scientist. You have to move some platforms to you can get up the cliff to your right, but instead of doing that, put them to you can get up the cliff to your left. The bolt will be right there.

PLATINUM BOLT #2

After completing all 4 objectives (see your objectives by pressing ), from your ship go down the path to your right, you will notice on of the “dragon boats” have appeared, it’s will only appear when you completed the objectives. It will ride you to a cave, the Platinum bolt will be inside.


Maktar Nebula – 2 Platinum Bolts & 4 Skill Points

SKILL POINT #3: Wrench Ninja: Blade to Blade – Defeat Chainblade with only the wrench.

This is easiest to do later in the game. If you have played the series before then you may get this on first try. It’s all about learning the patterns, how he moves, when he will attack etc. It’s also easier with Nanotech, Wrench and Armor upgrades.

SKILL POINT #4: Vandalize – Bust up the Maktar Resort.

There are 3 paths where you have to destroy most of the destructibles. If you are standing at your ship, then there’s a path to your left, right, and in front of you. The road to the left is leading to the Arena, the middle one is very short, and the right one leads to the limo that drives you to the Moon planet. Note that you have to destroy flying things too, use a long range weapon like the Pulse Rifle to shoot them. Slot machines can only be destroyed with explosive weapons. You need to destroy about 90-95% of the resort. Use the Hyper strike ( + ) to destroy most on your path (You need the Box Breaker).

SKILL POINT #5: 2B or not 2B hit – Kill B2 Brawler without getting hit.

This can be a bit difficult, try this later on when you have some more powerful weapons, one of the challenges in the Arena, are the same as the Skill Point – destroy the B2 without being hit. So when you are trying to beat all challenges then you will get this on the way but remember to notice the small indicators when it’s about to strike, and dodge a lot (See Note 2).

SKILL POINT #6: Clank needs a new pair of shoes – Win 300 bolts from a slot machine.

There are many slot machines on Maktar Nebula. Keep smashing them with you wrench, you need the slot machine to land on 3 “BAR” to give you 300.

PLATINUM BOLT #3

When standing at your ship, take the path to your left. You will get to a limo that will drive you to another location. Then you have climb up some ledges, at the top you have to jump to bigger platform where two Thugs and some Chickenbots will be waiting. Jump onto the crates to your right and jump up on the building and behind the big pillar looking thing you’ll find you first Platinum Bolt.

PLATINUM BOLT #4

When taking a ride in a Limo you’ll get to a smaller Planet. When on the planet, jump up onto roof of the limo. Then when you are looking from the limos’ left back end, you’ll see a platform with a jump pad on it. You can it without the help of Clank’s thruster pack, just try to stand on the limos’ “rocket”. Get on the platform and use the jump pad, just jump straight up, and you will fly into a Platinum bolt.


Barlow – 2 Platinum Bolts & 1 Skill Point

SKILL POINT #7: Speed demon -Beat 2:10 in the hoverbike race.

This is not as difficult as the “Speedy” Skill Point from R&C 1. This is a lot easier. You just need to remember the locations of the boost pick-ups and the shortcuts. You can do this with some seconds left over. Remember to do it on a challenge that doesn’t have weapons pickups.

PLATINUM BOLT #5

The first Platinum bolt is right after the when you swam a smaller swimming section. When you get out of the water you should see a pillar in front of you with four turning platforms connected to it. If you turn around then you see a ledge on the silo you just got out from. Hang on to the ledge and shimmy all the way around it. Then you have to swing to some turning platforms and then into a cave, at the end you will find the Platinum bolt.

PLATINUM BOLT #6

During any Hoverbike race, when you have to drive through some water near the beginning of the track, you will have to take a hard right, instead of going right go left, and the Platinum bolt should be right in front of you.


Endako – 2 Platinum Bolts & 2 Skill Points

SKILL POINT #8: Destroy all breakables – Bust up the Circular City.

Same as the other “destroy everything” Skill Points, you need the Box Breaker to do this a million times easier. Go through the level when doing the Hyper Strike ( + ). You need to destroy 90-95% of the level for the Skill Point. Remember to shoot down “flying” destructibles, like signs.

SKILL POINT #9: Operate Heavy Machinery – Destroy 10 robots with the crane.

When progressing normally you’ll come to this section. You will be in control of a crane. Use it to pick up the big crate and start dropping it on the the Sweeper bots. There should be just enough enemies for the skill point.

PLATINUM BOLT #7

This can be a bit hard to describe. This is where you are controlling a crane. There will be a locked door above ground level that can be blown up. It’s easiest to spot if you first of leave the console, and then spotting the doorway. To blow up the door – place the solid crate under the door, and then place the explosive crate on top of it. The Platinum bolt is in the room.

PLATINUM BOLT #8

When you are going to Clank’s apartment, you will encounter a Thug in a helicopter, from here you go left, and you have to jump a small gap. At the end of this path there like an yellow edge, you can jump down here to a platform where the Platinum bolt is.


Feltzin Space System – 1 Platinum Bolt

PLATINUM BOLT #9

You have to complete the 4th challenge where you have to fly through some rings without missing any of them. If you miss one – restart.


Notak – 3 Platinum Bolts & 1 Skill Point

SKILL POINT #10: Planet Buster – Destroy the large floating globe.

From your ship, go down with the lift and turn left. Following this path you’ll get to a big globe with floating rings around it. You have to destroy the rings before you can blow up the globe itself.

PLATINUM BOLT #10

Right at the start of the level, go left instead of going over the bridge. You will get to a building where to Thugs will jump through the glass, to the right of that building there’s a glass sign of Megacorp. Destroy the sign and behind you will your Platinum bolt.

PLATINUM BOLT #11

Back at the start of the level, cross the little bridge and immediately turn left, the Platinum bolt is to your right at the end of the path.

PLATINUM BOLT #12

When progressing naturally you’ll get to an area with some exploding barrels, there will be one of the Dynamo Activators. Use it and run up to the new-opened door, the Platinum bolt is inside.


Siberius – 2 Platinum Bolts & 1 Skill Point

SKILL POINT #11: You can break a Snow Dan – Kill the Snow Dan.

This is right at the beginning. You will get to a garage where a MSR 1 (spider looking bot) will spawn. Go on the ledge to the back of the garage to find the Snowman.

PLATINUM BOLT #13

Near the start of the level you will get to an elevator. Take the elevator down and you see a little column. Use the Tractor Beam to drag the column onto the elevator platform and take the elevator back up. Drag the column along the path until you reach a gap in the path, then when standing on the column you will be able to reach a platform where the Platinum bolt is.

PLATINUM BOLT #14

From the same elevator, don’t go down. Go to your right and stand on the edge and glide down, behind an edge you will find the next Platinum bolt.


Tabora – 3 Platinum Bolts & 1 Skill Point

PLATINUM BOLT #15

There is a Platinum bolt located in the slightly North-Eastern part of the Desert, you will find it when you are working toward the 100 crystals.

PLATINUM BOLT #16

This is the easiest Platinum bolt to find in the game. At the end of the Glide course, you will get this one automatically, so it’s actually unmissable.

PLATINUM BOLT #17

Inside the mining area, you have to stand on a platform to lift two others and then freeze the water to create a stair that leads to the next area. But stand on the last platform and freeze the water, go up the platforms and look left, you will see the last Platinum bolt right in front of you.

SKILL POINT #12: Heal your chi – Get all crystals.

You will have fun when going for this Skill Point. It’s not frustrating at all. The area isn’t too big, and the crystals are easy to spot, just go around the area systematically. You can get crystals in to ways, finding them or killing the big flying bugs that spawn from the ground. These spawn locations are easy to see. It will take about 17-23 minutes to get this.


Dobbo – 2 Platinum Bolts & 3 Skill Points

SKILL POINT #13: Old Skool – Kill all enemies with only the weapons from Ratchet and Clank 1.

The weapons you can use are:

  • Bomb Glove
  • Decoy Glove
  • Tesla Claw
  • Visibomb Gun
  • Walloper
  • Wrench (yes, you can use your wrench)

You need to use the teleporter near your ship first, go all the way through this area killing everything, at the end there will be another teleporter that teleports you back to your ship. Now, go through the level from here and kill the rest of the enemies. I recommend that you use the Visibomb from the most part, and do it from a distance.

SKILL POINT #14:- Dukes Up – Defeat mech with only melee attacks

Defeat the Thug Leader using only your melee attacks (). It may take some time, but it’s not so difficult. You should also focus on “Robo Rampage” when attempting this.

SKILL POINT #15: Robo Rampage – Destroy all buildings

You should do this at the same time of “Dukes Up”. There are many buildings on the planet, it will take some time but be patient and keep smashing.

PLATINUM BOLT #18

Near the end of the Glide course where you are following a Robot, glide straight up and you will see the Platinum bolt in between the bars.

PLATINUM BOLT #19

Spiderbot required. After you destroyed a tank, a versa-target will spawn. You will see a locked door right in front of you. You need to throw a Spiderbot and crawl into the vent that leads into the locked room where the bolt is, unlock the door by crawling onto the switch. Go into the unlocked room and claim you Platinum bolt.


Hrugis Cloud– 1 Platinum Bolts

PLATINUM BOLT #20

You have to finish a challenge where you are flying though some rings, you need to fly through all the rings for the Platinum bolt.


Joba – 2 Platinum Bolts & 4 Skill Points

SKILL POINT #16: That’s impossible! – Beat the impossible challenge.

This is a rather time consuming challenge. It takes around 20 minutes to complete this challenge. There are a total of 60 waves to this challenge, you should try this later on when you have better weapons, the Shield Charger will really help with this, especially if it’s upgraded! It isn’t as difficult as it may sounds. You get 200,000 bolts for completing the challenge.

SKILL POINT 17: How fast was that? – Beat 2:27 in the hoverbike race.

Another time related Skill Point. This time it’s just on another track, you just need to do the same. Learn the locations of boost pick-ups and shortcuts.

SKILL POINT #18: Wrench Ninja II: Massacre – Kill all enemies with only the wrench.

This is really hard to do on the first visit of the planet. You should visit the planet again later in the game when your Nanotech is levelled up. Also on a second visit there won’t be so many enemies as there were on the first visit. Note that you also have to kill the enemies in the “secret” area. It’s after climbing some ledges you will get outside, in front you is a turret, turn right right immediately and you will see a Swingshot point, swing over and kill the enemies there too.

SKILL POINT #19: Bye bye birdies – Kill 12 birds.

The birds are flying around. They are all over the place, you have to be every place to find all of them, and they aren’t too hard to spot.

PLATINUM BOLT #21

After climbing so ledges and getting outside, a turret will in front of you and shooting at you. Look right and you’ll see a Swingshot target, swing over and follow the path and you will get your Platinum bolt at the end.

PLATINUM BOLT #22

When have gotten the Levitator upgrade for Clank, fly straight up and the Platinum bolt will be at the top of a tower.


Todano – 3 Platinum Bolts & 3 Skill Points

SKILL POINT #20: Nothing to see here – Destroy all Megacorp rockets during the tour.

There are a total of 4 rockets doing the tour, they are big and red, and you will walk past all 4 when progressing through the level at the start. They will take some hits with the wrench. Don’t do this at the same time of “You’re my hero” as the rockets will fall and kill the tourists.

SKILL POINT #21: You’re my hero – Prevent any tourists from being killed during the tour.

This can be a little annoying. Don’t use any weapons, because then you might by accident kill a tourist. You should only use your wrench to kill the enemies. The only enemies are the Squirrels. Kill them all with you wrench before they get to the tourists, and don’t destroy any of the big rockets, because they will fall down and kill some tourists.

SKILL POINT #22: Try to sleep – Turn 16 Squirrels into sheep.

From your ship you will encounter some Squirrels, use the Sheepinator to turn them into sheep. The last Squirrels, are right after you take the lift up (The lift is located at the end of the Tour). If you don’t get enough Squirrels, then re-visit the planet later on. You don’t have to do it on one visit.

PLATINUM BOLT #23

At the start of the level a robot representing Fizzwidget will be doing a tour with some tourists. At the end of the tour will Fizzwidget open a door and disappear. Inside the newly opened room is your first Platinum bolt.

PLATINUM BOLT #24

This is in the room with the conveyor belts and force fields. I recommend that you get this when you have completed all missions on this planet, because then will the force fields be turned off and this will be simpler to get this bolt. Use the Tractor Beam to move the two columns too you can use them to jump up to the ledge that you couldn’t reach before. The ledge is indicated with a yellow/black striped panel. Follow this path, destroy the Inspector bot, and at the end you will meet the Captain Qwark fan and you Platinum in the room beside him.

PLATINUM BOLT #25

Spiderbot required. In the room with the force field and belts again. Use the smallest column to get to the conveyor belt, jump onto the second belt, and throw a Spiderbot on the first conveyor belt. If you look around while controlling the Spiderbot then you;ll see an air vent, follow it into a room and step on the button to open the door. As Ratchet, go too this room and get the 2nd Platinum bolt. You can jump from the conveyor belt you are standing on to the platform where the room is located.


Boldan – 3 Platinum Bolts & 1 Skill Point

SKILL POINT #23: No schocking developments – Ride the grind rail without getting hit.

This can be a bit difficult. As most Skill Points – learn the pattern, you need to know when you have to be in the middle, when you have to jump etc. If you get hit, then jump off and die. Good luck with this, may take some tries.

PLATINUM BOLT #26

Spiderbot required. Take the center path from your ship to get to a wall made of glass, it’s a bit hard to miss, behind the glass is a Platinum bolt. On the other side is a little hole, use your Spiderbot to crawl through and open the entrance to the bolt.

PLATINUM BOLT #27

Following the same path, you will get to an arrow with some enemies and lots of crates, go up the elevator, from here you should see a platform with enemies, you have to use the Swingshot to get over there, but instead of swinging over, look slightly down to you left. You should spot the elevator looking platform with the Platinum bolt on it. Use your gliding ability to get to it.

PLATINUM BOLT #28

You need to go back for this. This is in the room where Ratchet & Clank are captured. It up on a ledge behind the Fizzwidget robot, use the Swingshot to get up there and get the Platinum bolt.


Aranos – 1 Platinum Bolt & 0 Skill Points

PLATINUM BOLT #29

When you are at your ship, look out towards the edge, jump down, turn 180 degrees and glide simultaneously. You will be gliding down to a platform far below you where your only Platinum bolt for this level will be.


Gorn – 1 Platinum Bolt & 0 Skill Points

PLATINUM BOLT #30

As with the two other flying levels, you have to complete the challenge with rings, without missing any of them. This particular one has 53 rings.


Snivelak – 1 Platinum Bolt & 1 Skill Point

SKILL POINT #24: Moving Violation – Destroy 14 ships.

You can get this when you come to a Vendor near a big bridge, go out to the side and look for some ships. The ships just keep spawning. Use the Pulse Rifle to destroy them. When don’t have any more ammo, then walk over to the Vendor and buy ammo.

PLATINUM BOLT #31

This is when you get to a huge bridge, its right at an Armor & Weapon vendor. Look to your right and you should see a lot of Dynamo activators. You have to activate these as you move up. You need to activate them while in the air, because the activators turn the platforms to you can continue though they don’t stay turned for long but it isn’t too difficult, just be quick on your feet.


Smolg – 2 Platinum Bolts & 0 Skill Points

PLATINUM BOLT #32

This is in the big warehouse with all the crates. Use the Dynamo to make a crate roll down a conveyor belt. Jump on the crate and then jump again up to two stacks of crates, wall jump on these to get up. From here you see two other stacks of crates, walk between them and you will see the Platinum bolt a little to your left.

PLATINUM BOLT #33

This is when you are flying using the Levitator pack. At the 3rd Levitator panel, fly slightly up to your left, and you should have exactly enough fuel to reach a platform. The bolt should be right there.


Damosel – 2 Platinum Bolts & 2 Skill Points

SKILL POINT #25: Midtown Insanity – Complete grinding sequence without getting hit.

This is easier than the other grinding Skill Point. There are some Protopets on the rails, whack ’em down with your wrench (). If there’s 3 Protopets standing right after each other, then just spam  and you kill all of them without getting hit. There aren’t any difficult parts to this. It may look pretty extreme when you are playing through it and be a little confusing but you should be able to do it in some few tries.

SKILL POINT #26: Safety Deposit – Rescue all tourists at the bank.

At some point you get to a bank. There will be 4 tourists at the ground floor. Watch out that you don’t blow them up with your weapons by accident. There will be 2 enemies at the ground floor, use the Lancer to take them out, this way you won’t kill the tourists. From the ground floor use your Pulse Rifle to kill the last enemies up at the “balcony”.

PLATINUM BOLT #34

This is in the bank where you can get the “Safety Deposit” Skill Point. There will be a fountain of water to your right, freeze the water and grind over the ice to find your Platinum bolt.

PLATINUM BOLT #35

Hypnomatic required. This is when you are outside at a big pyramid looking structure. Use the Hypnomatic to take control of one of the robots on top of the pyramid, move to the front wall of the pyramid and detonate it to reveal a room with the Platinum bolt.


Grelbin – 3 Platinum Bolts & 1 Skill Point

SKILL POINT #27: Be a Moon Child – Collect all 101 Crystals

Same as “Heal your chi”, this time there’s just one more crystal. The whole icy desert isn’t available from the start. You need to complete the level to make some small paths up to the bigger area with the last crystals. Remember when at the building at the end of the level, there will a vehicle you can use to drive around the desert. You can also use your Charge Boots to get around quickly.

PLATINUM BOLT #36

At the end when you completed a series of water chambers, dive into the last chamber, and follow a tunnel into another chamber where the Platinum bolt will be in the corner.

PLATINUM BOLT #37

There will be two tubes where some robots will spawn. It’s the second to last room from the teleporter. In this room there will be a robot that you can control with the Hypnomatic, use the robot to step on a button to open the door. Go inside and your Platinum bolt.

PLATINUM BOLT #38

This is in the big icy desert with all the crystals. Look on the map for two thick parallel lines with a black spot in between them. That’s where the Platinum bolt is.


Yeedil – 2 Platinum Bolts & 0 Skill Points

PLATINUM BOLT #39

At the very start of the level, there will be a big suspension bridge, you can grind on the supports. Grind on the right one and jump at the top reach the Platinum bolt.

PLATINUM BOLT #40

Near the end you will find yourself in a room with very big columns, and Trooper enemies and some tanks. Use the Tractor Beam on one of the pillars to you right (Look for the Tractor Beam target). Move it out of the way and climb the ledges, and at the top there will be some grind rails. Complete the small grinding sequence and you will glide right into it in at the end.


General Skill Points

SKILL POINT #28: Nano to the max – Max out Ratchet’s Nanotech (Health).

There’s a total of 80 Nanotech “lives”. You get 1 each time you level up, you level up by killing enemies. The bar that represents your progress is right under your lives – It has a red/yellow color. You can also upgrade you Nanotech by collecting Nanotech upgrades; there are only 10 of them in the game.

SKILL POINT #29: Weapon Envy – Buy all weapons and fully upgrade them.

You upgrade weapons by using them on enemies. Try avoiding using upgraded weapons to you can get this fast as possible. You need to purchase all weapons in the game (excluding Clank Zapper) and upgrade them (those that can be upgraded). The weapons that can’t be upgraded is the weapons from R&C 1 (Bomb Glove, Decoy Glove, Tesla Claw, Visibomb Gun, and Walloper). Then there’s two other weapons that can’t be upgraded, these are RYNO II & Zodiac.

I have made a list for the required weapons for the trophy and what they cost in bolts:

  • Blitz Gun (15,000)
  • Bomb Glove (1,000)
  • Bouncer (100,000)
  • Chopper (5,000)
  • Decoy Glove (5,000)
  • Gravity Bomb (Free)
  • Hoverbomb Gun (100,000)
  • Lancer (Free)
  • Lava Gun (25,000)
  • Minirocket Tube (50,000)
  • Miniturret Glove (25,000)
  • Plasma Coil (150,000)
  • Pulse Rifle (20,000)
  • RYNO II (1,000,000)
  • Seeker Gun (5,000)
  • Sheepinator (Free)
  • Shield Charger (100,000)
  • Spiderbot Glove (15,000)
  • Synthenoid (65,000)
  • Tesla Claw (8,000)
  • Visibomb Gun (15,000)
  • Walloper (8,000)
  • Zodiac (1,500,000)

Note: The Weapons don’t need to be upgraded to Mega or Ultra, but only once (It’s orange when it’s upgraded once).

SKILL POINT #30: Nice Ride – Fully upgrade Ratchet’s ship.

Ship upgrades, weapons and shields costs Raritanium, not bolts. You get Raritanium for defeating enemies in the these levels:

  • Feltzin System
  • Hruglis Cloud
  • Thug-4-less fleet

Here’s the list of upgrades you need to purchase for your ship:

  • Triple boost acceleration engine (15 Raritanium)
  • Fusion laser cannons (30 Raritanium)
  • Electro-Mine launcher (10 Raritanium)
  • Mega-Mine launcher (20 Raritanium)
  • Fast-Lock missile launcher (20 Raritanium)
  • Torpedo launcher (10 Raritanium)
  • Multi-Torpedo launcher (20 Raritanium)
  • Advanced shielding system (20 Raritanium)
  • Ultra-Charge shielding system (40 Raritanium)
  • Nuclear detonation device (60 Raritanium)
  • Hyperspace warp system (45 Raritanium)

PAC-MAN WORLD RE-PAC Trophy Guide & Roadmap

FAQs

Is Pac-Man World Re-Pac a remake?

This is a complete Remake of the PS1 classic Pac-Man World. The remake includes a lot better graphics but still stays true to the original.

How many Levels does Pac-Man World Re-Pac have?

The game have a total of 23 Levels spread across 6 different Areas. Beside the Main Levels there’s 36 Maze Levels and the option to play the Original Pac-Man.

How long is Pac-Man World Re-Pac?

It will take the average player 6-8 hours to complete the main story. If you want to get 100%, it can take around 8-12 hours, depending on how long it takes you to complete the Original Pac-Man.


Roadmap

  • Estimated trophy difficulty: 7/10
  • Approximate amount of time to platinum: 8-12 Hours
  • Offline Trophies: 41 (1trophy, 4trophy, 8trophy, 28trophy)
  • Online Trophies: 0
  • Hardest TrophiestrophyRetro Gamer
  • Number of missable trophies: 0
  • Glitched trophies: 0
  • Does difficulty affect trophies?: No – there are no difficulty settings
  • Minimum Playthroughs: 1
  • PS4/PS5 Autopop & Save Transfer: No
  • PS4/PS5 Crossbuy: Yes
  • Free-Roam / Chapter Select after Story?: Yes – you can replay all levels, including the boss fights
  • Release Date: August 25, 2022

STEP 1: Complete The Game + Collect Everything + Complete All Bonus Stages + Earn a Total of 765,000 Points

Keep and eye on PAC-MAN WORLD RE-PAC All Collectible Locations when you are playing through the game. You need to collect all the Collectibles along with every pac-dot and fruit – you need to havea total of 765k points after beating the final boss (This unlocks trophyOpen Sesame / The Magic Key). See the trophy on how to get maximum points on every level. Be sure that you don’t skip the Slots (you play the Slots after each Level), try to get as points as possible, along with the misc trophies involving this feature.

Be aware of the 2 level specific trophies on your first playthrough – trophySpace Ace (Level 3-4) and trophySpeed Racer (Level 4-4). If you don’t get them during this step, replay the levels during step 2 of the roadmap.

Trophies earned during this step:


STEP 2: Trophy Clean-up

Now is the time to get all the different trophies related to defeating enemies in a certain way. Replay any level and start farming the defeats with the moves that you need. You also have a total of 99 Lives, if you haven’t unlocked it already during step 1, the same with the 765.000 points – now is the time to replay Levels and get higher scores if you need to.

Trophies earned during this step:


STEP 3: All Maze Stages & Maze Marathon Mode

This step can be a bit repetitive. You need to complete all 36 Maze Stages (6 from each Area), and then complete the Maze Marathon Mode, which is all 36 Stages in one stiting. Go to the Pirate Ship Area and interact with the signpost (there’s a picture of a Galaxian on the sign) to enter Maze Mode.

Trophies earned during this step:


STEP 4: Original Pac-Man

This will be the only difficult part about this trophy list – completing Round 9 of Original Pac-Man will be super frustrating, if you don’t know the correct technique. The secret to completing the Original Pac-Man is knowing the different patterns.

Trophies earned during this step:


Trophy Guide

PAC-MAN World Master
Collect All Trophies.

Earn every trophy in Pac-Man World Re-Peac to unlock the Platinum.

Windbag Loser
Defeat Windbag.

Automatic story-related trophy, cannot be missed.

Sick of Magma
Defeat Anubis.

Automatic story-related trophy, cannot be missed.

Space Explorer
Defeat King Galaxian.

Automatic story-related trophy, cannot be missed.

Radical Racer
Defeat Clown Racers.

Automatic story-related trophy, cannot be missed.

Back to the Scrap Heap
Defeat Krome Keeper.

Automatic story-related trophy, cannot be missed.

The Real Deal
Defeat Toc-Man.

Automatic story-related trophy, cannot be missed.

Speed Racer
Finish Clown Prix in 140 seconds or less.

LEVEL 4-4: Clown Prix

Completing this boss under 140 seconds can be a bit tight. If you hit a bomb, restart the episode to try again. Cut corners close to the edge and use your speed boost on long stretches.

Space Ace
Clear the King Galaxian Episode with no misses.

LEVEL 3-4: King Galaxian

The trophy description can be a bit confusing – when they write “misses,” it doesn’t refer to your shots, it refers to your lives. Complete the boss fight without losing a single life and you unlock the trophy.

Family Man
Rescue your first family member.

See trophy The People’s Hero.

The People’s Hero
Rescue all family members.

There is a total of 6 Family Members to rescue, 1 in each of the 6 areas. Rescuing a Family Member consists of two steps, finding the Key and then finding the cage. Below you can see an overview of where to find all Keys and Family Members.

  • Pirate Ship Area (Pooka)
    • 1-2: Corsair’s Cove (Key)
    • 1-3: Crazy Cannonade (Cage)
  • Ruins Area (Pac-Buddy)
    • 2-2: Manic Mines (Key and Cage)
  • Space Area (Professor Pac)
    • 3-2: Far Out (Key and Cage)
  • Funhouse Area (Pac-Sis)
    • 4-2: Barrel Blast (Key)
    • 4-3: Spin Dizzy (Cage)
  • Factory Area (Pac-Boy)
    • 5-3: Down The Tubes (Key and Cage)
  • Boss Mansion Area (Pac-Mom)
    • 6-2: Creepy Catacombs (Key)
    • 6-3: Grave Danger (Cage)

The Family Member Locations and Keys are included in this guide – PAC-MAN WORLD RE-PAC All Collectible Locations.

Friendly
Talk to all family members on Ghost Island.

Before you can talk to all 6 family members, you need to rescue each and everyone of them. After rescuing a family member, you’ll find them standing in the hub world.

See trophy The People’s Hero.

Covered in Fruit
Collect all the fruit and clear a bonus stage for the first time.

See trophy Bonus Stage Master.

Bonus Stage Master
Clear all types of bonus stages.

Collecting all 6 Pac-Man letters in a level unlocks a bonus stage at the end of the level. There are a total of 6 different types of bonus stages (1 for each world). Collect all the fruit in each bonus stage type to unlock the trophy. They are all pretty simple and can be completed without to much trouble.

Pirate Ship Area Maze
Clear all Pirate Ship Area Maze Stages.

You access Maze Stages by interacting with the signpost located in the Pirate Ship Area (main hub world). There are 6 Maze Stages tied to each world. 3 Maze Stages are unlocked from the start and the last 3 are unlocked by completing the levels in that specifcic world. Complete all 6 Maze Stages to unlock the trophy.

See trophy Maze Master.

Ruins Area Maze
Clear all Ruins Area Maze Stages.

You access Maze Stages by interacting with the signpost located in the Pirate Ship Area (main hub world). There are 6 Maze Stages tied to each world. 3 Maze Stages are unlocked from the start and the last 3 are unlocked by completing the levels in that specifcic world. Complete all 6 Maze Stages to unlock the trophy.

See trophy Maze Master for a video covering all Maze Stages.

Space Area Maze
Clear all Space Area Maze Stages.

You access Maze Stages by interacting with the signpost located in the Pirate Ship Area (main hub world). There are 6 Maze Stages tied to each world. 3 Maze Stages are unlocked from the start and the last 3 are unlocked by completing the levels in that specifcic world. Complete all 6 Maze Stages to unlock the trophy.

See trophy Maze Master for a video covering all Maze Stages.

Funhouse Area Maze
Clear all Funhouse Area Maze Stages.

You access Maze Stages by interacting with the signpost located in the Pirate Ship Area (main hub world). There are 6 Maze Stages tied to each world. 3 Maze Stages are unlocked from the start and the last 3 are unlocked by completing the levels in that specifcic world. Complete all 6 Maze Stages to unlock the trophy.

See trophyMaze Master for a video covering all Maze Stages.

Factory Area Maze
Clear all Factory Area Maze Stages.

You access Maze Stages by interacting with the signpost located in the Pirate Ship Area (main hub world). There are 6 Maze Stages tied to each world. 3 Maze Stages are unlocked from the start and the last 3 are unlocked by completing the levels in that specifcic world. Complete all 6 Maze Stages to unlock the trophy.

See trophy Maze Master for a video covering all Maze Stages.

Boss Mansion Area Maze
Clear all Boss Mansion Area Maze Stages.

You access Maze Stages by interacting with the signpost located in the Pirate Ship Area (main hub world). There are 6 Maze Stages tied to each world. 3 Maze Stages are unlocked from the start and the last 3 are unlocked by completing the levels in that specifcic world. Complete all 6 Maze Stages to unlock the trophy.

See trophy Maze Master for a video covering all Maze Stages.

Maze Master
Clear the Maze Marathon Mode.

Complete all 36 Maze Stages to unlock Maze Marathon Mode. This mode consists of all the previous completed Maze Stages which you need to complete in one siting. After completing everything else, you will have more than enough lives to get through this mode. You will probably only lose about 10-15 lives completing the Maze Marathon.

Gambler
Play Slots 100 times.

You enter the Slots after every level. The amount of “Plays” you have depends on the amount of coins you have collected. This trophy will come naturally while playing the game.

Fever!
Activate a Fever in Slots.

You need to get an equal amount of points (1.000, 2.000, 10.000 etc.) after any level (when you reach Slots) to activate Fever.

I recommend doing this on the level 1-2: Corsair’s Cove, it’s a short and easy level. This might take a couple of tries, sometimes you land on a dot unintentionally and get 10 points to much, or mess up in another way.

Jackpot!
Line up a Galaxian in Slots.

This trophy can be a bit tricky. Lining up 3 of the same images can be a bit tedious. The Galaxian is the token with yellow, red and blue color (used to unlock Maze Stages in the regular levels).

You need to memorise the 2-3 fruits that are shown before the Galaxian. When the Slots show the fruits you have memorised, press :x: to stop the wheel from spinning – hopefully it will land on the Galaxian. The hardest Galaxian to land is the 3rd and the last one (the last wheel will spin really fast). Whenever you complete a level, attempt to land a Galaxian to get avoid replaying levels later on, just to get a chance to earn this trophy.

Beginner’s Luck
Line up a pattern of two in Slots for the first time.

You enter the Slots after every level. The amount of “Plays” you have depends on the amount of coins you have collected. This trophy will come naturally while playing the game.

The King’s Crown
Get a Gold Crown in every stage.

> PAC-MAN WORLD RE-PAC All Collectible Locations

Foodie
Eat 200 Fruit. (Original Mode excluded.)

This will most certainly unlock naturally. You need to collect everything point related throughout the game anyways – you need a lot of points for the trophy Open Sesame trophy.

What Does This Key Do?
Obtain a Key for the first time.

> PAC-MAN WORLD RE-PAC All Collectible Locations

Key Master
Collect all Keys.

> PAC-MAN WORLD RE-PAC All Collectible Locations

P・A・C・M・A・N
Collect bonus letters for the first time and complete PACMAN.

> PAC-MAN WORLD RE-PAC All Collectible Locations

P・A・C・M・A・N Master
Complete PACMAN for all stages with bonus letters.

> PAC-MAN WORLD RE-PAC All Collectible Locations

Boom! Boom! BOOM!
Defeat 50 Enemies with Bomb Dot.

Bomb Dots are white Dots which defeat every enemy in the area. You will most likely still need this trophy after completing the game – there’s not that many Bomb Dots located in the game.

You can farm 50 defeats in Level 3-4: King Galaxian. Simply replay the Level as much as you need.

Pac-Dot Attack!
Defeat 100 enemies with Pac-Dot and/or Bomb Attacks.

Use :r2: to throw a Pac-Dot. Defeat a total of 100 enemies to earn the trophy. To avoid farming after game completion, use the Pac-Dot throughtout the game to occasionally defeat some enemies.

Bowling For Bad Guys
Defeat 100 enemies with Rev Roll.

Use :triangle: to perform a Rev Roll (you need to hold the button down and release it after gaining some speed). To avoid farming after game completion, use the Rev Roll throughtout the game to occasionally defeat some enemies.

Tough Tushy
Defeat 100 enemies with Butt Bounce.

Press :x: + :x: to perform a Butt Bounce, this will most likely be your main attack since – it’s a lot more precise than other moves. If you haven’t earned the trophy after game completion, replay any level and farm defeats with Butt Bounce.

Big Eater
Get 1600 points by eating Ghosts successively. (Original Mode excluded.)

In order to eat Ghosts, you need to pick up the big Dot power-up (it’s yellow and blinks over and over). They are located in almost every level in the game.

This trophy will come naturally while playing the game.

Ghost Hunter
Eat 100 Ghosts. (Original Mode excluded.)

In order to eat Ghosts, you need to pick up the big Dot power-up (it’s yellow and blinks over and over). They are located in almost every level in the game. This trophy will come naturally while playing the game.

Pac-Man Begins
Play original PAC-MAN.

See trophy Retro Gamer.

Retro Gamer
Clear round 9 of original PAC-MAN.

The arcade machine unlocks after completing the main story, it’s located in the Pirate Ship Area. The trick is to follow a specific pattern according to which round you are playing. The ghosts DO have specific behavior according to how you move. 1st round is one pattern, 2nd-4th round is a second pattern, and from then on it´s a third pattern for the rest of the rounds.

I messed up on round 9 because I got super nervous. Keep trying and you will get it.

  • Round 1 – easy pattern, follow video.
  • Round 2-4 – almost the same, except you turn back near the start and go up to avoid the blue ghost.
  • Round 5+ – this is where it gets tricky. Follow the video for every move. Pause when you play it yourself to check back on the video and follow the next steps.

Open Sesame
Get a Magic Key.

You need a total of 765.000 points to earn the Magic Key. Press :opt: to check your total score (it’s listed on your save file).
Here a few tips to get the best high score possible for every Level:

  • Don’t die (miss) during a Level – The fewer misses you have, the more points you earn.
  • Defeat all Ghosts – Whenever there is a section with a yellow poer-up, eat all ghosts to get the maximum bonus of 1600 points.
  • Defeat all normal enemies – Every single enemy will yield some extra points.
  • Collect everything – Collect all Dots, Fruit, Letters and Keys.
  • Play the Slots – Line up as many Fruits and Galaxians as possible, this is where you can get a lot of extra points for a better high score.

Invincible
Get 99 or more extra lives.

Some people will earn this by the end of the game. If you still need to reach 99 lives – replay Level 4-1: Clowning Around. There are 3 lives right at the start of the level, collect them > leave the Level > repeat. You don’t need to complete the Level to save your progress.

PAC-MAN WORLD RE-PAC All Collectible Locations

This guide will cover every Collectible in the game – that includes all Keys, Maze Doors, Pac-Man Letters, Gold Crowns and Family Members. There are 2 types of keys that need to be collected. The first type (blue key) is used to open cages that hold Family Members and the other type is for Mazes (there are one Maze Level in each main Level). Next collectible is the Pac-Man letters – collecting all 6 letters in one Level unlocks the Golden Crown.

Collectible overview

  • 33 Golden Crowns
  • 16 Maze Keys
  • 16 Maze Doors
  • 6 Blue Keys for Family Members
  • 6 Family Members (found in big cages)

Below you’ll find a video for each main level. There are few Levels with no collectbles, you just need to complete the Levels to earn the Gold Crown. Those Levels include 1-1, 1-4, 2-4, 3-4, 4-4, 5-4 and 6-4.

You need to focus on collecting the 6 Letters for each main Level and 1 Maze Key (and unlock the Maze Door). Beside that, some level includes the Blue Keys and cages with Family Members (written beside the Level name).

Pirate Ship Area

There are a total of four levels in the Pirate Ship area, which include:

1-1: Buccaneer Beach

1-2: Corsair’s Cove (Blue Key)

1-3: Crazy Cannonade (Pooka)

1-4: HMS Windbag (Boss fight)


Ruins Area

The Ruins area is smaller than the others and includes only three levels:

2-1: Crisis Cavern

2-2: Manic Mines (Blue Key and Pac-Buddy)

2-3: Anubis Rex (Boss fight)


Space Area

There are a total of four levels in the Space area, including the following:

3-1: Space Race

3-2: Far Out (Blue Key and Professor Pac-Man)

3-3: Gimme Space

3-4: King Galaxian (Boss fight)


Funhouse Area

The clown-themed Funhouse area comes with four levels:

4-1 Clowning Around

4-2: Barrel Blast (Blue Key)

4-3: Spin Dizzy (Pac-Sis)

4-4: Clown Prix (Boss fight)


Factory Area

The Factory area contains a total of four levels, including:

5-1: Perilous Pipes

5-2: Under Pressure

5-3: Down The Tubes (Blue Key and Pac-Boy)

5-4: Krome Keeper (Boss fight)


Boss Mansion Area

The Boss Mansion area is the final world and it comes with the following four levels:

6-1: Ghostly Garden

6-2: Creepy Catacombs (Blue Key)

6-3: Grave Danger (Pac-Mom)

6-4: Toc-Man’s Lair (Boss fight)


> PAC-MAN WORLD RE-PAC Trophy Guide & Roadmap

Crisis Core Final Fantasy VII Reunion Trophy Guide & Roadmap

FAQs

Is Crisis Core Final Fantasy VII Reunion before the Final Fantasy VII Remake (2020)?

Yes, this is a prequel to FF7. The story takes place before the FF7 Remake and introduces some new characters like Zack and Angeal.

How long does it take to complete Crisis Core?

It will take the average player around 8-10 hours to complete the main story. It will take less if you skip cutscenes and don’t do any optional missions.

Is Crisis Core Final Fantasy VII Reunion a remaster or remake?

This game is a remaster of the original PSP game Crisis Core from 2007. Every scene got the make-over treatment and looks superb. They changed a few things like the combat and summon cinematics.

How does Crisis Core combat work?

Crisis Core uses a real-time battle system -not turn-based like earlier titles. You can move around, attack, block, cast materia, initiate special abilities, use items and more. One of unique features in Crisis Core are the DMW (Digital-Mind-Wave). It’s a spinning wheel in the top-left corner which are active during combat – it grants the player different status effects and special attacks, limit breaks and summons.


Roadmap

  • Estimated trophy difficulty: 5/10
  • Approximate amount of time to platinum: 20-25 hours
  • Offline Trophies: 51 (1trophy, 3trophy, 5trophy, 42trophy)
  • Online Trophies: 0
  • Hardest Trophies: trophyDivine Rule Broken & trophyShinra’s Squats Champion
  • Number of missable trophies: All trophies, except trophies that are unlocked by completing specific Chapters.
  • Glitched trophies: 0
  • Does difficulty affect trophies?: Yes – Luckily, beating just the final boss on Hard difficulty unlocks the trophy trophySOLDIER of Legend (you can change difficulty via the pause menu).
  • Minimum Playthroughs: 1 on Normal difficulty – change difficulty to Hard before the final boss.
  • Free-Roam / Chapter Select after Story?: No – there´s no Chapter-Select or Free-Roam in the game
  • Release Date: December 13, 2022

STEP 1: NORMAL DIFFICULTY PLAYTHROUGH + EVERY MISSABLE COLLECTIBLE & TROPHY [8-10 HOURS]

Follow The Collectibles Guide for your playthrough – it´s your companion guide for getting all missable Collectibles and Trophies. There are a lot of Collectibles in the game, but luckily only a few are actually missable. The Collectibles Guide also show you how to get the missable chapter-specific Trophies. Everything is listed in chronological order.

Play through the game while following the Collectibles Guide. Play up until Chapter 10 (which is the last Chapter) and the very last Save Point in the game. There will be a bright white light, and the game prompts you with a menu, asking if you want to continue – this is right beside the final Save Point.

Trophies earned during this step:

MISSABLE WARNING: Like it’s mentioned above, everything is missable! If you miss a Chapters-specific trophy you have to play through the whole game again. Every time you complete a Chapter, the game prompts you with a save option – save at least once for every Chapter, this way you don’t have to go all the way back to the start of the game, IF you miss anything.


STEP 2: COMPLETE SOME MISSIONS + 100% DMW PROGRESS [2-5 HOURS – LUCK-BASED]

This next step involves completing most of the missions. While completing misssions, you automatically get progress towards your 100% in the DMW. Refer to the DMW Image Locations Guide to earn all the different images. Some of the images are earned in some high-level missions, that is why you need complete most of the missions while working towards the images. You will raise in level and earn some new materia which will help you complete them.

Recommended materia and upgrades (materia fusion):

  • Costly Punch – It can 1-hit many enemies and deal 99,999 dmg with the right equipment – there are multiple ways to break the damage barrier. You can create Costly Punch by fusing Goblin Punch (reward for earning the trophy Waterfall Chaser in Chapter 9) with any purple materia from the QMC+ Shop (also unlocked in Chapter 9).
  • Jump materia – This can be better than Costly Punch during the earlier missions. Jump is an AOE (area-of-effect) attack which hits multiple enemies. This helped me to complete about half of all missions as quickly as possible. Many encounters are over after a single use of Jump.
  • Cure/Cura/Curaga – Used to heal Zack. Curaga is the strongest verison and heals you the most.
  • Other than that, use anything that you like! Just remeber to fuse materia to increase your percentages in health and other usable stats. I recommend focusing on increasing your VIT and SPR stats – they are essential in step 3 of the roadmap and defeating the boss Minerva.

NOTE: Always enter Buster Sword Stance (SQUARE + X) before using Costly Punch or Jump – it will increase your damage.

When you have collected all DMW images, refer to the 100% DMW Guide (AFK Farming Method). Getting DMW progress to 100% unlocks the Genji Armor. It´s part of a trophy in step 3, but it will also help you complete the last missions. The Genji Armor increases your health limit to 99,999 amd grants Endure and Regen status effects.

Trophies earned during this step:


STEP 3: COMPLETE ALL MISSIONS + MINERVA SUPERBOSS [8-10 HOURS]

Now you want to complete the last of the missions, beside M.9-6-6 which is the Minerva boss fight. Keep an eye out for the last pieces of Genji Equipment. Completing all missions (beside M.9-6-6) will give you a lot of materials for materia fusion. Take a look on the Minerva Boss Guide for the list of materia you want to use and upgrade.

You earn the last collectibles during this step. The last Mail Senders and Shops are automatically unlocked when you complete the last missions. See the Collectibles Guide for the list of remaining Collectibles.

Trophies earned during this step:


STEP 4: FINAL BOSS ON HARD DIFFICULTY [30-60 MIN.]

When you have defeated Minerva, change your difficulty to Hard from the Pause Menu. Defeating just the final boss on Hard, unlocks the trophy for beating the whole game. Note that this may be a bug and CAN be patched in the future.

Trophies earned during this step:

Related Crisis Core Final Fantasy VII Reunion Guides:


Trophy Guide

My Living Legacy
Acquired all trophies.

Earn every trophy in Crisis Core Final Fantasy VII to unlock the Platinum.

Embrace Your Dreams
Cleared the Prologue.

Automatic story-related trophy, cannot be missed.

He Wouldn’t Betray Us
Cleared Chapter 1.

Automatic story-related trophy, cannot be missed.

We’re Not Monsters
Cleared Chapter 2.

Automatic story-related trophy, cannot be missed.

Angels Dream of One Thing
Cleared Chapter 3.

Automatic story-related trophy, cannot be missed.

Where Did Everyone Go?
Cleared Chapter 4.

Automatic story-related trophy, cannot be missed.

Protect Your SOLDIER Honor
Cleared Chapter 5.

Automatic story-related trophy, cannot be missed.

Did Genesis Really Die?
Cleared Chapter 6.

Automatic story-related trophy, cannot be missed.

I May Abandon Shinra
Cleared Chapter 7.

Automatic story-related trophy, cannot be missed.

I’ll Come Visit
Cleared Chapter 8.

Automatic story-related trophy, cannot be missed.

We’ll All Be Heroes
Cleared Chapter 9.

Automatic story-related trophy, cannot be missed.

Thanks to You, Zack
Cleared Chapter 10.

Automatic story-related trophy, cannot be missed.

Come and Get It
Won a battle for the first time.

Automatic story-related trophy, cannot be missed. This will be your very first trophy. After the first cutscene of the game, you will be fighting a group of enemies – defeating all of them triggers the next story cutscene and earns you the trophy.

Prove Your Honor to Me
Performed a limit break for the first time.

Automatic story-related trophy, cannot be missed. You will automatically enter Limit Break when fighting enemies – Limit Break is activated when 3 identical images line up in the DMW (The spinning object in the upper-left corner). This will be one of your very first trophies.

Got Materia Fusion Down
Performed materia fusion for the first time.

Automatic story-related trophy, cannot be missed. You unlock Materia Fusion in Chapter 3. Press OPTIONS > Materia Fusion > Fuse any 2 materia to unlock the trophy. There will be a little tutorial guiding you through it.

Overpowered
Dealt 99,999 damage to an enemy.

Your max damage output is 9,999 by default. You need to break the damage barrier in order to do 99,999 damage with one attack – there are multiple ways to achieve this.

  • 1st option – In Chapter 6 you unlock something called Buster Sword Stance. Increasing the Proficiency to 25% breaks the damage limit. Defeating enemies while in Buster Sword Stance increases proficiency. The benefit of using this stance is taht your next attack deals increased damage.
  • 2nd option – Equip any accessory that breaks your damage limit. One of the earliest accessories you can get, that increase your damage limit to 99,999 is the “Brutal” accessory. The accessory is earned by completing Mission 7-4-6 or 9-5-1. You can also find the accessory in a chest in M9-6-3.

Next step is to actually deal 99,999. I highly recommend that you use the Costly Punch materia – it’s the same materia you will use for the Minerva Superboss near the end of the game.

You can get the Costly Punch materia at the earliest in Chapter 9. You need to craft the materia following this method.

When you reach Gongage, after a cutscene with Cissnei, turn around and open a chest to find the QMC+ Shop. Next you want the Goblin Punch materia earned by completing the waterfall minigame (See trophyWaterfall Chaser on how to complete the minigame).

With both the Shop and materia unlocked – buy any purple DMW materia from the QMC+ Shop and fuse it with Goblin Punch, this will give you the Costly Punch.

When your stats get hgher as you level up and fuse materia, you’ll end up damaging 99,999 without even trying. Note that damaging enmies from behind will increase your damage even more.

Limit Break Collector
Obtained all DMW images.

There are a total of 18 DMW images to collect. Luckily only one of the images are missable. Rest of the images are unlocked by playing just the story (automatically unlocked) or by completing missions.

>Crisis Core Final Fantasy VII Reunion – All DMW Image Locations Guide.

DMW Master
Achieved 100% progress for all DMW.

Before you can earn this trophy, you need to collect all 18 DMW images – see trophyLimit Break Collector on how to collect them all. After finding every image, refer to the guide below.

>Crisis Core Final Fantasy VII Reunion – 100% DMW Guide (AFK Farming Method)

The guide will give you the best way to farm flashback scenes and earn 100% DMW progress as quickly as possible.

Missions Completed: 25%
Completed 25% of all missions.

See trophyMission Completionist.

Missions Completed: 50%
Completed 50% of all missions.

See trophyMission Completionist.

Missions Completed: 75%
Completed 75% of all missions.

See trophyMission Completionist.

Mission Completionist
Completed 100% of all missions.

You will unlock all missable missions by following the Crisis Core Final Fantasy VII Reunion All Collectibles Guide.

I recommend leaving most of the missions for the end-game. You can complete half or more of the missions in about 1 minute, when you’re just a bit overpowered. This makes the process a bit more bearable.

Shop Completionist
Unlocked all shops.

You will get this by following the Crisis Core Final Fantasy VII Reunion All Collectibles Guide.

List of Shops and how to unlock them:

  • Research Dept. QMC+ (found in a chest in Chapoter 9)
  • Gongaga Trading (M2-3-1)
  • Juno Souvenirs (M2-4-1)
  • Myhtril Mine Traders (M2-4-5)
  • Wutai Secret Shop (M4-2-6)
  • The Happy Turtle (M4-3-6)
  • Sec.7 Shop (M4-4-3)
  • Sec.8 Materia Shop (M6-2-1)
  • Sec.5 Materia Shop (M6-2-3)
  • Sec.6 Accessory Shop (M6-2-6)
  • Nibel Accessories (M6-4-4)
  • Bone Village Outlet (M7-5-3)
  • Online Shop Duo (M9-3-3)
  • Online Shop Shade (M9-5-4)

Mail Completionist
Received mail from all senders.

You will get this by following the Crisis Core Final Fantasy VII Reunion All Collectibles Guide.

You only need to recieve 1 Mail per Sender to earn this trophy. There are only 6 missable Mail Senders. 5 of them are from the 5 Fan Clubs (which are tied to another trophy), and the last Mail Sender is the Reporter on the street in Midgar (choose NOT to report him).

Genji Equipment
Collected all Genji equipment.

> Crisis Core Final Fantasy VII Reunion – How To Get All Genji Equipment

Hero of the Wutai War?
Received highest evaluation from Lazard for Assault on Fort Tamblin.

CHAPTER 1

After the “Mt. Tamblin – Mountain Path” Save Point, you storm Fort Tamblin. You’ll see a box appear in the upper-left corner. Here you can see how many enemy forces you have defeated in the area. You need to defeat all enemies before you leave the area. If you open the map, you can see some of the enemy locations. A few of the enemies enemies only spawn when you interact with a watchtower or some of the rotating walls. There are 2 enemies in and watchtowers and 3 enemies hiding behind the rotating walls.

Make sure that all 16 enemy encounters have green checkmarks in the upper-left corner, before you leave through the gate and continue to the next area.

The trophy unlocks later in the chapter. When you have completed the boss fight, you meet up with Lazard and he’ll evaluate you. If you defeated all the enemies you get the highest evaluation and the trophy.

Fan Club Aficionado
Joined every fan club.

You will get this by following the Crisis Core Final Fantasy VII Reunion All Collectibles Guide.

Master Mako Stone Miner
Prevented the Materia Room from being shut down.

CHAPTER 2 (Can be earned up until Chapter 7)

This trophy is obtainable between Chapter 2 and the point of no return in Chapter 7. You need to unlock and complete 6 missions for a researcher in the Shinra Building.

From the start of the Chapter, don’t talk to Tseng (this will trigger the next story segment), instead leave the area to trigger a little cutscene. You will be transported to Midgar Streets by the fountain. Go back into the Shinra Building, head to the elevator and select the SOLDIER Floor. Next you want to enter the Materia Room (the text is written on the door), it´s located left of a Save Point.

Talk to a Researcher to unlock the missions M8-2-1 through M8-2-6. Complete all 6 missions, this can be done from any Save Point. Completing all missions will reward you with Mako Stones. Give all the Stones to the Researcher to unlock the trophy.

If the missions are to difficult to complete, you can wait up until Chapter 7 to complete them.

Banora Treasures
Collected all items and arrived at Angeal’s house before the Banora airstrike.

CHAPTER 2

After you talk to Tseng in the Shinra Building, you’ll find yourself in Banora. After meeting with Angeal’s mother, you get the objective to meet up with Tseng at the factory. Before meeting up with Tseng, you need to interact with 5 glowing items lying around the area. There are 3 located close together in the village, and 2 located on the way up the hil to meet with Tseng. Interacting with them makes the available to you later in the Chapter.

After the Shells minigame (trophySlicin’ SOLDIER) you get a call from Tseng. You will get 45 seconds to head back to Angeal’s mother. On the way, you need to collect all 5 glowing items (2 on the hill and 3 in the village). Collecting all 5 will earn you the trophy when you reach the house, before the timer runs out.

Everyone’s Hero
Saved everyone calling for help during the assault on the Shinra Building in Chapter 3.

CHAPTER 3

This trophy takes place after you go to the Director’s Room to talk to Lazard. An alarm will go off and the whole building will be under attack. When you are riding the elevator down, be sure to choose “Get off and look around.” You will find yourself on the SOLDIER floor. There are 3 NPC’s you need to save. 1 as soon as you get off the elevator, 1 lying on the ground to the left, and a pair of NPC’s in the Materia Room.

Head back to the elevator and complete the next 2 story-related fights. After a cutscene where you’re introduced to Cissnei, you will find a NPC to your left and 1 to your right in the LOVELESS Avenue destrict.

Saving all 5 groups of NPC’s earns you the trophy.

First-Rate SOLDIER
Defeated all virtual data in the Training Room.

CHAPTER 3

Right at the start of Chapter 3, head to the Training Room on the SOLDIER Floor (Shinra Building). Talk to Hojo and complete all 4 virtual fights to unlock the trophy. They are all super simple and quick to complete. The only one that can be a bit annoying is the last fight. Just play it safe and heal with Cure whenever you are low on health.

Precise Restoration
Achieved 100% recovery with the Mako Recovery Unit.

CHAPTER 4

After leaving the Slums, you will follow a highway and end up in the Shinra Building with Hojo. To his left you’ll see a console you can interact with. The console will count down from 5 and hide the number on the screen when it reaches 3. Continue counting down by yourself and press X as soon as you reach 0. It can take a couple of tries to get the timing right, but you can keep trying as many times as you want.

Of Significant Worth
Judged by Hojo to be a “SOLDIER member of significant worth” in the Fusion Chamber.

CHAPTER 4

After leaving the Slums, you will follow a highway and end up in the Shinra Building with Hojo. You can see a big blue champer in between two consoles, this is the Fusion Chamber. Enter the chamber to start a little minigame. Hojo will ask you a series of questions, choosing the dialogue listed below will earn earn you the trophy.

  1. A SOLDIER operative like Sephiroth
  2. State-of-the-art science and technology
  3. A person unafraid to challenge Shinra

Cell Raider
Checked all cells on the 67th floor of the Shinra Building.

CHAPTER 4

After leaving the Slums, you will follow a highway and end up in the Shinra Building with Hojo. There will be a console to the right of the Fusion Chamber. Before you interact with the console, equip the “steal” materia (Bruno gives it to you earlier in the Chapter). You need to steal 6 keys from 6 enemies, enter the 6 cells (using the keys) and open 3 chest in each cell (18 chests total) and return to Hojo before the timer runs out.

Wutai’s Nemesis
Caught all the Wutai spies that had infiltrated Midgar.

CHAPTER 5

Head to the LOVELESS Avenue in Sector 8. Find and talk to a SOLDIER 2nd Class, agree to help him find the Wutai spies. To reveal a spy, you need to talk to the character 3 times – this will reveal there true identity. The order of which you need to find them are fixed. Here’s the list:

  1. Man in front of the LOVELESS Avenue Theater.
  2. Shinra Trooper in Sector 5 Market. He is walking around the area.
  3. Male Shinra employee. Located upstairs by the elevators in the Shinra Building Entrance. Run up and down the stairs to make the spy spawn.
  4. Woman talking to a man in the Fountain area. She is located right by the entrance to the Sector 1 Train Station.
  5. Shinra Employee in the Exhibit Room. He’s standing by the big rocket.
  6. Little kid running around the Park in the Sector 6 Slums. The kid wears a hat.

Fan Club Savior
Helped every fan club continue their activities.

CHAPTER 7

There are a few steps to earn this trophy – they are as follows:

  1. Talk to Genesis Fan by the fountain – Choose: “Merge with a rich Fan Club!”
  2. Talk to other Fan in LOVELESS Avenue.
  3. Talk the first Fan again.
  4. Talk to the boy running around near the first Fan.
  5. Find and talk to his mother on the Sector 1 Platform.

Midgar Full of Flowers
Constructed every flower wagon type.

You will get this by following the Crisis Core Final Fantasy VII Reunion All Collectibles Guide.

Seven Wonders Expert
Learned about all of Nibelheim’s Seven Wonders.

CHAPTER 8 & 9

You will get this by following the Crisis Core Final Fantasy VII Reunion All Collectibles Guide.

Cage Opener
Opened the path to the Cage of Binding.

CHAPTER 10

This trophy can be earned near the start of Chapter 10. You need to interact with 4 gravestone-looking tablets and defeat 5 specific enemies. The first tablet is looking where you enter the Dephts of Judgement, you will see it right by the Save Point. The last 3 can be found in Portal of Severance, Howling Fang and right beside the entrance to the Lake of Oblivion.

After interacting with all 4 tablets, enter the Lake of Oblivion – here you will find 5 Mako Springs (they look like crystals hanging from the ceiling). Interact with a Mako Spring to spawn an enemy. Defeat all 5 enemies spawned from each of the springs to open the Cage of Binding.

Slicin’ SOLDIER
Cut down every incoming shell.

CHAPTER 2

This trophy can be earned in Chapter 2, after being to factory with Tseng. There will be a little tutorial on how to complete the minigame. Whenever the reticle on the shell turns blue, press SQUARE to slice them. You need to hit all 10 without missing to earn the trophy.

If you miss a shell, reload your latest auto-save to try again (you have to complete the minigame to reload the auto- save).

Master Blender
Blended a perfume with the perfect amount of oil.

CHAPTER 4

This trophy takes place in the Sector 5 Slums Market area, after getting your wallet back. Interact with the “Shopping Paradise” store to start this minigame. You need to count the correct number of oil drops needed to craft a perfect perfume.

  • Drip = 1 drop
  • DripDrip = 2 drops
  • Splash! = 10 drops

When the correct number has been reached – press X. There is a Save Point beside the shop. I recommend backing up your save before attempting this. You need to complete this minigame 3 times, without failing, for another trophy – See trophyGood Match For Aerith for more info.

Bingo!
Guessed the exact number in the number-guessing game.

CHAPTER 4

This trophy takes place in the Sector 5 Slums Market area, after getting your wallet back. Talk to a lone boy standing in the corner. This will start the number-guessing minigame. Aerith will mention 2-3 numbers, and then you have to pay the boy 50 gil for him to mention 3 more numbers. Now, the trick to finding the correct number is to compare Aerith’s and the boy’s numbers. The number that is mentioned twice is the correct one.

Example: Aerith mentions 1, 2 and 3. The boy mentions 2, 5 and 6 – the correct number is 2 because it’s mentioned by both.

Godlike
Rated to have “godlike speed” in collecting materia.

CHAPTER 4

This trophy takes place in the Sector 5 Slums Market area. After getting your wallet back, head over to the store with the “Item World” sign to start this minigame. You need to collect 20 pieces of materia under 14 seconds. Press L3 to sprint and spam X to pick up all the materia along the way. When the Shopkeeper rates you with “godlike speed” – you earn the trophy. Retry the minigame if you failed to complete it under 14 seconds.

Shinra’s Squats Champion
Achieved victory against the SOLDIER 2nd Class in the physical fitness test.

CHAPTER 5

At the start of the Chapter, head to the Training Room and talk to the man present – this starts the squat minigame. You need to beat the first 4 opponents for the trophy. You have to press TRIANGLE when Zack’s hands are behind him to perform a squat.

The reason why this is one of the hardest trophies, is because of the timing for performing a successful squat. After a series of successful squats, Zack speeds up, this makes the timing different from the previous set of squats. There are a total of 4 different speeds of which he performs his squats. This will take a couple of tries, but just keep trying – the more you try the more you learn the pattern.

Note: turn on controller vibration to help with the timing – this will give you a little cue for the right timing.

Master Infiltrator
Infiltrated the mako excavation facility without being discovered once.

CHAPTER 5

 You will reach a snowy mountain area as part of the story. You need to infiltrate a facility without getting spotted. Before you attempt it, make a backup save at the Save Point right next to the facility. You reach the facility right after a cutscene with Tseng and the Shinra Trooper.

You will see a couple of blue zones when you infiltrate the facility – enter the zone and use L1 to crouch and hide from the patrolling guards. If you get spotted before entering the facility, reload your backup save to try again.

Immovable Object
Defeated all enemies in Defense of the Junon Perimeter.

CHAPTER 6

When you’re chasing down Hollander, you reach a story-related minigame where you need to defend the area and keep enemies from reaching a gate. There are a total of 30 enemies you need to defeat. Run side to side on the road to engage combat encounters with incoming enemies. I recommend staying near the ned of the road – this will give you more time to react and stop the incoming enemies.

Zack the Sniper
Did not allow a single gun bull head to escape while sniping.

CHAPTER 9

When you’re leaving Nibelheim, you will find sniper rifles laying on the path to the next objective. You have to pick up the sniper at all 8 sniper spots (some are hidden away from the main path), and defeat all gun bull head enemies – if 1 escape, you have to reload your last autosave and start all over.

There is a method to make it alot easier. After the 3rd sniping spot, run back and forward to encouner more enemies. Farm as many kill points as you like and use them on the next sniping spot to upgrade it’s damage. The upgrades are shared between every sniper spot. The more points you farm, the more upgrades you can buy and give yourself a good chance of successfully completing all 8 sniping spots on your first try. It’s not necessary to fully upgrade the sniper.

The trophy unlocks when you reach the next Save Point, located a bit further ahead after the last sniping spot.

Waterfall Chaser
Collected ten chests coming down the waterfall in the hills of Gongaga.

CHAPTER 9

After a cutscene with Genesis in Gongaga, you’ll find yourself on a map called “Hills.” Run around the area and complete 7 random combat encounters. Now, when you try to leave the area, you get the chance to complete the waterfall minigame. You have to collect 10 chests falling down the waterfall, while dodging the monsters. The chests follow the same pattern:

Center > left > right > center > left > right > center > left > right > center – Trophy unlocked.

If you get hit by a monster or miss a chest, you have to leave the area, come back, and complete 7 random combat encounters to triger the minigame again.

Good Match For Aerith
Told by Bruno that you and Aerith “make a good couple.”

CHAPTER 4

For this trophy, you need to get a high affection level with Aerith before you leave the Sector 5 Slums. Here’s an overview of all the steps:

  1. Make sure that you have 5 potions in your inventory before entering the Sector 5 Market (Buy 5 from a Shop using the pause menu). We need to trade them in a later step.
  2. Talk to the 3 different shops around the Market. (+10 affection)
  3. Find the little girl standing by some crates, talk to her and choose: “Wait a little longer” for a total of 10 times.
  4. Trade 5 potions to the little boy standing on the opposite side of the Market. (+10 affection)
  5. When you get a cutscene with Aerith and the thief – select the 2nd dialogue option: “I’ll buy the medicine for you.” (+10 affection)
  6. Get your wallet back from the monsters.
  7. Head over to the store with the “Item World” sign and talk to the man to start a minigame. You need to collect 20 pieces of materia under 14 seconds. Press L3 to sprint and spam X to pick up all the materia along the way. When the Shopkeeper rates you with “godlike speed.” (+5 affection)
  8. Interact with the “Shopping Paradise” store to start this minigame. You need to count the correct number of oil drops needed to craft a perfect perfume. When the correct number has been reached, press X. There is a Save Point beside the shop. I recommend backing up your save before attempting this. NOTE: If you fail you LOSE points with Aerith! Succesfully make 3 perfect perfumes without failing. (+15 affection)

When you leave the Slums (as part of the story), Bruno will stop you. He’ll say that you and Aerith will “make a great couple.” If he says “good couple,” then you missed something above or made a bad perfume.

Divine Rule Broken
Defeated Minerva.

> Crisis Core Final Fantasy VII Reunion – Minerva Boss Guide

SOLDIER of Legend
Cleared the game in Hard Mode.

There is a wuick and easy way to earn this trophy – simply change the difficulty to Hard before the final boss. Defeating the final boss on Hard difficulty is enough to earn the trophy. This may be a bug and can be patched in the future. To change the difficulty – open the pause menu, go to Options > Gameplay Settings > Difficulty > Hard.

I recommend doing this after completing all 300 missions and defeating Minerva – this wil make the final boss a walk in the park.